Common Toyota Timing Chain Problems and Fixes
Your car’s engine needs everything to work together perfectly. The timing chain is key in making sure the camshaft and crankshaft move in sync. If it breaks, you’ll face big engine problems that can cost a lot to fix.
Toyota engine problems with the timing system start small but get worse fast. You might hear strange rattling sounds when you start the car. Other signs include engine misfires, less power, and the dreaded check engine light.
Seeing metal in your oil means your engine is wearing out fast. You should fix this right away to avoid a total engine breakdown. Catching these problems early is key to saving your car.
This detailed timing chain repair guide will teach you how to spot, figure out, and fix these issues. Whether you like to fix things yourself or prefer a mechanic, you’ll learn what to do to keep your car running right.
Key Takeaways
- Timing chains synchronize camshaft and crankshaft movement for proper engine operation
- Common symptoms include rattling noises, engine misfires, and check engine light activation
- Metal particles in oil indicate serious timing chain wear requiring immediate attention
- Early detection prevents costly engine damage and complete system failure
- Regular maintenance and quality oil usage help prevent timing chain issues
- Professional diagnosis is recommended when multiple symptoms appear together
Understanding Toyota Timing Chain Systems
The Toyota timing chain system works like a mechanical orchestra. It makes sure every engine part moves in perfect sync. This system links your engine’s crankshaft and camshaft together. Unlike rubber belts, metal chains last longer but need regular care to work right.
How Toyota Timing Chains Function
Toyota timing chains connect the crankshaft and camshaft directly. When the crankshaft turns, it moves the timing chain. This chain then turns the camshaft at half its speed. This 2:1 ratio is key for the engine to run smoothly.
The chain’s metal makes it strong against engine heat and stress. Proper timing is vital because any mistake can damage the engine badly.
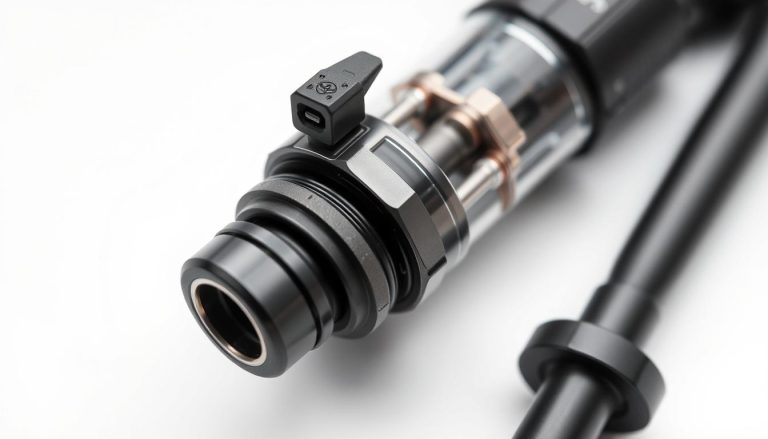
Key Components: Chain, Tensioner, and Guides
The Toyota timing chain system has important parts working together:
- Metal timing chain – Connects crankshaft and camshaft
- Hydraulic tensioner – Keeps chain tension right
- Guide rails – Keep the chain on track
- Chain sprockets – Wheels that the chain fits onto
Each part is key for precise Toyota engine timing. The tensioner keeps the chain tight, and guide rails keep it in place.
Toyota’s Timing Chain Design Across Model Years
Toyota has improved their timing chain systems a lot over time. Older models had simpler single-chain designs. But newer engines often use dual chains for better reliability. Some engines even have extra chains for the oil pump, making the system more complex but efficient.
Knowing your model’s design helps spot issues and know what maintenance it needs.
Identifying Toyota Timing Chain Problems
Knowing the signs of timing chain failure helps keep your Toyota running well. Early detection saves time and money and keeps your car reliable. The symptoms can vary based on the failing part.

Chain Stretch and Elongation Signs
Chain stretch is a clear sign of timing chain failure in Toyotas. You’ll hear a rattling noise when starting the car that goes away as it warms up. This is because the chain stretches, causing slack in the timing system.
As the chain stretches more, you’ll notice your engine isn’t running smoothly. It might idle roughly, have less power, and use more fuel. These symptoms often develop gradually, making them easy to overlook at first.
Tensioner Failure Symptoms
Failed tensioners make the loudest noise you’ll hear from a Toyota timing chain. The sound is like metal grinding or knocking, and it’s loudest at idle. Unlike chain stretch rattling, tensioner failure noise stays the same, no matter the engine temperature.
When tensioners fail, the check engine light often comes on. The loose chain messes with valve timing, causing error codes related to camshaft sensors. Immediate attention is needed to avoid more engine damage when you see these signs.
Guide Rail Deterioration Indicators
Worn guide rails make scraping or grinding sounds when the engine is running. These plastic parts wear down from constant chain contact, making engine oil dirty. You might find small plastic pieces when changing the oil.
Looking closely, you can see cracked or missing parts of the guide rails. The chain might seem to wobble or move too much when the engine is running. This movement means you need to replace the chain right away.
Oil Pump Drive Chain Complications
Oil pump drive chain problems show unique symptoms that mechanics quickly spot. You’ll see low oil pressure warnings and timing-related noises, which is dangerous. The engine might not get enough oil and have timing issues at the same time.
Seeing metal particles in the engine oil means the oil pump drive chain is wearing out. These chains work under a lot of stress and can fail suddenly. Getting a professional to check is key when oil pressure and timing issues happen together.
Toyota Models Most Prone to Timing Chain Issues
Not all Toyota vehicles face the same timing chain risks. Some models and years see more issues than others. Knowing which models are at risk helps owners spot problems early and plan for maintenance.
Certain engine designs and manufacturing periods lead to higher failure rates in specific Toyotas. These problems often come from design choices, material quality, and production variations that affect reliability over time.
2AR-FE Engine Challenges in Camry Models
Toyota Camry timing chain problems are common in 2007-2017 models with the 2AR-FE engine. These cars often see chain stretch between 80,000 and 120,000 miles.
The 2AR-FE engine’s timing chain tensioner design leads to faster wear. Owners might hear rattling noises at startup and experience rough idling, signaling issues.
2ZR-FE Engine Issues in Corolla
Toyota Corolla timing chain issues mainly hit 2009-2017 models with the 2ZR-FE engine. Ignoring tensioner failures can cause serious engine damage.
The 2ZR-FE engine is also prone to oil starvation problems that speed up timing chain wear. Keeping up with regular oil changes is key for these models.
SUV Model Vulnerabilities
Toyota RAV4 timing chain problems are most common in 2009-2012 models. Highlander models from the same period face similar issues.
These SUVs face more stress on timing parts due to higher engine loads and frequent stop-and-go driving.
Hybrid System Complications
Prius and other hybrids have unique timing chain considerations due to complex powertrain integration. Issues can impact both the gasoline engine and hybrid system performance.
Hybrid vehicles’ frequent engine start-stop cycles add stress to timing chain components, like the tensioner system.
| Model | Affected Years | Engine Type | Common Mileage Range |
|---|---|---|---|
| Camry | 2007-2017 | 2AR-FE | 80,000-120,000 |
| Corolla | 2009-2017 | 2ZR-FE | 90,000-130,000 |
| RAV4 | 2009-2012 | 2AZ-FE | 100,000-150,000 |
| Highlander | 2008-2013 | 2AZ-FE | 110,000-160,000 |
Recognizing Early Warning Symptoms
Your Toyota’s timing chain sends clear warning signals before it fails completely. Learning to identify these early symptoms can mean the difference between a manageable repair and complete engine replacement. Catching problems in their initial stages saves thousands of dollars and prevents catastrophic engine damage.

Modern Toyota vehicles provide multiple warning signs when timing chain components begin to wear. These symptoms typically appear gradually, giving you valuable time to address the issue before it becomes critical.
Startup Rattling and Chain Noise
Toyota timing chain rattling often appears first during cold starts. The noise sounds like marbles shaking in a can and typically lasts 10-15 seconds after startup. This happens because oil pressure hasn’t built up enough to properly tension the chain.
The rattling may disappear once the engine warms up initially. But as wear progresses, the noise becomes more persistent and louder.
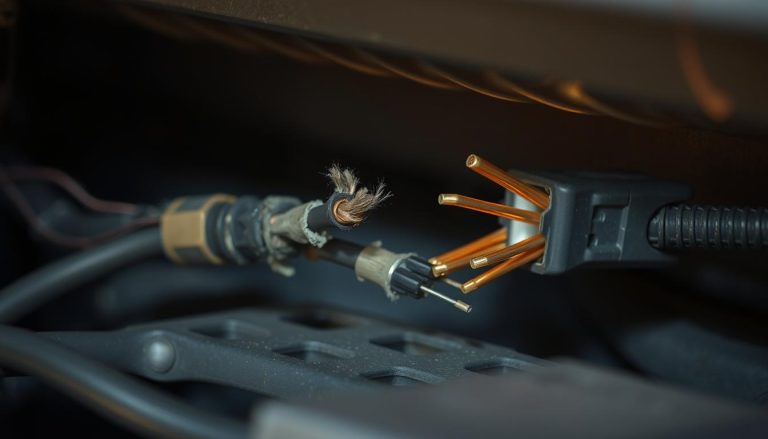
Metal Particles in Engine Oil
During routine oil changes, mechanics may discover tiny metallic flakes. These timing chain metal particles oil contamination indicates active chain wear. The particles are literally pieces of your timing chain being ground away by friction and stress.
Check Engine Light and Error Codes
Modern Toyota vehicles trigger warning lights when timing discrepancies occur. Toyota check engine light timing codes like P0016, P0017, or P0018 point to timing-related problems detected by the engine management system.
Performance Loss and Rough Idling
Engine performance symptoms develop as chain stretch affects valve timing precision. You’ll notice rough idling, hesitation during acceleration, and overall power loss. These issues occur because the timing chain can no longer maintain proper synchronization between engine components.
| Symptom | Severity Level | Typical Timeline | Action Required |
|---|---|---|---|
| Cold start rattling | Early | First 2-3 months | Monitor closely |
| Metal particles in oil | Moderate | 3-6 months | Schedule inspection |
| Check engine light | Serious | 6-12 months | Immediate diagnosis |
| Performance loss | Critical | 12+ months | Urgent repair needed |
Step 1: Performing Initial Diagnostic Assessment
The first step in diagnosing Toyota timing chain issues is gathering key information. This phase helps you understand your engine’s condition before diving into more complex tests. A systematic approach here can save time and avoid unnecessary repairs.
Your Toyota timing chain diagnosis begins with careful observation and basic tests. These simple steps often reveal the most important clues about engine problems.
Checking Oil Condition and Contamination
Start your timing chain oil inspection during your next oil change. Fresh oil should appear amber or black without metallic particles. Look for unusual discoloration that shows internal wear.
Check for gritty texture between your fingers. Metal particles in the oil suggest timing chain components are wearing against each other. This contamination clearly shows internal engine damage.
Listening Test for Chain Noise Patterns
Toyota engine noise diagnosis requires focused listening during specific conditions. Start your engine when it’s completely cold. Timing chain problems usually create distinctive rattling sounds during startup.
Pay attention to noise patterns as the engine warms up. Healthy timing chains become quieter as oil pressure builds. Damaged chains maintain consistent rattling or grinding sounds from the front engine area.
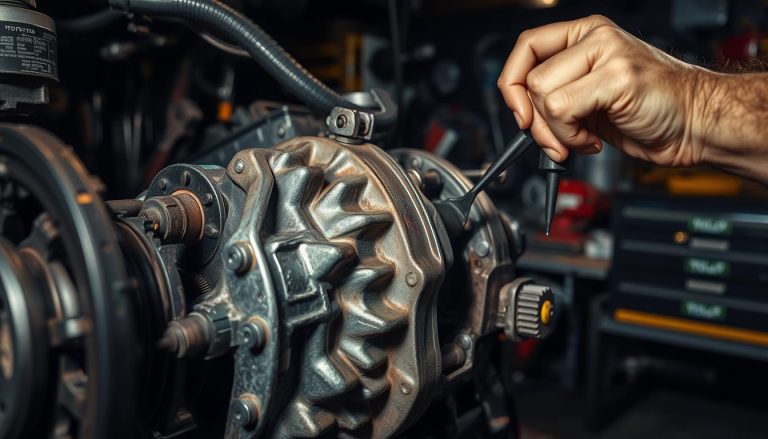
Visual Inspection of Engine Bay
Examine accessible engine components for obvious problems. Look for oil leaks around timing covers or damaged external parts. Check for signs of overheating that might contribute to timing chain wear.
This initial assessment phase provides baseline information before advancing to complex diagnostic procedures. Document your findings to track problem progression.
Step 2: Using Diagnostic Tools and Equipment
Professional tools turn guesswork into clear facts when checking Toyota timing chains. These tools give detailed info about your engine’s health. They help figure out exactly what repairs are needed. Proper diagnostic procedures save time and money by finding specific problems before starting repairs.

OBD Scanner Code Reading Procedures
Toyota OBD timing codes show important info about timing chain issues. Use an OBD scanner to connect to the car’s port and get error codes. Common codes include P0016 (camshaft position correlation), P0020 (intake camshaft position actuator), and P0021 (intake camshaft timing over-advanced).
These codes help find out if the problem is with the timing chain or other parts like VVT actuators. Document all codes before clearing them to track repair progress well.
Compression Testing Techniques
A timing chain compression test checks cylinder pressure to see if valves are timing right. Remove spark plugs and turn off the fuel system before testing. Crank the engine and record pressure for each cylinder.
Healthy cylinders should show 140-180 PSI compression with little difference between cylinders. Low or uneven compression often means the timing chain is stretched, affecting valve operation.
Timing Chain Stretch Measurement Methods
Measuring timing chain stretch needs special tools to check elongation. Use a timing chain checking tool or dial indicator to measure chain length against specs. Toyota chains need replacing if stretched more than 0.5 inches from original length.
This process gives clear proof for when to replace the chain, avoiding unnecessary repairs.
Borescope Inspection Process
Borescope cameras let you see inside timing parts without taking everything apart. Put the scope through spark plug holes or timing chain cover openings. Look for worn guide rails, damaged tensioner shoes, and scoring on cylinder walls.
| Diagnostic Tool | Primary Function | Key Information Provided | Skill Level Required |
|---|---|---|---|
| OBD Scanner | Error Code Reading | Timing System Fault Codes | Beginner |
| Compression Tester | Cylinder Pressure Testing | Valve Timing Accuracy | Intermediate |
| Chain Stretch Tool | Chain Length Measurement | Exact Elongation Data | Advanced |
| Borescope Camera | Visual Internal Inspection | Component Wear Assessment | Intermediate |
Professional diagnosis eliminates guesswork and ensures you replace only the components that actually need attention, saving both time and money on your Toyota timing chain repair.
Step 3: Preparing for Timing Chain Repair
Getting ready is key to a successful Toyota timing chain repair. Organize your space and gather all needed tools to avoid delays and risks. Rushing can lead to frustration and mistakes that harm your engine.

Essential Tools and Safety Equipment
The right timing chain repair tools make a big difference. You’ll need a socket set, torque wrenches, and tools specific to your Toyota. These help you avoid a tough repair.
Timing chain safety equipment keeps you safe during the repair. Safety glasses protect your eyes, gloves keep your hands safe, and good lighting helps with precision.
Vehicle Preparation and Fluid Drainage
Put your Toyota on level ground with enough space around the engine. Drain the oil and coolant to prevent spills and messes.
Clean the engine bay before you start. This keeps dirt out of the engine during disassembly.
Battery Disconnection and Component Removal
Start by disconnecting the negative battery terminal. Then, disconnect the positive terminal. This protects your car’s electronics.
Take off the engine cover and any parts that get in the way. Take photos of where things go and keep bolts organized for easy reassembly.
| Preparation Category | Required Items | Safety Priority | Time Required |
|---|---|---|---|
| Tools | Socket sets, torque wrenches, timing tools | Medium | 15 minutes |
| Safety Equipment | Glasses, gloves, proper lighting | High | 5 minutes |
| Fluid Drainage | Drain pans, funnels, containers | Medium | 30 minutes |
| Component Removal | Camera, labeled containers, cleaning supplies | Low | 45 minutes |
Good Toyota timing chain replacement preparation is key to a successful repair. It helps you avoid costly mistakes during the complex process.
Step 4: Accessing the Timing Chain Assembly
Getting to Toyota’s timing chain assembly needs patience and precision. You’ll remove covers, accessories, and protective elements. This lets you access the timing system without contamination.
Each part must be removed in the right order to avoid damage. This ensures a smooth reassembly process.
Organize removed parts and fasteners carefully. Label each component and store bolts in separate containers. Take photos at each step to document the original configuration.

Removing Engine Cover and Accessories
Start by removing the plastic engine cover and air intake components. Disconnect the negative battery cable first for safety. Remove the air filter housing, intake tubes, and any vacuum lines that block access to the timing cover area.
Next, disconnect ignition coils and spark plug wires from the cylinder head. Label each wire to ensure proper reconnection. Remove any brackets, wiring harnesses, or accessories mounted on or near the timing cover.
Some models require removing the cooling fan, radiator hoses, or power steering components. Check your specific Toyota model’s service manual for the exact sequence.
Timing Chain Cover Removal Process
The Toyota timing chain cover removal begins with draining engine oil and coolant if not already completed. Remove the crankshaft pulley using a harmonic balancer puller tool. This step requires significant force, so ensure the crankshaft is properly secured.
Locate all timing cover bolts, which vary in length and thread pitch. Remove bolts in reverse order of the installation sequence specified in your service manual. Some covers have hidden bolts behind accessories or within recessed areas.
Carefully separate the timing cover from the engine block. Use a plastic prying tool to avoid damaging sealing surfaces. Clean all old gasket material from both surfaces before proceeding.
Marking Timing Positions Before Disassembly
Before disturbing any timing components, mark the relationship between the crankshaft, camshaft, and timing chain. Use a permanent marker or paint pen to create reference marks on the sprockets and chain.
Take detailed photos of the timing marks from multiple angles. These images serve as backup references if your physical marks become unclear during the repair process.
| Component | Marking Method | Critical Points | Photo Documentation |
|---|---|---|---|
| Crankshaft Sprocket | Paint marker on teeth | TDC alignment mark | Close-up and wide angle |
| Camshaft Sprockets | Permanent marker lines | Intake/exhaust timing | Individual and combined |
| Timing Chain Links | Colored paint dots | Sprocket engagement points | Chain-to-sprocket contact |
| Chain Guides | Position reference marks | Mounting bolt locations | Installation orientation |
Double-check all timing marks before proceeding with chain removal. Incorrect timing during reassembly can cause severe engine damage. This documentation step is critical for successful repair completion.
Step 5: Inspecting and Measuring Chain Components
Checking your Toyota’s timing chain system is key. It shows which parts need to be replaced. This step helps avoid fixing only part of the problem, which can cause it to fail early. Proper timing chain component assessment saves time and money by finding all worn parts before starting again.
Experts use special ways to measure each part carefully. They follow the maker’s rules to get accurate results. Skipping this step can lead to problems soon after the repair is done.

Chain Stretch Measurement Procedures
Timing chain wear measurement needs to be done right, using Toyota’s rules. Most Toyota timing chains have limits on how much they can stretch. You count the links over certain distances and compare them to the manual.
If the chain stretches too much, it needs to be replaced right away. A stretched chain can’t keep the valves in sync, even with new parts. Keep your measurements for later use and for warranty reasons.
Tensioner Functionality Testing
Check hydraulic tensioners by seeing how they react to oil pressure and spring tension. If they leak oil, have broken springs, or can’t keep the chain tight, they’re not working right. Mechanical tensioners need different tests to check their springs and ratcheting parts.
Guide Rail Wear Assessment
Look at the plastic and metal guide rails for any damage. Check where the chain touches the rails closely. Damaged guide rails can make the chain jump off and hurt the engine.
Sprocket Condition Evaluation
Check the sprocket teeth for even wear. Uneven wear means there’s a timing or alignment problem. Toyota timing chain inspection must include a close look at the sprockets. Damaged sprockets can ruin new chains quickly.
Step 6: Replacing Worn Timing Chain Parts
The first step in replacing the timing chain is to prepare carefully and check each part. It’s important to follow each step closely and keep everything aligned. Even a small mistake can cause serious damage to your engine.
Before you start, make sure all new parts fit your Toyota. Check the part numbers and look for any damage or defects on the parts.
Installing New Timing Chain Correctly
Start by setting the crankshaft at top dead center. The timing marks on the crankshaft pulley should match the engine block markings. This is the base for correct timing.
Put the new timing chain in place by following the colored links or special markings. These links match specific marks on the camshaft and crankshaft sprockets. Never force the chain into position – it should fit smoothly when timing is correct.
Work carefully around each sprocket. Make sure the chain fits well in each tooth without binding or skipping.
Tensioner and Guide Rail Replacement
Replace the timing chain tensioner and guide rails together. Old guides can damage your new chain, so this step is key for reliability.
Some Toyota tensioners need to be compressed and locked before you install them. Others require specific oil priming steps. Check your service manual for the exact steps for your model.
Install the guide rails with great attention to alignment. If the guides are not aligned right, the chain can derail, causing serious engine damage.
Proper Timing Mark Alignment
Aligning Toyota timing marks needs to be precise. Use the marks from disassembly as guides, but always check against the manufacturer’s specs.
Double-check all timing relationships before you start the final assembly. The camshaft timing marks should match their marks on the timing chain cover or cylinder head.
Torque Specifications and Sequences
Use the exact torque specs for each part. The torque for timing cover bolts, tensioner bolts, and sprocket bolts varies by Toyota model.
Under-torquing can cause parts to fail, while over-torquing can damage threads or warp surfaces. Use a calibrated torque wrench and follow the tightening sequence exactly.
Finish the timing chain replacement by checking all connections one last time before putting everything back together.
Step 7: Reassembling and Testing the Engine
Replacing the timing chain needs careful reassembly and testing. This ensures your Toyota engine runs smoothly. Toyota timing chain reassembly success depends on following proper procedures and verifying each step.
The reassembly process is the reverse of disassembly, with new parts and seals. Pay attention to torque specs and alignment marks. Double-check every connection against your reference photos.

Installing Timing Cover with New Seals
Clean all sealing surfaces before installing the timing cover. Remove old gasket material and oil residue completely. Apply a thin, even layer of RTV sealant to the cover mating surface.
Install new seals and gaskets according to Toyota specifications. Proper sealing prevents oil leaks that could contaminate your new timing chain system. Tighten cover bolts to specified torque values in the correct sequence.
Reconnecting Components and Refilling Fluids
Reconnect all electrical connectors, vacuum lines, and mechanical linkages you removed during disassembly. Verify each connection matches your reference photos. Secure all wiring harnesses properly to prevent interference.
Refill the engine with fresh oil using the correct grade for your Toyota model. Install a new oil filter and check fluid levels. High-quality oil provides proper lubrication during the critical break-in period.
Initial Startup and Break-in Procedures
Follow the proper timing chain break-in procedure for optimal longevity. Turn the engine over by hand to verify smooth rotation before starting. Check for proper oil pressure before allowing the engine to idle.
Start the engine and listen carefully for unusual noises. Allow it to idle for several minutes while monitoring oil pressure and temperature. Any rattling or grinding sounds indicate installation problems.
Post-Repair Testing and Verification
Toyota engine testing after repair confirms your work was successful. Check for smooth idle quality and proper acceleration response. Scan for diagnostic trouble codes using an OBD scanner.
Perform a thorough test drive under various conditions. Monitor engine performance, oil pressure, and operating temperature. Verify that all engine systems function normally before considering the repair complete.
Preventing Future Toyota Timing Chain Problems
Good maintenance habits can save you a lot of money on timing chain repairs. Toyota timing chain maintenance is easier with the right strategies. These steps help protect your engine and make your timing chain last longer.

Maintaining Proper Oil Change Intervals
Clean oil is key for your timing chain. Toyota oil change intervals are just guidelines, not strict rules. If you drive in harsh conditions, change your oil more often.
Driving in the city, short trips, and extreme weather are all tough on your car. Change your oil every 3,000 to 5,000 miles in these situations. This keeps your timing chain and tensioners in top shape and prevents damage.
Using Toyota-Specified Oil Grades
The right oil is essential. Toyota’s engineers design their cars to work best with specific oils. Using the wrong oil can lead to early wear and tensioner issues.
Synthetic oils offer better protection for your timing chain. They stay thick in cold or hot weather and last longer than regular oils.
Regular Maintenance Inspections
Regular checks by a mechanic can catch problems early. Ask them to listen for unusual noises during service. They can spot oil leaks around timing covers before they become big problems.
A Toyota engine maintenance schedule includes timing chain checks. Following this schedule helps spot wear before it’s too late.
Monitoring Engine Performance Indicators
Your engine will tell you if something’s wrong. Look out for changes in fuel efficiency, power loss, or a rough idle. These signs often show up before the timing chain fails completely.
| Warning Sign | Frequency to Check | Action Required |
|---|---|---|
| Engine noise at startup | Every start | Professional inspection |
| Oil consumption increase | Monthly | Check for leaks |
| Check engine light | Immediate | Diagnostic scan |
| Rough idle symptoms | Weekly | Schedule service |
An ounce of prevention is worth a pound of cure when it comes to timing chain maintenance.
Keep detailed records of your maintenance to spot patterns. Driving gently also helps your timing chain last longer by reducing stress on parts.
Cost Breakdown for Timing Chain Repairs
Toyota timing chain repair costs can vary a lot. This depends on whether you do it yourself or get a professional to do it. Knowing these costs helps you decide when and who to choose. The price depends on your Toyota model, engine type, and what needs fixing.

DIY Repair Parts and Tool Costs
Fixing it yourself can save a lot on labor costs. Basic timing chain kits cost between $200 and $600, based on your Toyota model and engine. These kits include everything you need like chains, tensioners, and gaskets.
You might need to buy tools if you don’t have them. Tools like timing chain tools and torque wrenches can cost $150 to $400. But, they’re useful for future repairs too.
Professional Service Pricing
Getting a professional to replace the timing chain can cost between $1,200 and $3,000. Luxury Toyotas and complex engines cost more because of more work needed. This price includes parts, labor, and a warranty.
Getting quotes from certified Toyota service centers is a good idea. This way, you can compare prices and avoid unexpected costs.
Labor Time and Complexity Factors
Labor is the biggest part of the cost for professional repairs. Some Toyotas are easy to work on, while others need a lot of disassembly. This affects how much you’ll pay.
| Repair Type | Parts Cost | Labor Cost | Total Range |
|---|---|---|---|
| DIY Basic Kit | $200-$600 | $0 | $200-$600 |
| DIY with Tools | $350-$1,000 | $0 | $350-$1,000 |
| Professional Standard | $400-$800 | $800-$1,500 | $1,200-$2,300 |
| Professional Complex | $600-$1,200 | $1,200-$2,500 | $1,800-$3,700 |
Determining When Professional Help is Needed
When timing chain problems go beyond simple fixes, you need a pro. Many Toyota owners can handle basic repairs. But, some issues need special tools and skills only experts have.
Complex Engine Damage Scenarios
Severe timing chain failures can damage more than just the chain. Bent valves, damaged pistons, and cylinder head problems need special tools and a machine shop.
When a timing chain breaks, it can hurt many parts. Experts use special tools to check the engine. They see if the engine needs a big rebuild.
Warranty and Insurance Considerations
Toyota’s warranty can affect your repair choices. Newer cars might have warranty coverage for timing chain issues. But, DIY repairs can void the warranty.
Some insurance covers mechanical breakdowns. This can help pay for professional repairs at approved places.
Finding Certified Toyota Service Centers
Certified Toyota service centers have trained techs. They use the latest tools and genuine Toyota parts. They know how to fix your car right.
| Service Type | Certified Center Advantage | DIY Limitation |
|---|---|---|
| Diagnostic Equipment | Factory-level scan tools | Limited code reading |
| Technical Support | Toyota engineering hotline | Online forums only |
| Parts Availability | Genuine OEM components | Aftermarket alternatives |
| Warranty Coverage | Full manufacturer backing | No warranty protection |
When timing chain problems are part of bigger engine issues, you need experts. They have the right tools and knowledge for a full fix.
Troubleshooting Common Repair Challenges
Even skilled mechanics face common issues when installing Toyota timing chains. These timing chain installation problems can make a simple repair complicated. Knowing these challenges is key to a successful repair.
Most problems come from needing precision and understanding how parts work together. Toyota timing chain troubleshooting needs a methodical approach to find and fix problems fast.
Timing Alignment Problems
Getting the timing right is the biggest challenge. Wrong timing marks can damage the engine by causing valves to hit pistons.
Use several reference points to check timing. Turn the engine by hand through a full cycle before putting it back together. Make sure all timing marks match the factory specs.
“A single degree of timing error can destroy an engine in seconds. Take time to verify everything twice.”
Tensioner Installation Issues
Tensioner problems often come from not compressing them right or not following the correct order. Some Toyotas need specific tensioner placement during chain installation.
Compress tensioners as the manual says. Some need locking pins, while others need oil priming.
Seal and Gasket Leak Prevention
Toyota timing chain leaks happen when sealing steps are not done right. Clean all surfaces well before putting on new gaskets.
Replace all seals when fixing the timing chain. Use the right torque and follow tightening steps to avoid warping.
Post-Repair Noise Concerns
Strange noises after fixing can mean problems or not enough break-in. Systematic diagnosis helps figure out if it’s normal or a real issue.
Watch the engine closely during the first starts. Some noises go away with the right break-in.
Conclusion
Your Toyota’s timing chain doesn’t have to be a worry or a big expense. With the knowledge from this guide, you can catch problems early. This way, small issues won’t turn into big engine damage.
The best Toyota timing chain maintenance tips are about being consistent. Regular oil changes with quality lubricants keep your chain system running well. Clean oil also reduces friction and stops debris buildup that speeds up wear.
Preventing timing chain problems starts with listening to your engine. Those small rattles during start-up or changes in how it runs are your Toyota’s way of saying it needs attention. Ignoring these signs can lead to more expensive repairs later.
Toyota engines are known for their reliability because of proper care and maintenance. Your vehicle will thank you for consistent care with years of reliable service. Whether you do repairs yourself or get a professional, acting quickly when problems show up is key.
Remember, timing chain work needs care and patience. If repairs are too much for you, don’t hesitate to get professional help. The right maintenance and timely repairs keep your vehicle’s value up and ensure it’s reliable for your family’s daily needs.
FAQ
What are the most common signs of Toyota timing chain problems?
Signs include a rattling sound when starting the engine cold and metal particles in the oil. The check engine light may come on with timing error codes. You might also notice rough idling, hesitation when accelerating, and a loss of power.
Chain stretch and elongation cause rattling noises and performance issues. These problems get worse over time.
Which Toyota models are most prone to timing chain issues?
The 2007-2017 Camry with the 2AR-FE engine often has timing chain stretch issues. The 2009-2017 Corolla with the 2ZR-FE engine has timing chain tensioner failures. Some RAV4 and Highlander models also show timing chain wear.
Prius and hybrid models have unique issues due to their complex powertrains.
How much does Toyota timing chain repair typically cost?
DIY parts and tools cost 0-600, depending on your Toyota model. Professional replacement costs
FAQ
What are the most common signs of Toyota timing chain problems?
Signs include a rattling sound when starting the engine cold and metal particles in the oil. The check engine light may come on with timing error codes. You might also notice rough idling, hesitation when accelerating, and a loss of power.
Chain stretch and elongation cause rattling noises and performance issues. These problems get worse over time.
Which Toyota models are most prone to timing chain issues?
The 2007-2017 Camry with the 2AR-FE engine often has timing chain stretch issues. The 2009-2017 Corolla with the 2ZR-FE engine has timing chain tensioner failures. Some RAV4 and Highlander models also show timing chain wear.
Prius and hybrid models have unique issues due to their complex powertrains.
How much does Toyota timing chain repair typically cost?
DIY parts and tools cost $200-600, depending on your Toyota model. Professional replacement costs $1,200-3,000. Labor costs are high because of the disassembly needed.
Can I replace a Toyota timing chain myself?
DIY replacement is possible for skilled mechanics. It requires patience and precision. You’ll need to disassemble, align timing marks, and use specialized tools.
Seek professional help for complex issues, warranty concerns, or if you’re inexperienced.
How do I prevent Toyota timing chain problems?
Use Toyota-specified oil for regular changes. This keeps the timing chain lubricated. Regular maintenance checks for unusual noises and oil leaks are also important.
Listen for noises, check for leaks, and watch for performance issues. Synthetic oils offer better protection.
What tools do I need for Toyota timing chain replacement?
You’ll need torque wrenches, timing chain tools, socket sets, and safety gear. Diagnostic tools like OBD scanners and compression testers are also necessary.
How do I know if my timing chain tensioner is failing?
Failure causes metal-on-metal sounds during idle. You might see oil leaks, damaged springs, or poor chain tension. Hydraulic tensioners may not respond to oil pressure changes.
What happens if I ignore Toyota timing chain problems?
Ignoring problems can lead to engine failure. This includes valve damage, bent valves, and needing a new engine. Chain stretch and failure can cause major engine damage.
How do I properly align timing marks during Toyota timing chain installation?
Mark crankshaft and camshaft positions before disassembly. Use paint markers. Toyota chains have colored links for alignment.
Double-check timing relationships before assembly. Rotate the engine by hand to verify alignment.
What causes Toyota timing chain stretch and elongation?
Stretch occurs over time due to wear and metal fatigue. Poor maintenance, contaminated oil, high engine temperatures, and aggressive driving speed up wear. Infrequent oil changes are the main cause of premature problems.
How do I test for timing chain stretch in my Toyota?
Use manufacturer specifications for measurement. You’ll need specific tools and techniques. Compression testing and borescope inspection can show engine performance issues.
What should I do if my Toyota timing chain breaks completely?
Stop driving immediately to avoid more damage. Complete failure can cause valve damage and internal engine damage. A professional assessment is needed to determine the damage and if a rebuild or replacement is necessary.
,200-3,000. Labor costs are high because of the disassembly needed.
Can I replace a Toyota timing chain myself?
DIY replacement is possible for skilled mechanics. It requires patience and precision. You’ll need to disassemble, align timing marks, and use specialized tools.
Seek professional help for complex issues, warranty concerns, or if you’re inexperienced.
How do I prevent Toyota timing chain problems?
Use Toyota-specified oil for regular changes. This keeps the timing chain lubricated. Regular maintenance checks for unusual noises and oil leaks are also important.
Listen for noises, check for leaks, and watch for performance issues. Synthetic oils offer better protection.
What tools do I need for Toyota timing chain replacement?
You’ll need torque wrenches, timing chain tools, socket sets, and safety gear. Diagnostic tools like OBD scanners and compression testers are also necessary.
How do I know if my timing chain tensioner is failing?
Failure causes metal-on-metal sounds during idle. You might see oil leaks, damaged springs, or poor chain tension. Hydraulic tensioners may not respond to oil pressure changes.
What happens if I ignore Toyota timing chain problems?
Ignoring problems can lead to engine failure. This includes valve damage, bent valves, and needing a new engine. Chain stretch and failure can cause major engine damage.
How do I properly align timing marks during Toyota timing chain installation?
Mark crankshaft and camshaft positions before disassembly. Use paint markers. Toyota chains have colored links for alignment.
Double-check timing relationships before assembly. Rotate the engine by hand to verify alignment.
What causes Toyota timing chain stretch and elongation?
Stretch occurs over time due to wear and metal fatigue. Poor maintenance, contaminated oil, high engine temperatures, and aggressive driving speed up wear. Infrequent oil changes are the main cause of premature problems.
How do I test for timing chain stretch in my Toyota?
Use manufacturer specifications for measurement. You’ll need specific tools and techniques. Compression testing and borescope inspection can show engine performance issues.
What should I do if my Toyota timing chain breaks completely?
Stop driving immediately to avoid more damage. Complete failure can cause valve damage and internal engine damage. A professional assessment is needed to determine the damage and if a rebuild or replacement is necessary.