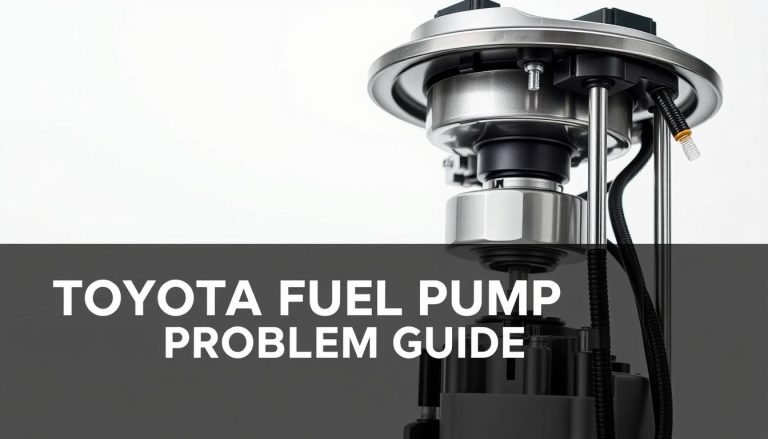

Toyota Prius Problems: Common Issues and Fixes
Your hybrid vehicle needs expert care when problems come up. The Toyota Prius is known for being reliable and fuel-efficient. But, like any complex machine, it can face specific problems that need professional help.
At Berkeley Toyota, we’ve got 42 years of experience with these hybrid vehicles. Each model has its own hybrid car issues that need special diagnostic methods. Issues like battery wear and electrical system problems can be costly if not caught early.
This guide covers everything from basic care to complex repairs. We’ll show you how to spot warning signs and know when to call in the pros for Toyota hybrid repairs. Your car reminds you to change oil and rotate tires every 5,000 miles. But, other problems need more advanced troubleshooting skills.
Key Takeaways
- Early problem detection can save thousands in repair costs
- Each Prius generation has unique maintenance challenges
- Professional diagnostics are essential for hybrid system issues
- Regular maintenance prevents most common electrical problems
- Battery degradation is the most expensive repair concern
- Understanding warning signs helps determine DIY vs professional repairs
Understanding Your Toyota Prius Hybrid System
Knowing how your Prius hybrid system works is key to fixing and maintaining it. This advanced tech uses different power sources for better fuel efficiency. The complexity of these systems requires careful study before attempting any repairs.
Your Prius is different from regular cars. It has a special powertrain that works together through computers. This setup brings unique maintenance challenges that need special knowledge.
How the Hybrid Powertrain Works
The Toyota hybrid tech blends power from two sources using a planetary gear system. The gasoline engine powers the car on highways. Electric motors handle low-speed operation and assist during acceleration.
Power moves through the hybrid transaxle in many ways. It can run on electric alone at slow speeds. When you need more power, the engine and motors work together.
Regenerative braking captures energy that would be lost. This energy charges the battery when you slow down. The power control unit manages this flow automatically.
“The Prius hybrid system represents the most refined integration of electric and gasoline power available in mass production vehicles.”
The computer systems watch hundreds of things every second. They check battery temperature, motor speeds, and engine load. This constant monitoring ensures optimal performance and protects expensive components.
Key Components That Can Fail
Several parts of the hybrid powertrain can fail over time. The hybrid battery pack loses capacity after 8-10 years. Individual cells can fail, reducing performance.
The inverter coolant pump often fails in older Prius models. This small pump keeps the power electronics cool. Pump failure leads to overheating and expensive inverter damage.
The 12-volt auxiliary battery powers the computer systems and accessories. Hybrid vehicles stress these batteries differently. They often fail without warning, leaving the vehicle completely inoperable.
| Component | Common Failure Age | Typical Symptoms | Repair Complexity |
|---|---|---|---|
| Hybrid Battery Pack | 8-12 years | Reduced MPG, warning lights | Moderate |
| Inverter Coolant Pump | 7-10 years | Overheating warnings, reduced power | Moderate |
| 12V Auxiliary Battery | 4-6 years | Won’t start, electrical glitches | Easy |
| Power Control Unit | 10-15 years | System errors, power loss | Complex |
| Electric Water Pump | 8-12 years | Engine overheating, coolant leaks | Moderate |
Electronic control modules can develop internal faults over time. Heat cycling and vibration stress these sensitive components. Module failures often require professional diagnosis and programming.
The head gasket is another serious failure point. Engine oil consumption and coolant loss indicate problems. This repair requires significant disassembly and professional expertise.
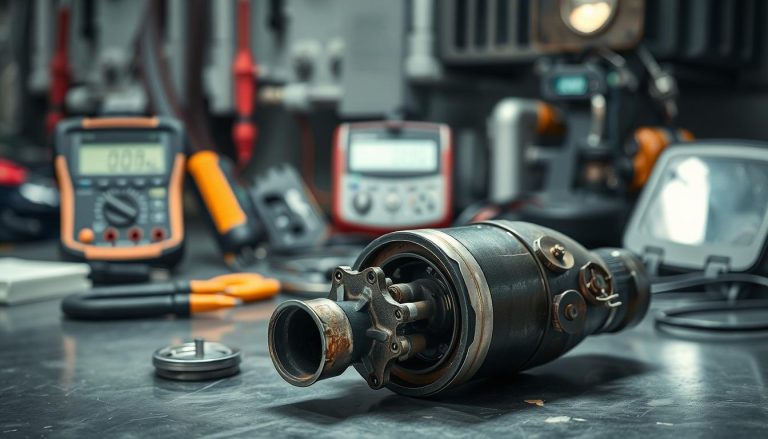
Essential Tools for DIY Repairs
Working on hybrid vehicles requires specialized safety equipment. High-voltage insulated gloves rated for 1000 volts are mandatory. Never attempt hybrid battery maintenance without proper protection.
A quality digital multimeter capable of measuring DC voltage up to 400 volts is essential. Standard automotive multimeters cannot handle hybrid system voltages safely. Invest in a meter designed for hybrid vehicle service.
Diagnostic scanners must support Toyota’s hybrid-specific protocols. Generic OBD-II scanners cannot access hybrid system data. Professional-grade scanners like the Techstream provide complete system access.
Insulated tools prevent accidental short circuits in high-voltage systems. Standard tools can conduct electricity and cause serious injury. Every tool that contacts hybrid components must be properly insulated.
A hybrid battery load tester helps evaluate individual cell performance. These specialized testers apply controlled loads while monitoring voltage drop. This testing reveals weak cells before complete failure occurs.
Safety equipment extends beyond electrical protection. Eye protection shields against battery acid and coolant splashes. Nitrile gloves protect hands from various automotive fluids during hybrid battery maintenance procedures.
“Proper tools and safety equipment are not optional when servicing hybrid vehicles – they are absolutely essential for both safety and successful repairs.”
Temperature monitoring equipment helps diagnose cooling system problems. Infrared thermometers identify hot spots in the inverter cooling system. This non-contact measurement prevents accidental contact with energized components.
The investment in proper tools pays dividends in repair success and personal safety. Quality equipment enables confident diagnosis and repair of complex Prius hybrid system issues.
How to Identify Common Toyota Prius Problems
Your Toyota Prius has warning signs for problems. Spotting these early can save you from expensive fixes that could cost thousands. Knowing these signs helps you act fast before issues get worse.
Hybrid cars like the Prius show symptoms differently than regular cars. They use both electric and gasoline power. So, when something goes wrong, the signs are unique.
Warning Signs to Watch For
Look out for unusual noises from the engine bay. Grinding, whining, or clicking sounds often mean cooling system or component failures. These sounds are not normal.
Changes in fuel economy are another sign. If your Prius uses more gas than usual, it might have hybrid system issues. It should always be fuel-efficient.
Notice how your car accelerates. Slow acceleration or hesitation could mean battery or inverter problems. Your Prius should accelerate smoothly.
Strange smells are also important. A sweet smell might mean coolant leaks, while burning smells could be electrical issues. Don’t ignore these signs.
Watch how your car starts up. The hybrid startup sequence is specific. Any changes could mean system problems.

Dashboard Warning Lights Decoded
Dashboard lights are your car’s way of talking to you. The red triangle light is the most serious for hybrid problems. It means issues with the high-voltage battery or inverter.
The check engine light can mean engine or emissions system problems. But for Prius, it often means hybrid system issues. Don’t think it’s just a minor problem.
Toyota’s maintenance reminder system is simple. It reminds you every 5,000 miles. But other warning lights need quick attention.
The brake system warning light is urgent. It usually means regenerative braking system problems. The battery charge indicator also needs quick checking.
Temperature warning lights are critical. They indicate cooling system issues. Both the engine and hybrid components need proper cooling.
Using Diagnostic Scanners
For hybrid system diagnostics, you need special tools. Toyota’s Techstream scan tools are the best for Prius. They read hybrid-specific trouble codes that others can’t.
Repair shops use Toyota’s Technical Information Service (TIS) for accurate diagnostics. This system gives access to technical bulletins and repair procedures for your vehicle.
Good Prius diagnostic tools show real-time data from sensors. They monitor battery voltages, system performance, and temperatures. This helps find problems early.
For DIY work, a scanner that supports Toyota hybrid systems is useful. These tools help you spot problems early and talk to repair shops better when needed.
Advanced scanners can test hybrid components. They can charge or discharge the battery, test cells, and check the inverter. This makes them better than basic code readers.
Understanding diagnostic data helps you make smart repair choices. When you know what the readings mean, you avoid unnecessary repairs and fix real problems.
Fixing Hybrid Battery Issues
Battery problems in Toyota Prius models can be expensive but fixable. Knowing how to diagnose and fix Prius hybrid battery problems helps you make smart choices. It’s all about proper testing and understanding your repair options.
Generation 3 Prius models from 2010-2014 have NiMH battery packs that need special care. These batteries face challenges from heat and long inactivity. Spotting early signs can prevent unexpected breakdowns.
Diagnosing Battery Degradation Symptoms
Spotting battery degradation symptoms early can save you money. Your Prius will show clear signs when the battery starts to fail.
One sign is reduced fuel economy. If your usual 50 MPG drops to 35-40 MPG without changing how you drive, it’s a problem. This happens because the engine works harder to make up for the weak battery.
Another sign is frequent engine cycling. A healthy Prius runs quietly on electric power at low speeds. But when the battery degrades, the engine starts and stops more often.
Your electric-only driving range will also get shorter. Instead of driving silently in parking lots, the engine starts right away. The dreaded red triangle warning light is the last sign before it fails completely.
Step-by-Step Battery Health Testing
Testing your hybrid battery’s health involves checking each cell’s performance. This helps you know which parts need fixing and guides your repair plan.
Professional tools give the most accurate battery health percentages. But, basic tools can also give you useful insights into your battery’s condition.
Using a Multimeter
A digital multimeter is your main tool for NiMH battery maintenance and testing. It measures each cell’s voltage and finds problem areas in the battery pack.
First, make sure you’re safe. Always disconnect the service plug under the rear seat. Wait at least 10 minutes for the high-voltage capacitors to discharge. Use insulated tools throughout.
Open the battery modules through the rear cargo area. Remove the plastic covers carefully and find the individual cell connections. Set your multimeter to DC voltage measurement mode.
Reading Battery Data
Healthy NiMH cells should read between 7.2 and 8.0 volts under load. Record each module’s voltage systematically. Cells that are failing or failed will show readings much lower than this.
Look for voltage imbalances between cells. A difference greater than 0.5 volts between the highest and lowest cells means problems. This imbalance forces the battery management system to limit overall performance.
Temperature readings are also important during testing. Hot cells often indicate internal resistance problems that lead to premature failure. Professional scanners can show these temperatures in real-time.
Battery Replacement vs Reconditioning Guide
Once you’ve found battery problems, you have several repair options. Each choice has different benefits and costs based on your situation and vehicle condition.
Reconditioning means replacing only the failed modules in your existing battery pack. This is cheaper but might not fix underlying system issues that caused the failures.
Complete hybrid battery replacement gives you a fresh start with new components. It’s more expensive at first but often comes with better warranties and longer-term reliability.
Cost-Benefit Analysis
Your decision should consider more than just the initial repair cost. Vehicle age, mileage, and condition all play a role in the best choice for you.
| Repair Option | Cost Range | Warranty Period | Best For |
|---|---|---|---|
| Module Reconditioning | $1,500 – $2,500 | 1-2 years | High-mileage vehicles |
| Complete Replacement | $3,000 – $4,500 | 3-5 years | Mid-age vehicles |
| Lithium Upgrade | $4,000 – $6,000 | 5-8 years | Long-term ownership |
Lithium battery upgrades offer better longevity and performance than original NiMH technology. They handle extreme temperatures better and last longer. But, the higher upfront cost is only worth it for long-term vehicle ownership.
Think about your Prius’s current value when deciding. Spending $4,000 on repairs for a $6,000 vehicle rarely makes sense. But, the same repair on a $12,000 vehicle is justified.
Installation Steps
Professional installation ensures safety and proper system integration. High-voltage components need specialized knowledge and tools that most DIY mechanics lack.
The installation starts with shutting down the system and checking safety. Technicians disconnect all high-voltage connections and verify zero energy state before starting work.
Removing the battery pack requires careful handling due to its weight and fragile connections. Most Prius battery packs weigh between 100-120 pounds and have multiple high-voltage cables.
Installing a new battery involves reversing this process with additional calibration steps. The vehicle’s computer systems need programming to recognize the new battery’s characteristics and optimize performance.
Professional mechanics usually finish the job in 3-4 hours. This includes safety checks, installation, system calibration, and road testing to ensure everything works right.
Solving 12V Battery Problems
Understanding 12V battery problems in your Toyota Prius can save you from unexpected breakdowns. The Prius 12V battery powers your hybrid system’s computers and controls the startup sequence. When this small but critical component fails, your entire vehicle becomes inoperable.
Unlike traditional cars, your Prius doesn’t use the 12V battery to start an engine directly. Instead, it powers the hybrid control systems that bring your vehicle to life. This unique setup means that auxiliary battery problems can strand you even when your main hybrid battery works perfectly.
Identifying 12V Battery Failure Signs
Recognizing early warning signs helps you avoid complete battery failure. Your Prius will show several symptoms before the auxiliary battery dies completely.
Watch for these common failure indicators:
- Vehicle won’t enter “Ready” mode when you press the power button
- Dashboard lights appear dim or flicker during startup
- Warning lights illuminate on the instrument panel
- Interior lights seem weaker than normal
- Smart key system becomes unresponsive
The most telling sign occurs when you press the power button and nothing happens. Your Prius may make clicking sounds or display error messages. These symptoms indicate your 12V battery replacement is needed soon.

Temperature extremes accelerate battery degradation. Cold weather reduces battery capacity, while hot climates increase internal corrosion. Your battery typically lasts three to five years under normal conditions.
Complete Battery Replacement Procedure
Replacing your Prius 12V battery requires specific steps and safety precautions. The process differs from conventional vehicles because of the hybrid system’s unique design.
Required Tools and Safety Gear
Gather these essential items before starting your 12V battery replacement:
| Tool Category | Specific Items | Purpose |
|---|---|---|
| Hand Tools | 10mm wrench, Phillips screwdriver, flathead screwdriver | Remove battery terminals and covers |
| Safety Equipment | Safety glasses, work gloves, flashlight | Protect from acid and electrical hazards |
| Testing Equipment | Digital multimeter, battery load tester | Verify new battery condition |
| Additional Supplies | Battery terminal cleaner, petroleum jelly | Clean connections and prevent corrosion |
Always wear safety glasses and gloves when handling batteries. Battery acid can cause serious burns and eye damage. Work in a well-ventilated area to avoid inhaling harmful gases.
Step-by-Step Installation
Follow these precise steps to replace your Prius 12V battery safely:
- Turn off your Prius completely and remove the smart key from the vehicle
- Open the rear hatch and locate the battery compartment on the right side
- Remove the plastic cover by lifting the tabs and sliding it forward
- Disconnect the negative terminal first using your 10mm wrench
- Remove the positive terminal and any hold-down brackets
Take photos before disconnecting wires to ensure proper reconnection. Label cables if multiple connections exist. This prevents Prius electrical issues during reassembly.
- Lift out the old battery carefully, as it weighs approximately 25 pounds
- Clean the battery tray with baking soda solution to neutralize acid
- Install the new battery in the same position as the old one
- Reconnect the positive terminal first, then the negative terminal
- Replace all covers and brackets in reverse order of removal
Test your installation by pressing the power button. Your Prius should start normally without warning lights. If problems persist, double-check all connections.
Preventing Future Battery Issues
Proactive maintenance extends your Prius 12V battery life significantly. Regular care prevents most auxiliary battery problems before they occur.
Implement these prevention strategies:
- Test battery voltage monthly using a digital multimeter
- Clean terminals every six months to prevent corrosion buildup
- Drive your Prius regularly to maintain proper charging cycles
- Park in shaded areas during hot weather when possible
Your Prius charges the 12V battery through a DC-DC converter connected to the hybrid battery. This system works differently than traditional alternators. If your hybrid battery develops problems, it can affect 12V battery charging.
Monitor your battery’s performance during seasonal changes. Cold weather reduces capacity temporarily, while consistent hot weather accelerates permanent degradation. Replace batteries showing voltage below 12.4 volts at rest.
Keep a portable jump starter designed for hybrid vehicles in your emergency kit. These devices can provide enough power to start your Prius when the 12V battery fails unexpectedly. But, they’re temporary solutions – replace the battery as soon as possible.
Regular maintenance appointments should include 12V battery testing. Many Prius electrical issues stem from weak auxiliary batteries that haven’t completely failed yet. Early detection prevents roadside emergencies and protects your hybrid system’s sensitive electronics.
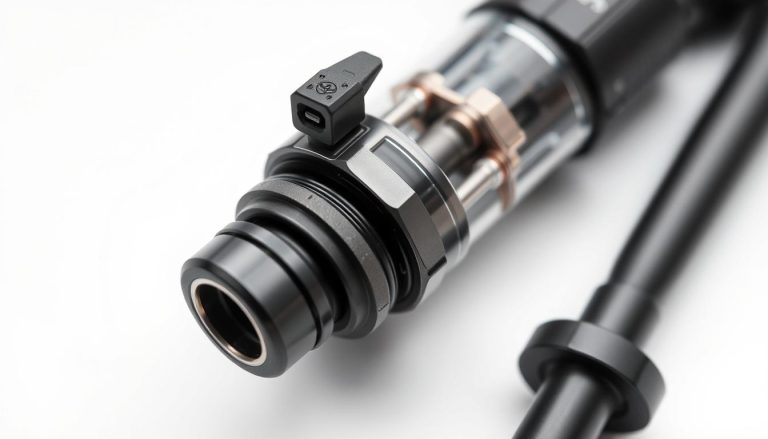
Repairing Inverter Coolant Pump Failures
Under your Prius hood, a small but important part keeps repair costs down. The Prius inverter coolant pump circulates coolant through your hybrid system’s power electronics. If it fails, your hybrid system could overheat.
This electric pump works separately from your engine’s cooling system. It keeps the inverter components cool. These parts convert DC power from the battery to AC power for the electric motors. Without cooling, they can overheat and fail quickly.
Recognizing Coolant Pump Problems
Your Prius will show warning signs if the hybrid cooling system fails. A red triangle warning light on your dashboard is a clear sign. It often comes with error codes P0A93 or P0A94, which mean inverter cooling issues.
Listen for strange noises from the engine bay. A failing pump might make grinding, whining, or clicking sounds. These sounds happen when you start the car or when the hybrid system is working.
Notice if your car feels slow or struggles on hills. The hybrid system might shut down to avoid overheating. In bad cases, you might see steam or smell burning coolant.
Look for coolant leaks around the pump housing. Pink or green fluid puddles under your car are a sign. Also, check for corroded electrical connections near the pump.
Diagnostic Testing Procedures
Start by using an OBD-II scanner to read hybrid system codes. Connect the scanner and look for inverter problems related to cooling. Common codes include P0A93, P0A94, P0A9A, and P0A9C.
Test the pump’s electrical supply with a multimeter. The pump should get 12 volts when the hybrid system turns on. No voltage means wiring issues or a faulty hybrid control module.
Check coolant flow by removing the radiator cap when the engine is cold. Look for coolant circulation. A working pump shows visible flow patterns in the reservoir.
Check coolant levels in both the engine and hybrid cooling systems. Low coolant can damage the pump and cause overheating. Top off with the correct Toyota coolant if levels are low.
Inspect the pump housing for cracks, corrosion, or damage. Also, check all electrical connections for tightness and corrosion.
Complete Pump Replacement Guide
Replacing the inverter coolant pump needs basic mechanical skills and takes 2-4 hours. You’ll need standard hand tools, a drain pan, and new Toyota hybrid coolant. The pump costs between $200-400, which is much cheaper than replacing the inverter.
Prepare your workspace by parking on level ground and engaging the parking brake. Let the engine cool down before starting work. Hybrid systems can be dangerous, so disconnect the 12V battery as a safety measure.
Removal Steps
Drain the hybrid cooling system by opening the drain valve near the inverter. Place a large drain pan underneath to catch all coolant. This prevents spills and environmental contamination.
Find the inverter coolant pump near the hybrid battery cooling system. Remove plastic covers and air intake components to access the pump. Take photos before disconnecting anything to help with reassembly.
Disconnect the electrical connector from the pump. Press the release tab and pull straight out. Avoid twisting or forcing the connector, as this can damage the wiring.
Remove the coolant hoses from the pump using hose pliers. Expect some coolant spillage even after draining. Mark the hose positions with tape to ensure correct reconnection.
Unbolt the pump from its mounting bracket using the appropriate socket. Most pumps use 10mm or 12mm bolts. Support the pump while removing the last bolt to prevent it from falling.
Installation and Testing
Install the new pump by reversing the removal process. Apply a thin layer of coolant to the hose connections to ease installation. Ensure all hoses seat properly and clamp securely.
Tighten the mounting bolts to Toyota’s specified torque. Over-tightening can crack the pump housing, while loose bolts cause vibration and premature failure.
Reconnect the electrical connector until it clicks into place. A loose connection will cause the pump to fail intermittently.
Refill the system with fresh Toyota hybrid coolant. Use only the specified coolant type to prevent corrosion and pump damage. Fill slowly to avoid air pockets.
Bleed air from the system by running the engine with the radiator cap off. Add coolant as the level drops and air bubbles escape. This step is critical for coolant pump replacement success.
Test the repair by starting the car and monitoring dashboard warning lights. The hybrid system should operate normally without fault codes. Check for leaks around all connections after the first test drive.
Addressing Head Gasket Problems
Generation 3 Prius owners often face head gasket failures. These problems start with clogged EGR valves. Models from 2010 to 2014 are most affected, leading to expensive repairs. Knowing the link between EGR valve issues and head gasket failure helps owners prevent engine damage.
The issue begins with carbon buildup in the EGR system. Clogged valves disrupt the air-fuel mixture. This imbalance puts too much pressure on the head gasket, causing it to fail.

Toyota fixed this issue in 2015 and later models. But, earlier owners need to watch for symptoms and maintain their cars well.
Identifying Head Gasket Failure Symptoms
Spotting Prius head gasket problems early can save a lot of money. White smoke from the exhaust, during startup or acceleration, is a clear sign.
Internal problems show as coolant loss without leaks. Your coolant reservoir might drop, even without puddles under your car. This is because coolant leaks into the combustion chambers through the damaged gasket.
Engine overheating is another sign. Your temperature gauge might rise too high, even during normal driving. This is because the cooling system loses pressure and efficiency.
Check your engine oil for signs of coolant mixing. If it looks milky or like chocolate milk, it means coolant is mixing with the oil. This reduces lubrication and can damage the engine more.
“The key to preventing catastrophic engine damage is catching head gasket problems early, before coolant contamination destroys internal components.”
Performing Diagnostic Tests
Professional diagnosis is key to confirming head gasket problems before expensive repairs. Several tests can give accurate results if done right.
A block test uses chemical indicators to detect combustion gases in the cooling system. It’s a reliable method for confirming head gasket failure.
Compression Testing
Compression testing checks cylinder pressure to find internal engine problems. Healthy Prius cylinders should have pressure between 150 and 180 PSI, with little variation.
Remove spark plugs and disable the fuel system before testing. Insert the compression gauge into each cylinder and crank the engine several times. Record and compare the readings.
Big differences in pressure between cylinders mean head gasket problems. A variation of more than 15% suggests internal leakage that needs immediate attention.
Coolant System Pressure Tests
Pressure testing shows both external leaks and internal contamination. It uses a pump to pressurize the cooling system beyond normal pressure.
Connect the pressure tester to the radiator or coolant reservoir. Pump the system to around 16 PSI for most Prius models. Watch for pressure drop over 10-15 minutes.
Rapid pressure loss means a leak somewhere in the system. External leaks are easy to see, while internal leaks suggest head gasket failure. Some technicians also check for bubbles in the coolant, which indicate combustion gases entering the cooling system.
Repair Options and Procedures
Head gasket repair options range from temporary fixes to full engine rebuilds, based on damage and budget. Knowing your options helps you decide what’s best for your Prius.
Chemical sealers offer temporary fixes for minor leaks. They expand when heated, potentially sealing small gaps. But, they’re not permanent and can cause cooling system clogs if used wrong.
Replacing the head gasket is the most reliable long-term solution. This repair costs between $2,000 and $4,000, depending on damage found. It involves removing the cylinder head, replacing the gasket, and reassembling with the right torque.
Prevention is the best way to avoid head gasket repair costs. Regular EGR valve cleaning or replacement every 60,000 to 80,000 miles stops carbon buildup. Use quality fuel with detergent additives to reduce carbon formation. Keep the cooling system working right through regular coolant changes and thermostat replacement. Fix engine overheating issues quickly to prevent more damage.
Have your EGR system checked during routine maintenance, if you own a 2010-2014 Prius. Early action saves a lot of money and keeps your hybrid running well for years.
Fixing Brake System Malfunctions
Brake system malfunctions in your Prius need special care. The hybrid brake system captures energy when you slow down. This advanced tech makes fixing problems unique.
The most common Prius brake problems include delayed brake response and inconsistent pedal feel. You might also see warning lights on your dashboard. Gen 3 Prius models from 2010-2014 often have brake sensor issues.

Troubleshooting Regenerative Braking Issues
Your Prius uses sensors for regenerative and traditional braking. When these sensors fail, you’ll notice warning signs. A spongy brake pedal is often the first sign of trouble.
Start by checking for brake system error codes with an OBD-II scanner. Look for codes about brake actuator operation and sensor communication failures. The Toyota Techstream scanner gives the most detailed data for hybrid brake system analysis.
Common symptoms include:
- Grinding noises during braking
- Reduced braking effectiveness
- Dashboard warning lights
- Inconsistent brake pedal response
Check your brake fluid level and condition often. Dark or contaminated fluid can harm sensor and actuator function. Clean brake fluid should be clear to light amber.
Repairing Brake Actuator Problems
The brake actuator assembly is key to your hybrid brake system. It manages the switch between regenerative and hydraulic braking. When actuator problems arise, quick brake actuator repair is vital for safety.
Start actuator diagnosis with a professional scan tool to monitor sensor data. Check actuator motor operation and hydraulic pressure during braking. Abnormal pressure patterns show internal actuator failure.
Key diagnostic steps include:
- Verify brake fluid reservoir levels
- Test actuator motor current draw
- Check hydraulic pressure sensor readings
- Inspect wiring harness connections
Actuator replacement needs special tools and procedures. The high-pressure system requires careful handling to avoid injury and damage. Professional service is often best for complex repairs.
Step-by-Step Brake Maintenance
Regular brake maintenance prevents many Prius brake problems. Your hybrid vehicle needs specific maintenance that’s different from traditional brakes. Following the right maintenance schedule helps extend component life and ensures top performance.
Check your brake pads and rotors every 15,000 miles or during regular service. Hybrid vehicles often have uneven brake wear due to regenerative braking. Front brakes usually wear faster than rear brakes in most Prius models.
Brake Fluid Replacement
Brake fluid replacement in your Prius requires special steps due to the electronic brake actuator. Standard bleeding methods don’t work well with hybrid brake systems. The actuator must be cycled using scan tool commands during bleeding.
Replace brake fluid every 30,000 miles, even if Toyota recommends longer intervals. Moisture contamination can harm sensor operation and cause actuator failure. Use only DOT 3 brake fluid specified for your vehicle.
Follow this procedure for proper fluid replacement:
- Connect scan tool and enter brake bleeding mode
- Start with the brake reservoir and work systematically
- Bleed each wheel in the specified sequence
- Monitor fluid color and consistency throughout
Actuator Calibration
Actuator calibration syncs the electronic and hydraulic brake systems after service or component replacement. This critical step ensures proper brake pedal feel and optimal stopping performance. Incorrect calibration can lead to dangerous brake system malfunctions.
Use the Toyota Techstream scanner or an equivalent professional tool for calibration. The process involves cycling the actuator through specific test sequences while monitoring system pressures. Complete calibration usually takes 15-20 minutes with the right equipment.
Never try actuator calibration without proper diagnostic tools and training. Improper calibration can damage expensive brake system components and compromise vehicle safety. Professional service ensures correct calibration and system verification.
Resolving Air Conditioning and Heating Issues
Your Prius HVAC system is different from regular cars. It has a hybrid HVAC system with an electric compressor. This compressor is powered by the high-voltage battery. It keeps the car cool even when the engine is off.
The electric system is unique and presents challenges. Prius AC problems need special tools and safety steps. Knowing these differences helps fix issues better.
“The electric AC compressor in hybrid vehicles represents a significant advancement in automotive climate control technology, but it also requires technicians to adapt their diagnostic and repair approaches.”
Most air conditioning repair issues come from electrical faults, refrigerant problems, or component failures. The system’s complexity means proper diagnosis saves time and money. Let’s explore the most effective troubleshooting methods.
Diagnosing Electric Compressor Problems
Electric compressor issues are common Prius AC problems. The compressor gets power directly from the hybrid battery. When it fails, you’ll notice symptoms right away.
Start by checking these warning signs:
- No cold air despite fan operation
- Unusual noises from the compressor area
- AC system cycling on and off rapidly
- Dashboard warning lights related to the hybrid system
Safety is key when diagnosing electric compressor issues. Always disconnect the high-voltage battery before working. Use proper insulated tools and follow safety protocols.
Test the compressor’s electrical supply with a multimeter. Check for proper voltage at the compressor connector. The system typically operates at 200-300 volts DC. Any significant deviation indicates electrical problems.

Fixing Coolant System Malfunctions
The hybrid HVAC system shares coolant with the engine and inverter cooling systems. Coolant problems affect both heating and compressor cooling. This makes diagnosis complex.
Common coolant-related issues include:
- Low coolant levels affecting heating performance
- Blocked coolant passages reducing efficiency
- Failed water pump impacting system circulation
- Thermostat problems causing temperature regulation issues
Check coolant levels in both the engine and inverter reservoirs. The system uses specific coolant types that shouldn’t be mixed. Always use Toyota-approved coolant to prevent chemical reactions.
Inspect coolant hoses for leaks or deterioration. The heating system relies on hot coolant flow through the heater core. Restricted flow causes poor heating performance, noticeable in cold weather.
Complete AC System Troubleshooting Guide
Systematic air conditioning repair requires following proper diagnostic sequences. This approach prevents unnecessary part replacement and ensures accurate problem identification.
Begin with basic system checks before moving to complex diagnostics. Visual inspection often reveals obvious problems like damaged components or loose connections. Document your findings to track repair progress.
The troubleshooting process involves several key steps:
- Verify customer complaints and symptoms
- Perform visual inspection of all components
- Check refrigerant levels and system pressures
- Test electrical connections and voltage supply
- Evaluate component operation under different conditions
Refrigerant Level Checks
Proper refrigerant levels are key for hybrid HVAC system operation. The electric compressor’s unique operating characteristics require specific checking procedures. Traditional methods may not provide accurate readings.
Use manifold gauges designed for hybrid vehicles. Connect to the service ports while the system operates. The electric compressor doesn’t cycle like conventional systems, providing steady pressure readings.
Check these pressure specifications:
| System Condition | Low Side Pressure | High Side Pressure |
|---|---|---|
| Normal Operation | 25-35 PSI | 200-250 PSI |
| Low Refrigerant | Below 20 PSI | Below 180 PSI |
| Overcharged System | Above 40 PSI | Above 280 PSI |
Older Prius models use R-134a refrigerant, while newer ones use R-1234yf. Never mix refrigerant types as this causes system damage. Check your vehicle’s specifications before adding refrigerant.
Component Testing Procedures
Individual component testing isolates specific electric compressor issues and other system problems. Each component requires different testing methods and specifications.
Test the cabin air filter first. A clogged filter reduces airflow and system efficiency. Replace filters showing dirt, debris, or odor contamination. This simple step often improves performance significantly.
Check temperature sensors throughout the system. The hybrid HVAC system uses multiple sensors for optimal operation. Faulty sensors cause poor temperature control and reduced efficiency.
Pressure switches protect the compressor from damage. Test switch operation at specified pressure points. Failed switches can prevent compressor operation or allow dangerous pressure conditions.
Electrical connections require careful inspection. Corrosion, loose connections, or damaged wiring cause intermittent problems. Clean connections with appropriate solvents and apply dielectric grease for protection.
The evaporator and condenser need visual inspection for damage or blockages. Bent fins reduce heat transfer efficiency. Use fin combs to straighten damaged areas and improve airflow.
Regular maintenance prevents most Prius AC problems. Replace cabin filters annually, check refrigerant levels seasonally, and inspect electrical connections during routine service. These simple steps extend system life and maintain optimal performance.
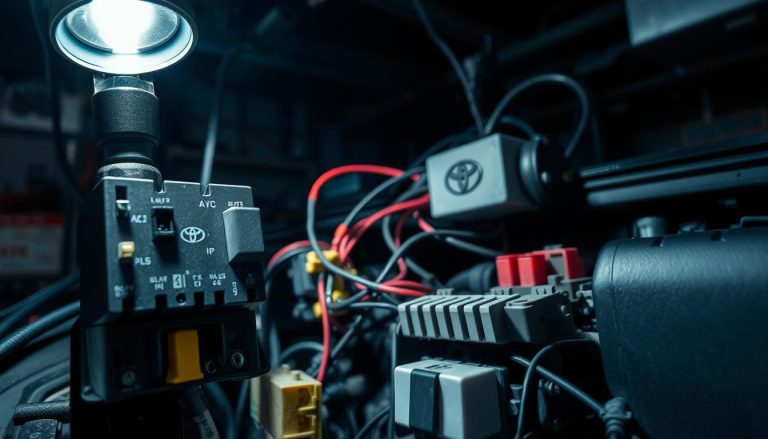
Repairing Electrical System Problems
Modern Prius vehicles have complex electrical systems. These Prius electrical problems need special knowledge and tools to fix. The mix of high-voltage hybrid parts with 12V systems makes fixing issues tricky.
Toyota service centers use Toyota’s Technical Information Service (TIS) and Toyota Techstream tools. These tools help diagnose and reprogram systems accurately. They offer features that generic scanners can’t.

Diagnosing Computer Module Failures
Computer module failures are complex Prius electrical problems. Prius vehicles have many Electronic Control Units (ECUs). Each ECU must talk to others for the car to work right.
ECU failures show up as warning lights or lost functions. You might see the hybrid system fail, accessories not work, or error messages. These signs mean there’s a problem with how modules talk to each other or with ECU parts.
Start by using a scan tool to get trouble codes. Look for U-codes for network faults. Many codes point to a big problem or wiring issue.
Check each module’s power and ground connections. Most need 12V power and several ground paths. Use a multimeter to check these basics before thinking of module failure.
Fixing Wiring Harness Issues
Wiring harness problems are common in Prius vehicles. They can come from age, heat, rodents, or defects. Wiring harness issues can cause hard-to-find problems.
Visual Inspection Techniques
Start by looking for damage on harness sections. Check for cracked insulation, corroded connections, and loose terminals. Look closely where harnesses are near heat sources.
Make sure connectors fit well and lock in place. Many problems come from connectors that look connected but aren’t. Wiggle connectors while checking system operation to find loose ones.
Look at ground connections too. Prius uses many for different systems. Clean and tighten corroded connections to avoid voltage drops.
Continuity Testing Methods
Continuity testing needs careful steps to avoid damage. Always disconnect the battery and modules first. Use a digital multimeter to avoid current damage.
Measure resistance on wire circuits. Compare to specs to find high-resistance spots. Some circuits have resistors that change normal values.
Do voltage drop tests on power and ground circuits. High drops mean bad connections or too small wires. This test finds problems not seen in simple checks.
ECU Reset and Reprogramming Steps
Resetting ECUs varies by module and problem. Simple resets might just need a battery disconnect. This clears faults and lets modules start fresh.
Some resets need scan tool commands. Use your tool’s special functions menu. Follow the manufacturer’s steps carefully to avoid more problems or warranty loss.
Computer module repair often means updating software. This needs dealer tools and Toyota’s database. Wrong reprogramming can damage expensive parts.
Write down all your diagnostic steps and results before fixing anything. Electrical parts can’t be returned once installed. Accurate diagnosis is key for cost-effective fixes. If you can’t diagnose or need special tools, get professional help.
Keep records of any electrical work for future use. These records help technicians understand past work and prevent duplicate efforts.
Solving Engine Oil Consumption Issues
Many Prius owners find their cars burn oil at a high rate. Sometimes, they use a whole quart every 1,000 miles. This Prius oil consumption issue affects certain model years, causing financial and environmental worries. Knowing how to measure, diagnose, and fix these problems helps you manage this issue.
The 2007, 2008, 2010, and 2011 Prius models have the highest oil consumption rates. These problems often start after 100,000 miles but can appear sooner. Fortunately, there are several effective solutions to reduce or stop this issue.

Measuring Oil Consumption Rates
Accurate measurement is key to solving Prius oil consumption problems. You need to track your oil consumption over several oil changes. Start by recording your odometer reading and oil level right after each oil change.
Check your oil level weekly with the dipstick. Note the mileage and oil added each time. Normal consumption should be less than one quart per 5,000 to 10,000 miles.
Keep a simple log with these details:
- Date of oil change and mileage
- Oil brand and viscosity used
- Miles driven between checks
- Amount of oil added during top-offs
- Any visible smoke or unusual engine sounds
Calculate your consumption rate by dividing total oil used by miles driven. If you’re burning more than one quart per 3,000 miles, you have excessive oil burning that needs attention.
Diagnosing Piston Ring Problems
Worn piston rings are the main cause of high oil consumption in affected Prius models. These rings seal the combustion chamber and prevent oil from entering the cylinders. When they wear out, oil burns along with the fuel mixture.
Look for these key symptoms of piston ring problems:
- Blue or gray smoke from the exhaust, specially during startup
- Increased smoke during acceleration or under load
- Oil fouling on spark plugs
- Reduced engine power and efficiency
Professional diagnostic tests can confirm ring wear. A compression test measures cylinder pressure, while a leak-down test shows where compression escapes. Low compression combined with high leak-down rates through the crankcase indicates worn rings.
You can perform a simple visual check by removing the oil filler cap while the engine runs. Excessive vapor or pulsing indicates blow-by from worn rings. But, professional testing gives the most accurate diagnosis.
Repair Solutions and Prevention Methods
Several repair approaches can address engine oil issues depending on the severity of ring wear. The timing cover gasket replacement often fixes oil consumption problems in 2011 Prius models. This repair addresses oil leaks into the timing chain area that can contribute to consumption issues.
For minor ring wear, high-mileage motor oils with seal conditioners can reduce consumption temporarily. These oils contain additives that help swell seals and reduce internal leakage. Switch to a high-quality 0W-20 or 5W-30 high-mileage oil for best results.
Severe ring wear requires engine rebuilding or replacement. This major repair involves removing the engine, disassembling it, and installing new rings, gaskets, and seals. Professional installation ensures proper torque specifications and timing alignment.
Engine Treatment Options
Several engine treatments can help reduce Prius oil consumption as temporary measures. Oil consumption additives work by thickening the oil slightly and helping seals perform better. Popular options include Lucas Oil Stop Leak and Bar’s Leaks Engine Repair.
Add these treatments at oil change time for maximum effectiveness. Follow package directions carefully, as too much additive can cause other problems. Results vary depending on the extent of wear, but many owners report 30-50% reduction in oil consumption.
Engine flushes can remove carbon deposits that contribute to ring sticking. Use a high-quality flush product before oil changes, but avoid harsh solvents that might damage seals. Gentle cleaning helps rings move freely in their grooves.
Maintenance Schedule Adjustments
Preventing future excessive oil burning requires adjusting your maintenance schedule. Reduce oil change intervals from Toyota’s recommended 10,000 miles to 5,000 miles or less. Frequent changes keep oil clean and reduce the formation of deposits that cause ring problems.
Monitor your cooling system closely, as overheating accelerates oil breakdown and ring wear. Replace coolant every 60,000 miles and fix any cooling system leaks immediately. Proper engine temperature helps oil maintain its protective properties.
Consider these preventive maintenance steps:
- Use high-quality synthetic or high-mileage oils
- Replace air filters regularly to prevent dirt ingestion
- Fix PCV system problems that affect crankcase pressure
- Address any engine codes or warning lights promptly
- Avoid extended idling that can cause carbon buildup
Regular oil analysis can detect developing problems before they become severe. Send oil samples to a laboratory every few changes to monitor wear metals and contamination levels. This proactive approach helps you catch piston ring problems early when they’re easier and cheaper to fix.
Fixing Transmission and CVT Problems
Toyota Prius CVT issues can be costly to fix, but most Prius transmission problems can be prevented. Your Prius has an electronic continuously variable transmission (eCVT). It uses planetary gears and electric motors for smooth power without traditional gear shifts.
The eCVT system needs clean fluid and precise pressure control. Quick action can prevent expensive transmission replacements.
Identifying CVT Failure Symptoms
Early warning signs can help prevent major repairs. Your Prius will give you clues before it fails completely.
Listen for unusual noises during acceleration. Whining or grinding sounds often mean internal wear or contaminated fluid.
Watch for jerky or hesitant acceleration. The eCVT should deliver smooth power without sudden jolts.
Monitor your dashboard for warning lights. These lights often appear before you notice driving symptoms.
Sudden loss of power or feeling like the Prius is “slipping” during acceleration is a sign of internal damage. This requires immediate attention.

Performing CVT Fluid Service
Regular transmission fluid service prevents most eCVT problems. Mechanics recommend fluid changes every 30,000 miles, even if Toyota says longer.
The eCVT system needs Toyota-specified fluid. Never use conventional automatic transmission fluid, as it lacks the specific properties needed for hybrid transmission components.
Fluid Replacement Procedure
Start by warming your Prius to normal operating temperature. Warm fluid drains more completely and provides better contamination removal.
Locate the transmission drain plug underneath your vehicle. Some Prius models require removing the transmission pan instead of using a drain plug.
Remove the drain plug carefully and allow the old fluid to drain completely into a suitable container. Inspect the drained fluid for metal particles or unusual discoloration.
Clean the drain plug and install a new crush washer before reinstalling. Tighten the plug to Toyota’s specified torque to prevent leaks.
Add the correct amount of new Toyota CVT fluid through the fill port. Check your owner’s manual for the exact fluid capacity and filling procedure.
Filter Replacement Steps
Not all Prius models have serviceable transmission filters, but those that do require filter replacement during fluid service. The filter traps debris and contaminants that could damage internal components.
Remove the transmission pan bolts in a crisscross pattern to prevent warping. Lower the pan carefully to avoid spilling remaining fluid.
Locate the internal filter and remove it according to your service manual procedures. Some filters twist off while others require bolt removal.
Install the new filter with a light coating of fresh CVT fluid on the sealing surfaces. Avoid over-tightening, which can damage the filter housing.
Clean the transmission pan thoroughly and install it with a new gasket. Torque the pan bolts to specification in the proper sequence.
Repair vs Replacement Decision Guide
Determining whether to repair or replace your eCVT depends on several factors. These include damage extent, vehicle age, and repair costs. Use this decision matrix to evaluate your options:
| Problem Type | Repair Cost Range | Success Rate | Recommended Action |
|---|---|---|---|
| Contaminated fluid only | $200-400 | 95% | Fluid service and filter replacement |
| Minor internal wear | $800-1,500 | 80% | Rebuild with new seals and gaskets |
| Planetary gear damage | $2,000-3,000 | 60% | Consider replacement if vehicle value supports cost |
| Multiple system failures | $3,000-5,000 | 40% | Replacement recommended for reliability |
Consider your vehicle’s overall condition when making repair decisions. A high-mileage Prius with multiple problems may not justify expensive eCVT repair costs.
Factor in labor costs, which can double the total repair expense. Some transmission work requires special tools and hybrid system knowledge that increase shop rates.
Evaluate warranty coverage on repairs versus replacements. New transmissions typically include longer warranties than rebuilt units or individual component repairs.
Remember that proper transmission fluid service every 30,000 miles prevents most expensive repairs. This preventive maintenance costs far less than dealing with major Prius transmission problems later.
Repairing Water Pump and Cooling System Failures
Water pump failures in your Prius can lead to expensive engine damage if not fixed quickly. The Prius has a complex cooling system, with separate circuits for the engine and hybrid parts. This makes Prius water pump problems more serious and costly to fix.
Your Prius has two cooling circuits. The main circuit cools the engine with a mechanical water pump. The secondary circuit uses an electric pump to cool hybrid parts like the inverter and motor generators.
Toyota suggests replacing coolant every 100,000 to 150,000 miles with super long life coolant. This is a big improvement over older coolants that needed to be replaced every 30,000 miles.
Diagnosing Water Pump Problems
Spotting water pump issues early can prevent expensive engine overheating damage. There are several signs to watch for in your Prius.
Look for coolant leaks around the water pump housing, which is behind the timing cover. Fresh coolant is bright green or pink, while old coolant may look rusty or dirty.
Listen for strange noises from the engine bay. A failing water pump might make grinding, squealing, or rattling sounds. These sounds often get louder when the engine is cold and may get softer as it warms up.
Keep an eye on your temperature gauge. Slowly rising temperatures or frequent overheating could mean pump problems. The Prius dashboard will show warning messages if coolant temperatures get too high.
Regularly check coolant levels. If coolant levels stay low even after topping off, it could mean leaks. Coolant leaks from the water pump start small but can get worse fast.
Cooling System Pressure Testing
Pressure testing can find internal pump seal failures before you see leaks outside. This test helps catch problems early.
To do a pressure test, you need special equipment and safety steps. Always test on a cold engine to avoid burns from hot coolant or steam.
Here’s how to do a pressure test:
- Remove the radiator cap and attach the pressure tester adapter
- Pump the system to 15-16 PSI (normal operating pressure)
- Watch the pressure for 10-15 minutes
- Record any pressure loss over time
- Look for external leaks while the system is pressurized
Pressure loss over 2 PSI in 10 minutes means internal seal failure. You’ll see coolant dripping from engine parts if there are external leaks.
Internal leaks might not show outside but will cause pressure loss. These failures can lead to coolant contamination in the engine oil or combustion chambers.
Complete Water Pump Replacement
Replacing the water pump requires taking apart the engine and paying attention to timing marks. This cooling system repair usually takes 4-6 hours for skilled technicians.
Before starting, gather the right tools and parts. You’ll need a complete gasket set, new coolant, a timing belt (if needed), and various specialty tools for your model year.
Removal Procedures
Start by draining the cooling system completely. Remove the engine cover and disconnect the negative battery terminal for safety.
Remove these parts in order:
- Engine cooling fan and shroud assembly
- Drive belts and pulleys
- Timing belt cover (mark timing positions first)
- Timing belt (if replacement interval is due)
- Water pump pulley and mounting bolts
Mark the timing belt position with paint or a permanent marker before removing it. Incorrect timing can damage the engine in interference engines.
Clean all surfaces well. Remove old gasket material and apply a thin layer of sealant to prevent coolant leaks.
Installation and Bleeding Steps
Install the new water pump using the right torque. Tighten bolts in a crisscross pattern for even pressure.
Put back components in reverse order, paying attention to timing marks. Double-check belt tension and pulley alignment before finishing.
System bleeding removes air pockets that cause overheating. The Prius needs specific bleeding procedures for both cooling circuits.
Follow this bleeding sequence:
- Fill the radiator with the right coolant mixture (50/50 ratio)
- Run the engine with the radiator cap off until the thermostat opens
- Add coolant as air bubbles come out
- Put the radiator cap back on and run the engine through several heat cycles
- Check for leaks and proper temperature operation
Watch coolant levels for a few days after finishing. You might need to add more coolant due to settling.
Only use Toyota-specified super long life coolant mixed correctly. The wrong coolant can damage seals and shorten pump life.
Improving Fuel System Performance
Fuel system problems can hurt your Prius’s fuel economy a lot. The hybrid’s fuel system works well with the electric motor for great efficiency. But, if parts get dirty or break, your car’s fuel economy drops a lot.
Your Prius has advanced fuel systems controlled by computers. Even small fuel system problems can make fuel efficiency drop a lot. So, it’s key to diagnose and maintain your car well.

Diagnosing Poor Fuel Economy Issues
First, know what your Prius usually does. Most owners notice a drop in fuel economy when it goes from 50+ mpg to 40 mpg or less.
Start by checking fuel trim values with an OBD-II scanner. These values show how the engine computer adjusts fuel. Big changes in fuel trim readings mean there’s a problem.
Common signs of fuel issues include:
- Lower miles per gallon than usual
- Rough idle or hard acceleration
- Check engine light on
- Strong fuel smell from the exhaust
Carbon buildup in the intake system often causes these problems. The Prius’s engine runs cooler, which can lead to more carbon buildup over time.
Cleaning Fuel Injectors
Cleaning fuel injectors is a great way to fix fuel economy problems. Dirty injectors mess up the fuel spray needed for good combustion in your hybrid engine.
Signs you need to clean your fuel injectors include poor acceleration, engine misfires, and lower fuel economy. Regular cleaning can improve fuel efficiency by up to 10% in many cases.
“Clean fuel injectors are key for the Prius’s efficiency. Even a little dirt can hurt performance a lot.”
Chemical Cleaning Methods
Chemical fuel injector cleaning is a good first step to fix fuel issues. Good fuel system cleaners dissolve carbon and varnish buildup over time.
To use, add the cleaner to your fuel tank. Results show up after two to three tank fills as the cleaner goes through the system.
Using top-tier gasoline helps prevent deposits. But, fuel system cleaners give a deeper clean for really dirty systems.
Choose cleaners made for hybrids when you can. They’re made for the Prius’s special engine.
Professional Cleaning Services
Professional fuel injector cleaning gets better results than chemicals alone. They use special tools to clean injectors well.
They take out the injectors for a deep clean. This gets rid of tough deposits that chemicals can’t.
Professional cleaning costs more but lasts longer. They also check if the injectors work right after cleaning.
Think about professional cleaning if chemicals don’t work or if tests show big injector problems.
Fuel System Maintenance Schedule
Regular maintenance is cheaper than fixing problems later. A good schedule helps avoid most fuel issues before they happen.
Change your fuel filter every 60,000 to 100,000 miles. City driving and bad fuel quality make filters dirty faster.
| Maintenance Item | Interval | Purpose | Cost Range |
|---|---|---|---|
| Fuel Filter Replacement | 60,000-100,000 miles | Prevent contamination | $150-$300 |
| Fuel System Cleaner | Every 10,000 miles | Remove deposits | $15-$30 |
| Professional Injector Cleaning | Every 100,000 miles | Restore flow patterns | $300-$600 |
| Fuel Quality Monitoring | Ongoing | Prevent problems | Minimal cost |
Use high-quality fuel additives or high-octane gas to stop carbon buildup. Premium fuel has extra detergents for better performance over time.
Keep an eye on your fuel economy to catch problems early. Most Prius owners can spot fuel issues by tracking their car’s performance.
Fixing fuel system problems quickly stops them from getting worse. Regular maintenance keeps your Prius fuel-efficient for years.
Implementing Preventive Maintenance Strategies
Using preventive maintenance keeps your Prius running well for years. Hybrid cars need special care because of their complex systems. A good maintenance plan avoids expensive repairs and keeps fuel costs low.
Understanding that hybrid cars need special care is key. Regular checks protect your investment and keep the car running efficiently. Smart maintenance decisions today prevent costly breakdowns tomorrow.
Essential Maintenance Timeline
Your Prius maintenance schedule should go beyond Toyota’s minimum. Toyota’s intervals are good, but real-world driving needs more frequent checks.
Here’s a better maintenance plan:
- Every 5,000 miles: Oil and filter changes (not Toyota’s 10,000-mile recommendation)
- Every 15,000 miles: Cabin air filter replacement and tire rotation
- Every 30,000 miles: Brake fluid service and transmission fluid change
- Every 60,000-90,000 miles: Coolant system service and major inspection
- Annually after 100,000 miles: Hybrid battery health assessment
Experts suggest this schedule for stop-and-go traffic, extreme temperatures, and hybrid vehicle service. It catches issues before they cost a lot.
Keep a detailed log of all maintenance. This helps spot patterns and ensures you don’t miss important checks. Consistent record-keeping also maintains warranty coverage and improves resale value.
DIY Maintenance Procedures
Many DIY maintenance tasks save money and keep you connected to your car. These tasks need basic tools and can be done safely at home.
Start with these easy tasks:
- Visual inspection of belts and hoses for cracks or wear
- Checking tire pressure and tread depth monthly
- Cleaning battery terminals to prevent corrosion
- Inspecting exterior lights and replacing burned-out bulbs
- Monitoring fluid levels during regular checks
Fluid Checks and Changes
Regular fluid checks protect your Prius from damage. Check these fluids monthly to catch problems early and keep your car running well.
Essential fluid checks include:
- Engine oil: Check level and color every month
- Brake fluid: Monitor level and clarity in the reservoir
- Coolant: Inspect both engine and inverter coolant systems
- Transmission fluid: Check level through the dipstick when warm
- Washer fluid: Keep reservoir filled for clear visibility
Oil changes are the most important DIY task. Use the correct viscosity oil as specified in your owner’s manual. Proper disposal of used oil and filters protects the environment and follows local regulations.
Filter Replacements
Clean filters ensure good airflow and protect your car’s components. Replace filters as needed for the best results.
Filter replacement intervals:
- Engine air filter: Every 30,000 miles or when visibly dirty
- Cabin air filter: Every 15,000-20,000 miles for clean interior air
- Fuel filter: As needed based on fuel quality and driving conditions
Dirty filters reduce efficiency and can damage expensive parts. Engine air filters are key for fuel economy. Cabin air filters affect air quality and HVAC system performance.
Professional Service Requirements
Certain tasks need professional expertise and special equipment. Hybrid vehicle service involves high-voltage systems that require proper training and safety.
Always use qualified technicians for these critical services:
- Hybrid system diagnostics using manufacturer-specific scanners
- High-voltage component inspection and testing procedures
- Hybrid battery service and reconditioning work
- Inverter system maintenance and coolant pump service
- Complex electrical repairs involving computer modules
Professional technicians have access to Toyota’s technical service bulletins and recall information. They understand the unique safety requirements for working on hybrid systems. Attempting these repairs without proper training can result in serious injury or expensive damage.
Choose service facilities that specialize in hybrid vehicles and have certified technicians. Ask about their experience with Prius models and whether they use genuine Toyota parts for critical repairs.
Regular professional inspections complement your DIY maintenance efforts. Schedule annual inspections to find issues before they become major problems. This proactive approach keeps your vehicle reliable and preserves its excellent fuel economy for years to come.
Determining When Professional Help Is Needed
Many Prius repairs can be done at home. But, some complex issues need the help of hybrid specialists. Knowing when to ask for help keeps you safe and avoids expensive mistakes. Hybrid vehicles have high-voltage systems that need special knowledge.
Deciding to get professional Prius repair services depends on safety and complexity. Some problems need special training and tools to fix.
Recognizing Complex Problem Signs
Some warning signs mean your Prius needs professional help right away. High-voltage system warnings on your dashboard are a big red flag. These lights mean there could be serious electrical issues.
Engine overheating with hybrid system warnings is a big challenge. If many systems fail at once, it’s a sign of a bigger problem. Only pros can find the root cause with the right tools.
Brake issues in hybrids involve both traditional and regenerative systems. This makes it critical to get a professional diagnosis for safety. Transmission problems in CVT-equipped Prius models also need special knowledge.
Electrical problems that affect many systems at once point to computer module failures. These need advanced diagnostic tools and Toyota technician training to fix right.
Finding Qualified Hybrid Specialists
Not all auto repair shops can handle hybrid vehicles. You need to find hybrid specialists by doing research. Look for shops that advertise hybrid and electric vehicle services.
Ask about technician qualifications and equipment. Good shops have hybrid-trained technicians and the right tools. They also keep up with Toyota’s technical services.
Certification Requirements
ASE certification is key for hybrid technicians. The ASE L3 certification covers hybrid vehicle specialist skills. It shows they know how to safely work with high-voltage systems.
Toyota’s training programs give extra skills. These programs teach the latest in Prius repair. They cover each Prius model’s specific needs.
Technicians need to keep learning. Hybrid tech is always changing. Look for shops that keep their staff up-to-date.
Cost Estimation Guidelines
Fixing a Prius costs more than fixing a regular car. This is because of the special tools and training needed. Labor costs at hybrid shops are also higher.
Diagnosing hybrid systems takes time. It involves many tests and special tools. Hybrid parts are also pricier than regular car parts.
| Repair Type | Conventional Cost | Hybrid Cost | Time Required |
|---|---|---|---|
| Brake System Repair | $300-600 | $450-900 | 3-6 hours |
| Battery Replacement | $150-300 | $3000-4500 | 2-4 hours |
| Cooling System Repair | $400-800 | $600-1200 | 4-8 hours |
| Electrical Diagnosis | $100-200 | $150-400 | 1-3 hours |
Warranty Considerations
Warranty protection is important for Prius owners. Wrong repairs can void warranties. Many hybrid parts have extended warranties.
Toyota’s hybrid system warranty covers major parts for 8 years or 100,000 miles. Some states offer more protection. Always check warranty status before big repairs.
Professional repair records help keep warranties valid. Qualified shops provide detailed records. DIY repairs might make warranty claims harder.
Consumer laws protect against repeated failures. These laws help if your car can’t be fixed after many tries. Professional records are key for these claims.
When you need professional Prius repair, ask for written estimates. Understand warranty terms. Make sure the shop knows your Prius model for the best results.
Conclusion
The Toyota Prius is a top choice for hybrid car owners. It has been on the road for over 20 years, with some models reaching 350,000 miles or more. RepairPal rates the Prius a solid 4.0 out of 5.0 for reliability, ranking it 10th among 24 midsize cars.
Keeping your Prius reliable starts with regular maintenance. Toyota’s service helps your hybrid stay in top shape. Catching small issues early can save you from big repairs and keep your wallet happy.
Understanding your Prius’s needs is key to long-term success. Its electric motor, battery, and gas engine work differently than regular cars. Knowing these differences helps you make smart choices about repairs and service.
Finding a skilled mechanic is also important. Look for shops that specialize in hybrid systems. They have the right tools and knowledge to fix problems right the first time.
Your Prius can provide years of reliable, efficient driving. The hybrid technology has proven itself in millions of vehicles. With the right care and attention to warning signs, your Prius will save you money and help the environment.
FAQ
What are the most common Toyota Prius problems across all generations?
Common Toyota Prius problems include hybrid battery wear, 12V battery failure, and inverter coolant pump issues. Head gasket problems, brake malfunctions, and excessive oil use are also common. Early models face more battery issues, while 2010-2014 models often have EGR valve problems leading to head gasket failures. Newer models are more reliable but need regular hybrid system checks and 12V battery replacements.
How do I know if my Prius hybrid battery is failing?
Signs of a failing hybrid battery include poor fuel economy and frequent engine cycling. You might see the red triangle warning light and notice sluggish acceleration. The engine might run more often, even in the city. A professional can check cell voltages to diagnose the issue.
Why does my Prius 12V battery keep dying?
The 12V battery in a Prius powers the hybrid system and is key for starting the car. It can fail due to age, extreme temperatures, or electrical draws. Unlike regular cars, a Prius won’t start if the 12V battery fails, even if the hybrid battery is fine.
What is the red triangle warning light on my Prius dashboard?
The red triangle light means there’s a problem with the hybrid system. It could be with the battery, inverter, or electric motors. You should get it checked right away with a Toyota Techstream scanner to find the exact issue.
How much does it cost to replace a Prius hybrid battery?
Replacing a Prius hybrid battery can cost between
FAQ
What are the most common Toyota Prius problems across all generations?
Common Toyota Prius problems include hybrid battery wear, 12V battery failure, and inverter coolant pump issues. Head gasket problems, brake malfunctions, and excessive oil use are also common. Early models face more battery issues, while 2010-2014 models often have EGR valve problems leading to head gasket failures. Newer models are more reliable but need regular hybrid system checks and 12V battery replacements.
How do I know if my Prius hybrid battery is failing?
Signs of a failing hybrid battery include poor fuel economy and frequent engine cycling. You might see the red triangle warning light and notice sluggish acceleration. The engine might run more often, even in the city. A professional can check cell voltages to diagnose the issue.
Why does my Prius 12V battery keep dying?
The 12V battery in a Prius powers the hybrid system and is key for starting the car. It can fail due to age, extreme temperatures, or electrical draws. Unlike regular cars, a Prius won’t start if the 12V battery fails, even if the hybrid battery is fine.
What is the red triangle warning light on my Prius dashboard?
The red triangle light means there’s a problem with the hybrid system. It could be with the battery, inverter, or electric motors. You should get it checked right away with a Toyota Techstream scanner to find the exact issue.
How much does it cost to replace a Prius hybrid battery?
Replacing a Prius hybrid battery can cost between $1,500 and $6,000. The price depends on the vehicle’s age, mileage, and condition. Many choose to replace only failed modules for a cheaper option.
Can I drive my Prius with a failing hybrid battery?
You can drive a Prius with a failing hybrid battery, but it will use more gas. If the battery fails completely and shows the red triangle light, the car might not move well or at all. It’s best to fix battery issues quickly to avoid being stuck.
What causes head gasket problems in 2010-2014 Prius models?
Head gasket issues in 2010-2014 Prius models often come from clogged EGR valves. Carbon buildup blocks these valves, causing high pressures that damage the head gasket. Keeping the EGR valve clean or replacing it regularly can help prevent this.
How often should I change the oil in my Prius?
Experts say to change the oil in your Prius every 5,000 miles, not every 10,000 miles as Toyota suggests. This helps avoid oil consumption problems and keeps the engine running well. Use high-quality oil that matches your Prius’s needs.
What tools do I need for DIY Prius repairs?
For DIY Prius repairs, you’ll need high-voltage safety gear and digital multimeters that can measure up to 400V. You’ll also need diagnostic scanners for Toyota’s hybrid systems and insulated tools for high-voltage work. Basic hand tools are also necessary.
Why is my Prius air conditioning not working properly?
Prius AC problems often stem from the electric compressor, which runs off the hybrid battery. Issues include compressor failure, refrigerant leaks, electrical problems, or clogged air filters. Specialized diagnostic tools are needed for these high-voltage components.
How do I test my Prius brake system?
Testing the Prius brake system involves scanning for codes, checking brake fluid, and using Toyota’s Techstream scanner. This system combines traditional brakes with regenerative braking. Professional help is often needed due to the system’s complexity.
What is the inverter coolant pump and why does it fail?
The inverter coolant pump keeps the hybrid system cool. It’s electric and runs independently of the engine’s cooling system. Failure can cause overheating, reduced performance, and unusual noises. Replacing it costs $200-400.
How can I improve my Prius fuel economy?
To keep your Prius fuel-efficient, maintain it well. This includes cleaning fuel injectors, replacing air filters, and keeping tires at the right pressure. Address any engine or hybrid system problems quickly. Use top-quality gasoline and replace cabin air filters regularly.
When should I seek professional help for Prius repairs?
Get professional help for high-voltage system warnings, hybrid battery issues, brake problems, engine overheating, and electrical issues. Look for ASE L3 certified technicians with Toyota training and access to Toyota Techstream diagnostic tools.
What maintenance schedule should I follow for my Prius?
Follow a detailed maintenance schedule: oil changes every 5,000 miles, brake fluid every 30,000 miles, and transmission fluid every 30,000 miles. Also, service the coolant system every 60,000-90,000 miles and check the hybrid battery annually after 100,000 miles. This schedule helps avoid costly repairs.
Are Prius vehicles reliable long-term?
Yes, the Toyota Prius is reliable, with a 4.0 out of 5.0 rating from RepairPal. With proper care, it can last over 350,000 miles. Regular maintenance and early problem detection can prevent expensive repairs. The hybrid technology has proven durable over millions of miles.
,500 and ,000. The price depends on the vehicle’s age, mileage, and condition. Many choose to replace only failed modules for a cheaper option.
Can I drive my Prius with a failing hybrid battery?
You can drive a Prius with a failing hybrid battery, but it will use more gas. If the battery fails completely and shows the red triangle light, the car might not move well or at all. It’s best to fix battery issues quickly to avoid being stuck.
What causes head gasket problems in 2010-2014 Prius models?
Head gasket issues in 2010-2014 Prius models often come from clogged EGR valves. Carbon buildup blocks these valves, causing high pressures that damage the head gasket. Keeping the EGR valve clean or replacing it regularly can help prevent this.
How often should I change the oil in my Prius?
Experts say to change the oil in your Prius every 5,000 miles, not every 10,000 miles as Toyota suggests. This helps avoid oil consumption problems and keeps the engine running well. Use high-quality oil that matches your Prius’s needs.
What tools do I need for DIY Prius repairs?
For DIY Prius repairs, you’ll need high-voltage safety gear and digital multimeters that can measure up to 400V. You’ll also need diagnostic scanners for Toyota’s hybrid systems and insulated tools for high-voltage work. Basic hand tools are also necessary.
Why is my Prius air conditioning not working properly?
Prius AC problems often stem from the electric compressor, which runs off the hybrid battery. Issues include compressor failure, refrigerant leaks, electrical problems, or clogged air filters. Specialized diagnostic tools are needed for these high-voltage components.
How do I test my Prius brake system?
Testing the Prius brake system involves scanning for codes, checking brake fluid, and using Toyota’s Techstream scanner. This system combines traditional brakes with regenerative braking. Professional help is often needed due to the system’s complexity.
What is the inverter coolant pump and why does it fail?
The inverter coolant pump keeps the hybrid system cool. It’s electric and runs independently of the engine’s cooling system. Failure can cause overheating, reduced performance, and unusual noises. Replacing it costs 0-400.
How can I improve my Prius fuel economy?
To keep your Prius fuel-efficient, maintain it well. This includes cleaning fuel injectors, replacing air filters, and keeping tires at the right pressure. Address any engine or hybrid system problems quickly. Use top-quality gasoline and replace cabin air filters regularly.
When should I seek professional help for Prius repairs?
Get professional help for high-voltage system warnings, hybrid battery issues, brake problems, engine overheating, and electrical issues. Look for ASE L3 certified technicians with Toyota training and access to Toyota Techstream diagnostic tools.
What maintenance schedule should I follow for my Prius?
Follow a detailed maintenance schedule: oil changes every 5,000 miles, brake fluid every 30,000 miles, and transmission fluid every 30,000 miles. Also, service the coolant system every 60,000-90,000 miles and check the hybrid battery annually after 100,000 miles. This schedule helps avoid costly repairs.
Are Prius vehicles reliable long-term?
Yes, the Toyota Prius is reliable, with a 4.0 out of 5.0 rating from RepairPal. With proper care, it can last over 350,000 miles. Regular maintenance and early problem detection can prevent expensive repairs. The hybrid technology has proven durable over millions of miles.