Most Common Toyota Corolla Problems You Should Know
The Toyota Corolla is a huge success in car history. It first came out in 1966 and became the top-selling car by 1974. By 2021, it had sold over 50 million units, known for its reliability across many generations.
Even the most reliable cars can face common issues over time. Knowing about these Toyota Corolla problems helps owners and buyers make smart choices.
Some common problems include oil issues and sensor malfunctions. Recent recalls for fuel pumps, roof parts, and airbags show why it’s key to stay updated on reliability issues.
Spotting these Corolla maintenance issues early can save you money and hassle. Whether it’s jerky acceleration, vibrations, or oil leaks, knowing the signs helps fix problems before they get expensive.
Key Takeaways
- The Corolla’s 55-year history includes over 50 million vehicles sold worldwide, making it statistically reliable
- Oil-related issues like leaks and excessive consumption are among the most frequently reported concerns
- Sensor problems, particular with the Mass Air Flow (MAF) sensor, can cause performance issues
- Recent safety recalls affect fuel pumps, roof components, and airbag systems in newer models
- Early problem detection through regular maintenance helps preserve the vehicle’s renowned reliability
- Understanding common issues helps both current owners and future buyers make informed decisions
How to Identify Toyota Corolla Problems Early
Your Toyota Corolla sends out signals when something’s wrong. Early problem detection helps avoid expensive fixes. Regular checks keep your car running well and save money.
Learning to inspect your Corolla takes just a few minutes a week. It’s about knowing what to look for and when to act. Let’s look at the three main ways your Corolla alerts you to issues.
Visual Inspection Checklist
Begin your Corolla inspection tips by checking the fluids under the hood every two weeks. Look for oil leaks on your driveway or parking spot. Dark spots mean engine, transmission, or brake fluid problems.
Check your tires for uneven wear patterns. Excessive wear on one side means alignment issues, while center wear means overinflation. Check tire pressure monthly with a reliable gauge.
Look at belts and hoses for cracks, fraying, or bulging. These parts usually show wear before they fail completely.
Listening for Warning Sounds
Your ears are great for vehicle troubleshooting. Grinding sounds when braking mean worn brake pads that need fixing. Squealing from the engine bay often means belt problems.
Listen for unusual engine noises during startup and idle. Knocking sounds suggest serious engine problems. High-pitched whining from the transmission area may mean low fluid or worn parts.
Any new sounds that weren’t there before need checking. Sudden changes in your Corolla’s sounds are worth investigating.
Monitoring Dashboard Indicators
Toyota Corolla diagnosis is easier with dashboard warning lights. The check engine light is common in 1998-2016 models due to EVAP system issues.
Never ignore the oil pressure light, as it means engine damage. The battery light warns of charging system issues that could leave you stranded.
| Warning Light | Immediate Action | Potential Problem | Urgency Level |
|---|---|---|---|
| Check Engine | Schedule diagnostic scan | Emissions system issue | Moderate |
| Oil Pressure | Stop driving immediately | Low oil or pump failure | Critical |
| Battery | Test charging system | Alternator or battery problem | High |
| Temperature | Pull over safely | Cooling system failure | Critical |
Temperature warning lights need immediate attention to avoid engine damage. Coolant system problems can destroy your engine in minutes of overheating.
Engine Oil Consumption Issues
Understanding Toyota Corolla oil consumption issues can save you thousands in repair costs and prevent engine damage. This problem has affected multiple generations of Corollas, with certain model years experiencing severe cases. The 2000-2002 period alone had 124 complaints from owners dealing with excessive oil use.
Oil consumption problems usually come from bad piston rings. These rings let oil get into the combustion chamber. This makes your engine burn oil and fuel, leading to frequent top-offs and engine damage. The repair costs can be high, averaging $2,500 for most models and up to $4,500 for 2009 Corollas.

Step-by-Step Oil Level Check
Regular oil level checks can help catch Corolla oil problems early. Start by parking on level ground and letting the engine cool for at least 10 minutes after driving.
Follow these steps for accurate readings:
- Remove the dipstick and clean it thoroughly with a rag
- Insert the dipstick fully back into its tube
- Wait 30 seconds, then pull it out again
- Check the oil level against the minimum and maximum marks
- Note the oil color and consistency
Do this check at least once a week if you suspect oil consumption issues. Healthy engines should keep oil levels between changes without needing frequent additions.
Signs of Excessive Oil Burning
Recognizing the warning signs of excessive oil use helps you address problems early. Blue or gray smoke from your exhaust pipe indicates oil burning in the combustion chamber, noticeable during startup or acceleration.
Watch for these additional symptoms:
- Frequent low oil pressure warning lights
- Need to add oil between scheduled changes
- Strong burning oil smell while driving
- Spark plug fouling or misfires
- Reduced fuel economy
Document how much oil you add and when. If you’re adding more than one quart between oil changes, your Corolla likely has significant engine oil issues that need professional attention.
How to Address Oil Consumption Problems
Several approaches can help manage Toyota Corolla oil consumption, from temporary fixes to permanent solutions. Start with the least invasive methods before considering major repairs.
Temporary solutions include switching to high-mileage motor oil or using a slightly thicker viscosity oil. These options can reduce oil seepage through worn seals and rings. But they won’t fix the underlying mechanical problems.
For permanent fixes, consider these options:
- Piston ring replacement (most effective but expensive)
- Engine rebuild or replacement for severe cases
- PCV valve replacement (less expensive first step)
- Valve seal replacement if applicable
The 2009 model year presents unique challenges due to design changes that made repairs more complex and costly. Professional diagnosis becomes critical for these vehicles to avoid unnecessary work.
Keep detailed maintenance records showing oil consumption patterns. This documentation proves valuable if warranty coverage applies or if you need professional repairs. Some Toyota dealerships offer goodwill assistance for known oil consumption problems, mainly on affected model years.
Prevention is your best strategy. Use manufacturer-recommended oil grades, change oil at proper intervals, and address small leaks promptly. Regular maintenance catches developing problems before they become major expenses that could total thousands of dollars in repair costs.
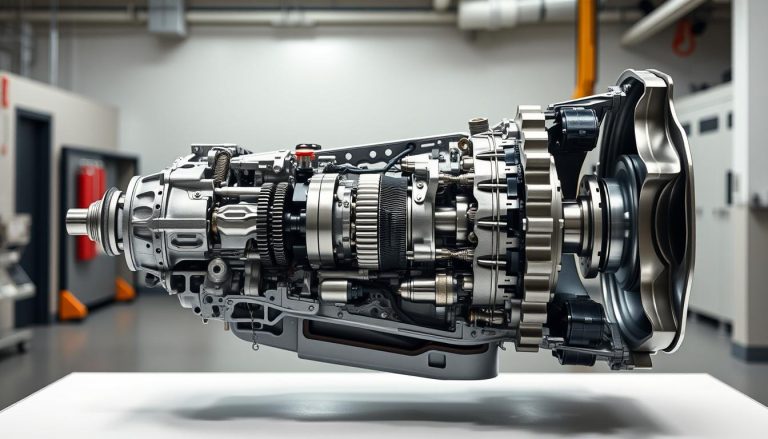
Transmission Failure Warning Signs
Transmission problems can turn your reliable Corolla into a costly repair. The transmission system moves power from the engine to the wheels. It’s a key part of your car.
Spotting issues early can save you from expensive fixes. A full rebuild or replacement can cost over $1,200. The 2003 model year is known for transmission troubles.
Your Corolla might have a manual, automatic, or CVT transmission. Each type shows different signs of trouble. Knowing these signs helps you catch problems early.
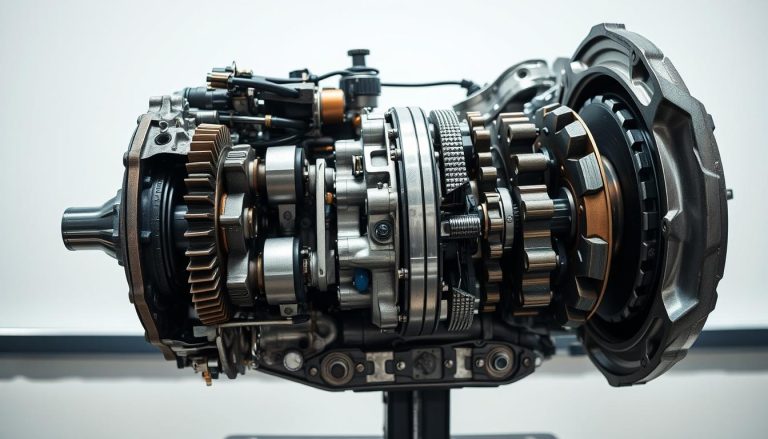
CVT Transmission Problems in 2014+ Models
CVT issues started in 2014 Corolla models. CVT transmissions use a belt and pulley system, unlike traditional automatics. This design offers a smooth drive but has its own failure points.
Common CVT warning signs include:
- Whining or humming noise during acceleration
- Hesitation when accelerating from a stop
- Jerky or shuddering movement at low speeds
- Engine revving without corresponding speed increase
- Unusual vibration through the steering wheel
CVT fluid needs more frequent changes than traditional fluid. Not changing it often enough can wear down internal parts. Many owners face problems around 80,000 to 120,000 miles without regular maintenance.
CVT transmissions also get hot during heavy loads or stop-and-go traffic. A burning smell or fluid leaks under your car mean trouble. Fix these issues fast to avoid Corolla transmission failure.
Manual Transmission Clutch Issues
Manual transmission problems often involve worn-out clutches and hydraulic system failures. The clutch connects and disconnects your engine from the transmission, making smooth gear shifts possible.
Watch for these manual transmission warning signs:
- Clutch pedal feels spongy or sinks to the floor
- Grinding noise when shifting gears
- Difficulty engaging first gear or reverse
- Clutch slipping during acceleration
- Burning smell from the engine bay
Clutch replacement costs between $800 and $1,500, depending on your location and labor rates. Catching hydraulic problems early can save hundreds. Low clutch fluid or a failing master cylinder causes many shifting issues.
The clutch in your Corolla should last 60,000 to 100,000 miles with proper driving. Riding the clutch, aggressive starts, and frequent stop-and-go driving reduce clutch life.
How to Test Transmission Performance
Regular transmission testing can catch problems before they become expensive. These simple tests take just a few minutes and require no special tools.
Start with a basic road test:
- Check transmission fluid level and color when the engine is warm
- Test acceleration from a complete stop
- Monitor shifting patterns at various speeds
- Listen for unusual noises during gear changes
- Feel for vibrations or hesitation during acceleration
Healthy transmission fluid is bright red and smells sweet. Dark, burnt-smelling fluid means internal damage and needs immediate attention. Never ignore fluid leaks or unusual odors from your transmission.
| Transmission Type | Common Problem Years | Typical Repair Cost | Warning Signs |
|---|---|---|---|
| Manual | 2003, 2009 | $800-$1,500 | Clutch slipping, grinding noises |
| Automatic | 2003, 2009 | $1,200-$2,500 | Harsh shifting, fluid leaks |
| CVT | 2014+ | $3,000-$4,500 | Whining noise, hesitation |
| All Types | Various | $200-$500 | Fluid service, minor repairs |
For automatic and CVT transmissions, watch for shift timing and smoothness. Delayed engagement, harsh shifts, or slipping between gears signal problems. Fix these symptoms quickly to prevent complete transmission failure.
Get professional diagnostic testing if you notice any concerning symptoms. Modern scan tools can detect transmission codes before severe problems occur.
Air Conditioning System Troubleshooting
Knowing how your Toyota Corolla’s HVAC system works is key to avoiding expensive fixes. Many Corolla owners face air conditioning issues that make driving uncomfortable and can harm your health. Common problems include compressor failure, refrigerant leaks, and musty odors.
Older Toyota Corollas, like the 2009 models, often have musty and moldy AC system problems. These issues happen when the HVAC system can’t remove water from evaporators properly. This widespread problem led to a lawsuit over health concerns from bad air quality inside the car.

Diagnosing AC Compressor Failure
Your AC compressor is vital for cooling. If it fails, you’ll see signs that need quick action. Warm air blowing from vents is a clear sign of compressor trouble.
Listen for odd noises when you turn on the AC. A failing compressor might make grinding, squealing, or clicking sounds. These sounds mean there’s internal damage that will get worse.
Look for oil leaks around the compressor. AC compressors use oil, and leaks mean seals are failing. You might also see the compressor clutch not working when you turn on the AC.
Test your AC by seeing how well it cools. If it takes a long time to cool or never gets cold enough, the compressor might be failing.
How to Check for Refrigerant Leaks
Refrigerant leaks are common Toyota Corolla AC problems that make cooling less effective. Start by checking all AC lines and connections for oily residue. Refrigerant leaks leave a greasy film.
Look for corrosion signs around AC fittings and connections. Green or white powdery deposits mean refrigerant is leaking. Check the evaporator drain tube under your dashboard too.
Watch how your AC performs over a few days. If cooling gets worse, even when everything seems normal, you might have a slow refrigerant leak. Special equipment can find the exact leak spot.
Check under your car for oily spots. While some water is normal, oily spots mean refrigerant leaks that need a pro to fix.
Steps to Maintain Your AC System
AC system maintenance stops many common problems and keeps parts working longer. Regular care saves money and keeps your car cool all year.
Change your cabin air filter every 12,000 miles or once a year. A clogged filter blocks airflow and makes your system work harder. This simple step can prevent many Corolla HVAC problems.
Run your AC for 10 minutes every month, even in winter. This keeps seals lubricated and stops refrigerant from settling in one place. Regular use keeps system pressure right.
Clean your evaporator drain often to avoid musty odors. Blocked drains cause these smells in many Toyotas. Use compressed air to clear debris from the drain tube.
| Maintenance Task | Frequency | DIY Difficulty | Cost Range |
|---|---|---|---|
| Cabin Filter Replacement | Every 12,000 miles | Easy | $15-$30 |
| System Performance Check | Monthly | Easy | Free |
| Evaporator Cleaning | Annually | Moderate | $50-$100 |
| Refrigerant Level Check | Annually | Professional | $75-$150 |
Get your AC checked by a pro every two years. They can find early problems, check refrigerant levels, and clean parts you can’t reach. This stops small issues from becoming big, expensive repairs.
Keep your condenser clean by removing leaves and debris from the front grille area. A dirty condenser reduces cooling and strains other parts. Regular cleaning keeps your AC running well and prevents early failure.
Brake System Problem Detection
The brake system in your Toyota Corolla works harder than any other part. It’s key to spot Toyota Corolla brake problems early for your safety. Knowing how to find brake system issues before they get worse can prevent accidents and save money.
Regular brake checks help find brake system issues early. Most brake problems start small and give you signs if you know what to look for. Your Corolla’s brakes need all parts working well together.
Checking Your Brake Pads
You can check your brake pads without taking off your wheels. Look through the wheel spokes to see the brake caliper and rotor. The brake pad should be at least 1/4 inch thick for safe driving.
Listen for squealing sounds when you brake. This noise means your pads are wearing thin. It’s a warning to replace them before they wear out completely.
Feel for vibrations in your brake pedal or steering wheel. These signs often mean warped rotors or uneven pad wear. Fix these issues fast to avoid costly repairs later.
Checking Brake Fluid Quality
Find your brake fluid reservoir under the hood. The fluid level should be between the minimum and maximum marks. Low fluid levels often mean worn brake pads or leaks.
Check the fluid color often. Fresh brake fluid is clear or light amber. Dark brown or black fluid needs to be replaced right away. Bad fluid can hurt your brakes and damage parts.
Test your brake pedal feel. A soft pedal means air in the brake lines or low fluid. Your pedal should feel firm and responsive.
Replacement Timing Guidelines
Most Toyota Corolla brake parts have set replacement times. Knowing these helps plan for Corolla brake maintenance and avoid emergency repairs.
Brake pad replacement usually happens every 25,000 to 70,000 miles. City driving wears pads faster than highway driving.
| Component | Replacement Interval | Warning Signs | Typical Cost Range |
|---|---|---|---|
| Brake Pads | 25,000-70,000 miles | Squealing, grinding sounds | $150-$300 |
| Brake Rotors | 50,000-100,000 miles | Vibration, pulsing pedal | $200-$400 |
| Brake Fluid | Every 2-3 years | Dark color, spongy pedal | $80-$150 |
| Brake Lines | 100,000+ miles | Fluid leaks, corrosion | $300-$600 |
Replace brake parts in pairs for even braking. Never replace just one pad or rotor. This can make your Corolla’s brakes unsafe.
Get professional inspections if you notice any odd symptoms. While basic checks help, experts can spot problems you might miss.
Electrical System Diagnostic Steps
Knowing your Toyota Corolla’s electrical system is key to avoiding expensive repairs. Toyota Corolla electrical problems often start with simple symptoms that many drivers overlook. Your car’s electrical system powers everything from the engine management to interior lights.
Modern Corollas rely heavily on electronic components. When these systems fail, they can affect multiple functions at once. Learning basic diagnostic steps saves you time and money while preventing roadside breakdowns.
Testing Battery and Alternator Health
Your battery and alternator work together to keep your Corolla running smoothly. Battery issues often disguise themselves as other problems, making proper testing essential.
Start by checking your battery voltage with a multimeter. A healthy battery should read 12.6 volts when the engine is off. Turn on your headlights for two minutes, then recheck the voltage.
If the reading drops below 12.4 volts, your battery needs replacement. Weak batteries cause cascading electrical problems throughout your Corolla’s systems.
- Clean battery terminals with baking soda and water
- Check for corrosion around battery posts
- Ensure battery cables are tight and secure
- Test battery under load using a proper tester
Testing your alternator requires the engine running. With the engine at idle, your multimeter should read between 13.5 and 14.5 volts. Alternator problems often cause dimming lights and slow engine cranking.
Rev the engine to 2,000 RPM and watch the voltage reading. If it exceeds 15 volts or drops below 13 volts, your alternator needs professional attention.
Troubleshooting Dashboard Warning Lights
Dashboard warning lights serve as your Corolla’s communication system. Each light indicates specific electrical system issues that require immediate attention.

The battery warning light doesn’t always mean your battery is dead. It often signals charging system problems or loose alternator belts. Never ignore this warning as it can leave you stranded.
Check engine lights frequently indicate electrical sensor failures. Common causes include faulty oxygen sensors, mass airflow sensors, or wiring issues. Use an OBD-II scanner to read specific error codes.
ABS and traction control lights often illuminate together. These systems share electrical components and sensors. Low brake fluid or wheel speed sensor problems trigger these warnings.
- Record which lights are illuminated
- Note when the lights appear during driving
- Check for loose connections under the hood
- Scan for diagnostic trouble codes
- Consult your owner’s manual for specific meanings
Fixing Power Window and Door Lock Issues
Power window problems plague many Toyota Corollas, including older models. These issues often stem from faulty switches, worn motors, or damaged wiring.
Test your power windows by operating them from both the driver’s controls and individual door switches. If windows work from one switch but not another, the problem is likely a bad switch.
Listen for unusual sounds when operating windows. Grinding noises indicate worn window regulators, while clicking sounds suggest electrical switch problems.
One unique problem affects many Toyota models: soy-based wire coating attracts rodents who chew through wiring harnesses, causing damage that can cost between $2,000 and $9,000 to repair.
Door lock actuators fail frequently in Corollas. You’ll hear clicking sounds from inside the door when locks attempt to engage. This clicking indicates motor failure instead of electrical problems.
Check door lock fuses first before assuming actuator failure. Blown fuses are cheaper fixes than replacement actuators. Locate the fuse box and test each fuse with a multimeter.
- Inspect wiring harnesses for rodent damage
- Test individual window switches with a multimeter
- Lubricate window tracks and mechanisms
- Replace faulty door lock actuators promptly
Professional diagnosis becomes necessary when multiple electrical systems fail simultaneously. Complex Toyota Corolla electrical problems often require specialized diagnostic equipment and expertise.
Regular electrical system maintenance prevents most common failures. Keep battery terminals clean, check wiring harnesses periodically, and address warning lights promptly to avoid costly repairs.
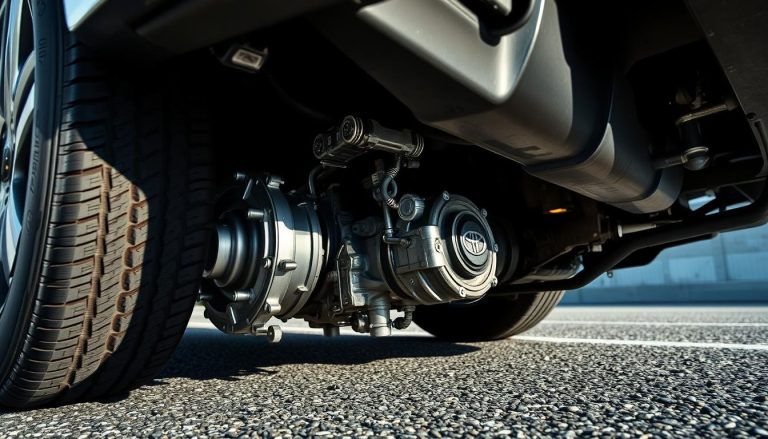
Suspension and Steering Problem Solutions
Finding Toyota Corolla suspension problems early can save you money and keep you safe. Your car’s suspension and steering work together to keep you comfortable and in control. If these systems fail, you’ll notice changes in how your car handles, sounds, and feels.
Most suspension and steering issues start small. You might first notice slight vibrations or a car pulling to one side. These signs often get worse if not fixed.
Many suspension and steering problems have clear symptoms. With some basic knowledge and simple tests, you can spot issues before they become expensive repairs.

Checking Struts and Shocks
Your Toyota Corolla’s struts and shocks control how your car handles bumps. When these wear out, you’ll feel every bump. Strut problems cause bouncing, nose-diving during braking, and uneven tire wear.
The bounce test is an easy way to check your struts and shocks. Push down hard on each corner and release quickly. A healthy suspension should bounce once and then settle. If it bounces more than once, your struts or shocks need replacement.
Look for signs of strut damage too. Check for oil leaks around the strut housing and examine the strut mount for cracks. Listen for clunking or knocking sounds when driving over bumps.
Worn struts make your Toyota Corolla lean in corners and feel unstable. It might take longer to stop or the front end dips dramatically when braking.
Identifying Power Steering Problems
Power steering issues make your Toyota Corolla harder to control and can be dangerous. The main symptom is increased effort needed to turn the steering wheel, mostly at low speeds or when parking.
Listen for whining or groaning noises when turning the wheel. These sounds often mean low power steering fluid or a failing pump. Check your power steering fluid level regularly. The fluid should be clear or slightly amber, not dark or foamy.
Inspect the area around your power steering pump and rack for leaks. Look for wet spots or stains on your driveway. Power steering fluid leaks often appear as reddish or clear liquid puddles.
Test your steering response by turning the wheel while the engine runs. The steering should feel smooth and consistent. If it feels jerky, delayed, or doesn’t return to center, your power steering system needs attention.
Diagnosing Alignment Issues
Wheel alignment issues cause your Toyota Corolla to pull to one side and create uneven tire wear patterns. These problems often develop after hitting potholes, curbs, or other road hazards.
The easiest alignment test is the straight-line driving check. On a straight, level road with light traffic, briefly let go of the steering wheel. Your car should continue straight without pulling to either side. If it drifts left or right, you likely have an alignment problem.
Examine your tires for uneven wear patterns. Proper alignment keeps tire wear even across the tread surface. Look for excessive wear on the inside or outside edges of your tires. Feathering, where the tread feels smooth in one direction and rough in the other, also indicates alignment issues.
Check your steering wheel position when driving straight. The steering wheel should sit centered with the Toyota logo upright. If you need to hold the wheel at an angle to drive straight, your alignment is off.
| Problem Type | Main Symptoms | Simple Test | Average Repair Cost |
|---|---|---|---|
| Worn Struts/Shocks | Excessive bouncing, nose-diving | Bounce test at each corner | $300-600 per pair |
| Power Steering Failure | Hard steering, whining noises | Check fluid level and color | $150-400 for pump |
| Poor Wheel Alignment | Vehicle pulls, uneven tire wear | Straight-line driving test | $75-150 for alignment |
| Steering Rack Issues | Loose steering, fluid leaks | Check for play in wheel | $500-1200 for replacement |
Regular inspection of your suspension and steering components helps catch problems early. Most steering issues and suspension problems give plenty of warning before they become dangerous. By learning to recognize these symptoms and performing simple tests, you can maintain your Toyota Corolla’s safety and comfort while avoiding costly emergency repairs.
Most Common Toyota Corolla Problems by Model Year
Looking at model years shows key Toyota Corolla problems to avoid. Each year has its own issues that affect how reliable and affordable the car is. Knowing these Corolla generation issues helps owners and buyers make better choices.
Some years are worse than others. The 2000, 2001, 2002, 2003, 2009, and 2014 models have specific problems. These specific year problems often come from design or manufacturing mistakes.

2003-2008 Generation Known Issues
The ninth-generation Corolla had big transmission problems early on. 2003 models had severe transmission issues that needed a full replacement. These issues came from bad valve body designs and poor fluid cooling.
Oil consumption was another big issue. Many owners burned a quart of oil every 1,000 miles. This problem started after 80,000 miles and got worse over time.
Power steering pumps also failed often. They would leak or lose pressure, posing safety risks. Replacing them cost between $300 to $600, depending on labor.
2009-2013 Generation Problem Areas
The 2009 model year was very troublesome for Corolla reliability by year. Owners faced expensive failures that could cost up to $4,500 in repairs. Water pump failures were a big problem, leading to engine overheating and damage.
Excessive oil consumption was also a big issue. Toyota even issued service bulletins about it. Many engines needed rebuilds or replacements under warranty.
Dashboard warning lights often malfunctioned. The check engine light would turn on without real problems, causing confusion and extra costs. Airbag warning lights also gave false alarms.
Interior parts were not as durable as before. Door handles broke often, and seat fabric wore out quickly. These quality issues were a letdown for Toyota fans.
2014-2019 Generation Common Failures
The 2014 model year brought new problems. Radio systems failed at alarming rates, needing full replacements. Infotainment screens would freeze, lose audio, or shut down.
Interior quality took a step back in these models. Cheap plastic trim cracked easily, and upholstery wore out fast. These issues hurt resale values a lot.
CVT transmission problems started in 2014. The transmissions shuddered, slipped, and failed early. Many needed replacement before 100,000 miles.
Air conditioning compressors failed more often in this generation. They would seize or lose refrigerant, hurting those in hot climates. Replacing them cost over $1,200, including labor.
2020+ Generation Emerging Problems
The newest Corolla generation shows some improvements but has issues. It has fewer major mechanical failures than before. But, some problems are starting to show up.
Infotainment system glitches are common in newer models. Touchscreen issues and connectivity problems annoy tech-savvy buyers. Software updates help but don’t fix all problems.
Paint quality is a growing concern for recent models. Owners see fading, chipping, and clear coat failure. These issues are common on white and silver cars in the sun.
CVT transmission reliability is uncertain, even with design improvements. Failures are less common than in 2014-2019 models, but long-term durability is unproven. Extended warranties are key for CVT vehicles.
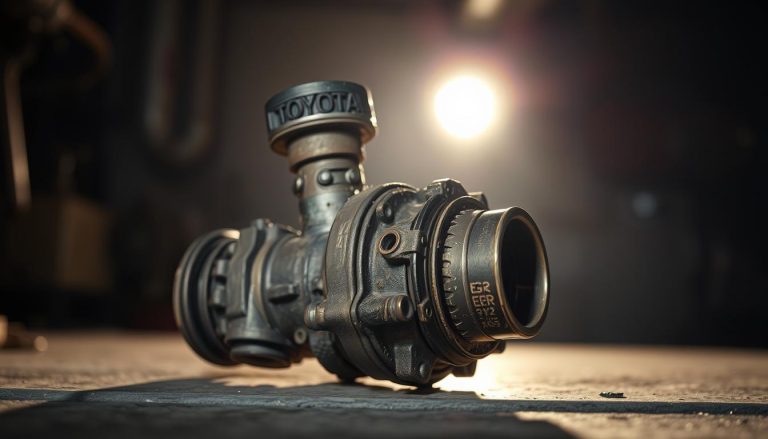
Fuel System Maintenance and Repair
Toyota Corolla fuel system problems can really hurt your car’s performance. But, most issues can be avoided with regular care. Your fuel system has several key parts that work together to give your engine clean fuel and air.
When these parts fail or get dirty, you’ll see your car’s fuel economy drop, it will idle roughly, and accelerate poorly.
The most common issues are with fuel injectors, the mass airflow sensor, and oxygen sensors. Each is vital for your engine’s performance. Regular maintenance of these parts can prevent expensive repairs and keep your Corolla running well for years.

Knowing how to keep and fix these parts can save you money and help you spot problems early. Let’s look at each part and learn how to take care of them.
Cleaning Your Fuel Injectors
Dirty fuel injectors are a big reason for poor engine performance and lower fuel economy. Over time, carbon deposits build up inside, blocking the spray pattern. This uneven fuel delivery makes your engine run rough.
Signs your fuel injectors need cleaning include:
- Rough idling or engine misfires
- Decreased fuel economy
- Hesitation during acceleration
- Black smoke from the exhaust
For cleaning, you can either do it yourself or have a professional do it. DIY cleaning is good for light deposits and regular upkeep. Buy a quality fuel system cleaner from your auto parts store. Add the cleaner to a nearly empty tank, then fill up with premium gas.
Drive normally for the next tank. The cleaner will dissolve light deposits as it flows through your system. Do this every 3,000 miles to keep your system clean.
For severe deposits or ongoing issues, professional cleaning is better. Mechanics use special tools to clean injectors with solvents. This service costs $100-200 but cleans thoroughly, more than DIY methods.
Testing Your Mass Airflow Sensor
MAF sensor problems are common in Toyota Corollas from 1998-2010. The mass airflow sensor measures air and tells your engine’s computer how much fuel to inject. If it fails, your engine gets the wrong fuel instructions.
Symptoms of a faulty MAF sensor include:
- Check engine light activation
- Poor acceleration and jerky performance
- Rough idling or stalling
- Decreased fuel economy
To test your MAF sensor, you’ll need a multimeter and basic tools. First, find the sensor between your air filter and throttle body. It’s a rectangular part with electrical connections.
With the engine running, carefully disconnect the MAF sensor connector. If your engine runs better without it, the MAF sensor is likely faulty. This test works because your engine’s computer uses default settings when the sensor is removed.
You can also clean the MAF sensor with specialized cleaner spray. Remove it carefully and spray the delicate wire elements. Let it dry completely before putting it back. This cleaning often fixes minor MAF sensor issues and is cheaper than replacing it.
Replacing Oxygen Sensors
Oxygen sensor problems can cause check engine lights and lower fuel economy. These sensors check exhaust gases and help your engine keep the right air-fuel mix. Most Toyota Corollas have two to four oxygen sensors, depending on the model year.
Oxygen sensors last 60,000-100,000 miles. Common failure symptoms include poor fuel economy, rough idling, and failed emissions tests. The check engine light usually comes on when an oxygen sensor fails.
Before replacing an oxygen sensor, use an OBD-II scanner to find out which one failed. The diagnostic code will show the sensor’s location, like “Bank 1 Sensor 1” or “Bank 1 Sensor 2.”
To replace an oxygen sensor, you’ll need an oxygen sensor socket or wrench. These sensors screw into the exhaust pipe and can be hard to remove because of heat and corrosion. Use penetrating oil and let it soak before trying to remove it.
Install the new sensor hand-tight, then tighten another half-turn with your wrench. Avoid over-tightening, as it can damage the exhaust threads. Most oxygen sensors cost $50-150, making this a cost-effective repair for most DIY mechanics.
After replacement, clear the diagnostic codes and drive your Corolla for several miles. The check engine light should go off once the new sensor starts working right. If the light stays on, you might need to do more to find other fuel system problems.
Exhaust System Problem Resolution
Exhaust system problems in your Toyota Corolla can cause poor performance and failed emissions tests. These Toyota Corolla exhaust problems can start small but grow if not fixed. Knowing how to diagnose and fix these issues can save you money and keep your car running well.
Your exhaust system is key to reducing harmful emissions and keeping your engine running right. If you notice jerky acceleration, unusual smells, or dashboard lights, act fast. Early action can prevent big repairs.

Catalytic Converter Diagnostic Steps
Catalytic converter issues are serious. A blocked or failing converter can make your car jerk and use more fuel. Here’s how to spot these problems.
Look for signs like sluggish acceleration or sulfur smells. Rattling noises when starting might mean the converter is damaged inside.
Use an OBD-II scanner to find diagnostic codes. Codes like P0420 or P0430 suggest catalyst problems. But, these codes can also mean faulty oxygen sensors or other issues.
Check the converter’s temperature with an infrared thermometer. A good converter is hotter at the outlet than the inlet. If temperatures are the same, it’s not working right and needs to be replaced.
How to Inspect Exhaust Components
Regular checks can stop small problems from getting big. Start with the car on level ground and the engine cool. Always put safety first.
Look over the exhaust system from the engine to the tailpipe. Watch for rust, holes, or loose spots. Black soot means leaks that need fixing fast.
Check exhaust hangers and brackets for damage or wear. Broken hangers can make the system sag, causing damage and noise. Replace worn hangers before they cause more harm.
Listen to your exhaust while the engine runs. Hissing, popping, or loud noises mean leaks or damage. Have someone rev the engine while you listen outside to find the source.
Fixing Emissions Test Failures
Emissions problems can stop your Corolla from passing tests. Most failures are due to the EVAP system, catalytic converter, or oxygen sensors. Knowing these systems helps fix problems quickly.
EVAP system issues often cause check engine lights and test failures. First, check the gas cap for a tight seal. A loose or damaged cap lets fuel vapors escape, causing codes and failures.
Look for cracks or disconnections in EVAP system hoses. These hoses can become brittle and leak. Replace any damaged hoses and make sure all connections are tight. Even small leaks can cause test failures.
If your Corolla fails emissions testing, don’t worry. Many failures are temporary and can clear up with proper exhaust system maintenance. Drive your car for several complete cycles before retesting to allow systems to reset.
Consider using a high-quality fuel system cleaner before retesting. These additives can clean fuel injectors and improve emissions. But, avoid quick fixes and focus on solving the real problem.
Interior and Exterior Component Repairs
While engine and transmission issues get a lot of attention, Toyota Corolla door problems and interior trim issues affect your daily drive. These parts might seem less important than major mechanical systems. But they greatly impact your vehicle’s comfort, safety, and value.
The 2014 Toyota Corolla model year had build quality issues. Dashboard cracking and radio malfunctions were common problems. These issues highlight the importance of fixing interior trim problems early to avoid bigger issues later.

Your Corolla’s interior and exterior components work hard every day. Door handles are pulled many times a day. Window regulators lift heavy glass up and down constantly. Dashboard materials expand and contract with temperature changes.
A broken door handle can leave you stranded outside your own car. A failing window regulator creates security risks and weather exposure problems.
Replacing Faulty Door Handles
Toyota Corolla door problems often start with sticky or broken exterior handles. Cold weather makes plastic components brittle. Frequent use wears internal mechanisms. Fortunately, replacing them requires basic tools and patience.
Start by removing the door panel. Pop off plastic clips carefully to avoid breaking them. Disconnect the door handle rod from the latch mechanism. Most Corolla models use a simple clip connection here.
Remove the exterior handle mounting bolts. These typically hide behind the door panel or under weatherstripping. Pull the handle straight out once bolts are removed. The connecting rod should slide out easily.
Installation reverses the removal process. Apply a thin layer of white lithium grease to moving parts. This prevents future sticking and extends component life. Test the handle operation before reassembling everything.
| Tool Required | Purpose | Estimated Time | Difficulty Level |
|---|---|---|---|
| Phillips screwdriver | Remove door panel screws | 5 minutes | Easy |
| Panel removal tool | Pop plastic clips safely | 10 minutes | Easy |
| 10mm socket | Remove handle bolts | 15 minutes | Moderate |
| White lithium grease | Lubricate moving parts | 2 minutes | Easy |
Diagnosing and Fixing Window Mechanisms
Window regulator issues plague many Toyota Corolla owners. These problems range from slow operation to complete failure. Understanding the difference between motor problems and regulator problems saves diagnostic time.
Test the window motor first. Press the window switch and listen carefully. A clicking sound usually indicates motor failure. No sound at all might mean electrical problems. Grinding noises typically point to regulator gear problems.
Remove the door panel to access the regulator assembly. The motor bolts to the regulator with three screws. Disconnect the electrical connector and test the motor with jumper wires. A good motor should run smoothly in both directions.
Regulator problems show up as bent tracks or broken cables. Window glass that tilts while moving indicates track damage. Glass that drops suddenly suggests cable failure. Both issues require complete regulator replacement.
When installing a new regulator, support the window glass with tape. This prevents the glass from falling during installation. Connect the motor to the new regulator before mounting everything in the door. Test operation before reassembling the door panel.
Fixing Interior Wear and Damage
Interior trim problems affect vehicle appearance and comfort. Dashboard cracking became notorious in certain model years. Seat wear reduces comfort and resale value. Door trim rattles create annoying noise during driving.
Dashboard cracks often start small and spread quickly. Temperature changes accelerate the process. Direct sunlight makes plastic brittle over time. Use dashboard protectant regularly to slow deterioration.
For existing cracks, several repair options exist. Dashboard repair kits work well for small cracks. These kits include flexible filler and matching paint. Clean the crack thoroughly before applying any repair materials.
Seat upholstery problems range from minor wear to major tears. Leather seats need conditioning every few months. Fabric seats benefit from regular vacuuming and spot cleaning. Address small tears immediately to prevent spreading.
Door trim rattles usually come from loose clips or worn bushings. Remove the trim piece and inspect all mounting points. Replace broken clips with new ones from the dealer. Add foam padding behind trim pieces to eliminate vibration noise.
Exterior component repair includes fixing trim pieces, replacing weatherstripping, and addressing paint issues. Plastic trim fades over time, making older models look worn. Trim restoration products can restore original appearance temporarily.
Weatherstripping replacement prevents water leaks and wind noise. Old weatherstripping becomes hard and loses flexibility. New weatherstripping installs easily with weatherstrip adhesive. Clean the mounting surface thoroughly before installation.
These repairs might seem minor compared to engine work, but they significantly impact your daily driving experience. A comfortable, quiet interior makes every trip more enjoyable. Properly functioning doors and windows provide security and weather protection.
Regular maintenance prevents many of these problems. Clean door tracks monthly to prevent regulator damage. Condition interior surfaces to prevent cracking. Address small issues before they become expensive repairs.
Creating Your Maintenance Schedule
A well-structured Toyota Corolla maintenance schedule is your guide to a reliable car. It helps avoid unexpected breakdowns and costly repairs. By taking care of your car, you can enjoy stress-free driving.
Planning your car’s maintenance makes owning a car enjoyable. You’ll know your Corolla gets the right care at the right time. This saves money and keeps your car running well for years.

Essential Monthly Checks
Monthly checks catch problems early, saving you money. These simple steps take just 15 minutes but offer peace of mind.
Fluid level monitoring is key. Check engine oil when it’s cool. Look for the right levels and a clean, amber color. Dark or gritty oil means it’s time to change it.
Tire pressure is another monthly task. Proper inflation improves safety and fuel efficiency. Check all tires, including the spare, and look for unusual wear.
Battery terminals need a monthly check for corrosion or loose connections. Clean them with baking soda and water. Also, test all exterior lights.
Windshield washer fluid levels should always be full. Check belts and hoses for damage. Listen for unusual noises when starting or driving.
Seasonal Maintenance Tasks
Seasonal maintenance planning prepares your Corolla for changing weather. Each season has its own challenges that need attention.
Spring preparation focuses on recovering from winter. Check the cooling system and clean the undercarriage. Replace cabin air filters.
Summer readiness focuses on air conditioning and heat management. Test AC before hot weather starts. Check coolant levels and radiator fins.
Fall maintenance prepares for cold weather. Test battery performance and check heating system. Replace worn wiper blades and inspect exhaust system.
Winter preparation ensures safe cold-weather driving. Switch to winter-grade oil if needed. Check antifreeze and heating system performance.
Long-term Maintenance Planning
Long-term planning helps budget for major services. Knowing Corolla service intervals prevents missed maintenance that could void warranty.
Major services happen at specific mileage intervals. Plan financially for these by setting aside money monthly. This avoids financial stress when services are due.
Safety-critical components always get priority. Brakes, tires, steering, and suspension systems affect your safety. Address problems with these components immediately.
Keep detailed maintenance records. This tracks service history and identifies patterns. It helps with warranty claims and increases resale value. Use digital apps or spreadsheets for record keeping.
| Service Type | Interval (Miles) | Estimated Cost | Priority Level |
|---|---|---|---|
| Oil Change | 5,000-10,000 | $30-60 | High |
| Brake Inspection | 12,000-15,000 | $100-200 | Critical |
| Transmission Service | 30,000-60,000 | $150-300 | High |
| Timing Belt | 60,000-100,000 | $500-800 | Critical |
| Major Tune-up | 30,000-100,000 | $200-500 | Medium |
Consider your driving habits when planning maintenance. Frequent city driving or highway use may need more frequent service.
Set aside $1,200-2,000 annually for routine maintenance on most Toyota Corollas. This is much less than the cost of major repairs from neglect.
Your Toyota Corolla maintenance schedule evolves with your driving habits and car age. Regular updates keep your maintenance planning effective for your needs.
Professional Repair Decision Guide
Choosing the right path for Toyota Corolla repair decisions is key. It’s about knowing when to fix things yourself versus when to call a pro. The decision depends on your skills, tools, and the repair’s complexity.
Some repairs need special tools and skills only pros have. Others are great for saving money and learning about your car. Knowing the difference keeps your wallet safe and you safe.
When DIY Repairs Are Appropriate
DIY repairs are best for simple tasks like routine maintenance and replacing parts. These jobs need basic tools and are usually safe if done right.
Good DIY projects include:
- Oil and filter changes
- Air filter replacement
- Brake pad inspection
- Battery terminal cleaning
- Cabin air filter installation
DIY is also good for exterior parts like door handles, mirrors, and light bulbs. These jobs don’t need special tools and have clear online guides.
But, avoid DIY repairs on airbag systems, fuel lines, or major engine parts. These need expert care for safety and proper function.
How to Choose a Qualified Mechanic
Choosing a professional mechanic starts with research and word of mouth. Ask people you trust about their repair shop experiences.
Look for these important qualifications:
- ASE (Automotive Service Excellence) certification
- Toyota-specific training credentials
- Clean, organized facility
- Written estimates before work begins
- Warranty on parts and labor
A good mechanic will explain problems clearly and show you damaged parts. They’ll also give detailed estimates and timelines before starting work.
Red flags include mechanics who won’t show you problems, push for quick repairs, or lack proper credentials. Trust your gut if something feels off.
Visit the shop during busy times to see how they work. Good shops are clean and treat customers well, even when busy.
Understanding Warranty Coverage
Warranty coverage changes based on your Toyota Corolla’s age and service history. New cars usually have full bumper-to-bumper coverage plus longer powertrain warranties.
Most Toyota Corollas have:
- 3-year/36,000-mile basic coverage
- 5-year/60,000-mile powertrain warranty
- 5-year/unlimited-mile corrosion protection
- 2-year/25,000-mile maintenance coverage
Extended warranties and service contracts offer more protection. But, read the fine print to know what’s covered and what’s not.
Even older cars might have warranty coverage for some repairs. Technical service bulletins (TSBs) can extend coverage for known issues in certain model years.
Keep detailed maintenance records to protect your warranty coverage. Missing records can void warranty claims, even for unrelated issues.
Always use genuine Toyota parts or approved alternatives for warranty work. Aftermarket parts might save money upfront but could void coverage for related failures.
When facing expensive repairs, talk to Toyota customer service about possible goodwill help. Manufacturers might assist with costs for vehicles near the end of warranty, for known issues.
Making smart Toyota Corolla repair decisions protects your investment and keeps you safe on the road. Whether DIY or professional, focus on quality work and the right parts for your car’s long life.
Conclusion
The Toyota Corolla is a top choice for dependable vehicles in America. This guide has covered some issues, but they don’t hurt its reputation. Knowing these problems helps you keep your car in great shape.
Keeping your Corolla in top condition starts with preventive care. Regular oil changes and brake checks are key. Catching problems early saves money and prevents big repairs.
Knowing about common issues makes you a better driver. You can spot problems like transmission and engine issues before they cause trouble. This makes you proactive, not just reactive.
Looking after your Corolla doesn’t need to be hard. Simple checks each month and seasonal inspections are enough. If you need a mechanic, you’ll know what to ask for.
How long your Corolla lasts depends on your care. With the right maintenance, it can go over 200,000 miles. By following maintenance schedules and fixing issues quickly, your Corolla will be reliable for years.
FAQ
What are the most common problems with Toyota Corollas across all model years?
Toyota Corollas often face issues like excessive oil consumption, mainly in 2009-2010 models. CVT transmission problems are common in 2014+ models. Other issues include air conditioning compressor failures, brake pad wear, and electrical problems like power window malfunctions.
Despite these problems, the Corolla is known for being reliable when properly maintained.
How can I check if my Toyota Corolla is burning too much oil?
Check your oil level weekly when the engine is cool. Look for blue smoke from the exhaust, frequent low oil warning lights, and needing to add oil often. If you add more than a quart between 5,000-mile service intervals, you have an oil consumption issue.
What are the warning signs of CVT transmission problems in 2014+ Toyota Corollas?
CVT transmission issues include delayed acceleration and whining or grinding noises. You might also notice jerky shifting, overheating warnings, and slipping or hesitation. If you see these signs, get your CVT system checked right away to avoid a complete failure.
How often should I replace my Toyota Corolla’s brake pads?
Brake pads usually last 30,000-70,000 miles, depending on how you drive. Replace them when the pads are 3mm or less thick, or if you hear squealing or feel vibration in the brake pedal. Check them every 12,000 miles to catch wear early.
Why does my Toyota Corolla’s air conditioning smell musty, and how can I fix it?
Musty AC odors come from mold and bacteria in the evaporator core and air ducts. Fix it by replacing the cabin air filter every 15,000 miles and using AC cleaning sprays. Running the AC regularly helps prevent moisture buildup. If the smell doesn’t go away, you might need professional duct cleaning.
What dashboard warning lights should I never ignore in my Toyota Corolla?
Never ignore the check engine light, oil pressure warning, battery/charging system light, brake system warning, or temperature gauge in the red zone. These lights indicate serious problems that could damage your engine or make you stranded. Pull over and address these warnings right away.
How do I know if my Toyota Corolla’s struts or shocks need replacement?
Do the bounce test by pushing down on each corner and releasing. If the car bounces more than twice, it’s time for new struts or shocks. Look for uneven tire wear, nose diving when braking, and visible fluid leaks around the shock absorbers.
Which Toyota Corolla model years should I avoid due to known problems?
Avoid 2009-2010 models for oil consumption issues and 2014-2016 models for CVT transmission problems. But, these issues don’t make these years unreliable. With proper care, many owners have trouble-free service.
How often should I clean my Toyota Corolla’s fuel injectors?
Clean fuel injectors every 30,000-50,000 miles or when you notice rough idling or poor acceleration. Use quality fuel injector cleaner every 5,000 miles. For severe buildup, professional ultrasonic cleaning may be needed.
What causes my Toyota Corolla to fail emissions testing?
Emissions test failures often come from faulty oxygen sensors, clogged catalytic converters, EVAP system leaks, dirty air filters, or carbon buildup. Make sure your check engine light is off before testing. Use fuel system cleaner and drive highway speeds before your test to help the system run well.
How much does it cost to fix common Toyota Corolla problems?
Repair costs vary by location and problem severity. Expect to pay
FAQ
What are the most common problems with Toyota Corollas across all model years?
Toyota Corollas often face issues like excessive oil consumption, mainly in 2009-2010 models. CVT transmission problems are common in 2014+ models. Other issues include air conditioning compressor failures, brake pad wear, and electrical problems like power window malfunctions.
Despite these problems, the Corolla is known for being reliable when properly maintained.
How can I check if my Toyota Corolla is burning too much oil?
Check your oil level weekly when the engine is cool. Look for blue smoke from the exhaust, frequent low oil warning lights, and needing to add oil often. If you add more than a quart between 5,000-mile service intervals, you have an oil consumption issue.
What are the warning signs of CVT transmission problems in 2014+ Toyota Corollas?
CVT transmission issues include delayed acceleration and whining or grinding noises. You might also notice jerky shifting, overheating warnings, and slipping or hesitation. If you see these signs, get your CVT system checked right away to avoid a complete failure.
How often should I replace my Toyota Corolla’s brake pads?
Brake pads usually last 30,000-70,000 miles, depending on how you drive. Replace them when the pads are 3mm or less thick, or if you hear squealing or feel vibration in the brake pedal. Check them every 12,000 miles to catch wear early.
Why does my Toyota Corolla’s air conditioning smell musty, and how can I fix it?
Musty AC odors come from mold and bacteria in the evaporator core and air ducts. Fix it by replacing the cabin air filter every 15,000 miles and using AC cleaning sprays. Running the AC regularly helps prevent moisture buildup. If the smell doesn’t go away, you might need professional duct cleaning.
What dashboard warning lights should I never ignore in my Toyota Corolla?
Never ignore the check engine light, oil pressure warning, battery/charging system light, brake system warning, or temperature gauge in the red zone. These lights indicate serious problems that could damage your engine or make you stranded. Pull over and address these warnings right away.
How do I know if my Toyota Corolla’s struts or shocks need replacement?
Do the bounce test by pushing down on each corner and releasing. If the car bounces more than twice, it’s time for new struts or shocks. Look for uneven tire wear, nose diving when braking, and visible fluid leaks around the shock absorbers.
Which Toyota Corolla model years should I avoid due to known problems?
Avoid 2009-2010 models for oil consumption issues and 2014-2016 models for CVT transmission problems. But, these issues don’t make these years unreliable. With proper care, many owners have trouble-free service.
How often should I clean my Toyota Corolla’s fuel injectors?
Clean fuel injectors every 30,000-50,000 miles or when you notice rough idling or poor acceleration. Use quality fuel injector cleaner every 5,000 miles. For severe buildup, professional ultrasonic cleaning may be needed.
What causes my Toyota Corolla to fail emissions testing?
Emissions test failures often come from faulty oxygen sensors, clogged catalytic converters, EVAP system leaks, dirty air filters, or carbon buildup. Make sure your check engine light is off before testing. Use fuel system cleaner and drive highway speeds before your test to help the system run well.
How much does it cost to fix common Toyota Corolla problems?
Repair costs vary by location and problem severity. Expect to pay $1,500-$4,000 for oil consumption fixes, $3,000-$5,000 for CVT transmission replacement, and $800-$1,500 for AC compressor replacement. Brake pad and power window motor replacements cost $200-$400 each. Early detection and maintenance can lower these costs.
Should I attempt DIY repairs on my Toyota Corolla?
DIY repairs are okay for basic maintenance like oil changes and air filter replacements. But, leave transmission work, electrical diagnostics, AC system repairs, and engine work to professionals. Always prioritize safety and consider your skill level and warranty implications before attempting repairs.
How can I extend my Toyota Corolla’s lifespan and maintain its reliability?
Follow the manufacturer’s maintenance schedule and check fluid levels monthly. Address problems early and use quality parts and fluids. Regular maintenance like oil changes, transmission service, and cooling system flushes can help your Corolla last over 200,000 miles.
,500-,000 for oil consumption fixes, ,000-,000 for CVT transmission replacement, and 0-
FAQ
What are the most common problems with Toyota Corollas across all model years?
Toyota Corollas often face issues like excessive oil consumption, mainly in 2009-2010 models. CVT transmission problems are common in 2014+ models. Other issues include air conditioning compressor failures, brake pad wear, and electrical problems like power window malfunctions.
Despite these problems, the Corolla is known for being reliable when properly maintained.
How can I check if my Toyota Corolla is burning too much oil?
Check your oil level weekly when the engine is cool. Look for blue smoke from the exhaust, frequent low oil warning lights, and needing to add oil often. If you add more than a quart between 5,000-mile service intervals, you have an oil consumption issue.
What are the warning signs of CVT transmission problems in 2014+ Toyota Corollas?
CVT transmission issues include delayed acceleration and whining or grinding noises. You might also notice jerky shifting, overheating warnings, and slipping or hesitation. If you see these signs, get your CVT system checked right away to avoid a complete failure.
How often should I replace my Toyota Corolla’s brake pads?
Brake pads usually last 30,000-70,000 miles, depending on how you drive. Replace them when the pads are 3mm or less thick, or if you hear squealing or feel vibration in the brake pedal. Check them every 12,000 miles to catch wear early.
Why does my Toyota Corolla’s air conditioning smell musty, and how can I fix it?
Musty AC odors come from mold and bacteria in the evaporator core and air ducts. Fix it by replacing the cabin air filter every 15,000 miles and using AC cleaning sprays. Running the AC regularly helps prevent moisture buildup. If the smell doesn’t go away, you might need professional duct cleaning.
What dashboard warning lights should I never ignore in my Toyota Corolla?
Never ignore the check engine light, oil pressure warning, battery/charging system light, brake system warning, or temperature gauge in the red zone. These lights indicate serious problems that could damage your engine or make you stranded. Pull over and address these warnings right away.
How do I know if my Toyota Corolla’s struts or shocks need replacement?
Do the bounce test by pushing down on each corner and releasing. If the car bounces more than twice, it’s time for new struts or shocks. Look for uneven tire wear, nose diving when braking, and visible fluid leaks around the shock absorbers.
Which Toyota Corolla model years should I avoid due to known problems?
Avoid 2009-2010 models for oil consumption issues and 2014-2016 models for CVT transmission problems. But, these issues don’t make these years unreliable. With proper care, many owners have trouble-free service.
How often should I clean my Toyota Corolla’s fuel injectors?
Clean fuel injectors every 30,000-50,000 miles or when you notice rough idling or poor acceleration. Use quality fuel injector cleaner every 5,000 miles. For severe buildup, professional ultrasonic cleaning may be needed.
What causes my Toyota Corolla to fail emissions testing?
Emissions test failures often come from faulty oxygen sensors, clogged catalytic converters, EVAP system leaks, dirty air filters, or carbon buildup. Make sure your check engine light is off before testing. Use fuel system cleaner and drive highway speeds before your test to help the system run well.
How much does it cost to fix common Toyota Corolla problems?
Repair costs vary by location and problem severity. Expect to pay $1,500-$4,000 for oil consumption fixes, $3,000-$5,000 for CVT transmission replacement, and $800-$1,500 for AC compressor replacement. Brake pad and power window motor replacements cost $200-$400 each. Early detection and maintenance can lower these costs.
Should I attempt DIY repairs on my Toyota Corolla?
DIY repairs are okay for basic maintenance like oil changes and air filter replacements. But, leave transmission work, electrical diagnostics, AC system repairs, and engine work to professionals. Always prioritize safety and consider your skill level and warranty implications before attempting repairs.
How can I extend my Toyota Corolla’s lifespan and maintain its reliability?
Follow the manufacturer’s maintenance schedule and check fluid levels monthly. Address problems early and use quality parts and fluids. Regular maintenance like oil changes, transmission service, and cooling system flushes can help your Corolla last over 200,000 miles.
,500 for AC compressor replacement. Brake pad and power window motor replacements cost 0-0 each. Early detection and maintenance can lower these costs.
Should I attempt DIY repairs on my Toyota Corolla?
DIY repairs are okay for basic maintenance like oil changes and air filter replacements. But, leave transmission work, electrical diagnostics, AC system repairs, and engine work to professionals. Always prioritize safety and consider your skill level and warranty implications before attempting repairs.
How can I extend my Toyota Corolla’s lifespan and maintain its reliability?
Follow the manufacturer’s maintenance schedule and check fluid levels monthly. Address problems early and use quality parts and fluids. Regular maintenance like oil changes, transmission service, and cooling system flushes can help your Corolla last over 200,000 miles.