Toyota 4Runner Problems: Issues & Fixes Explained
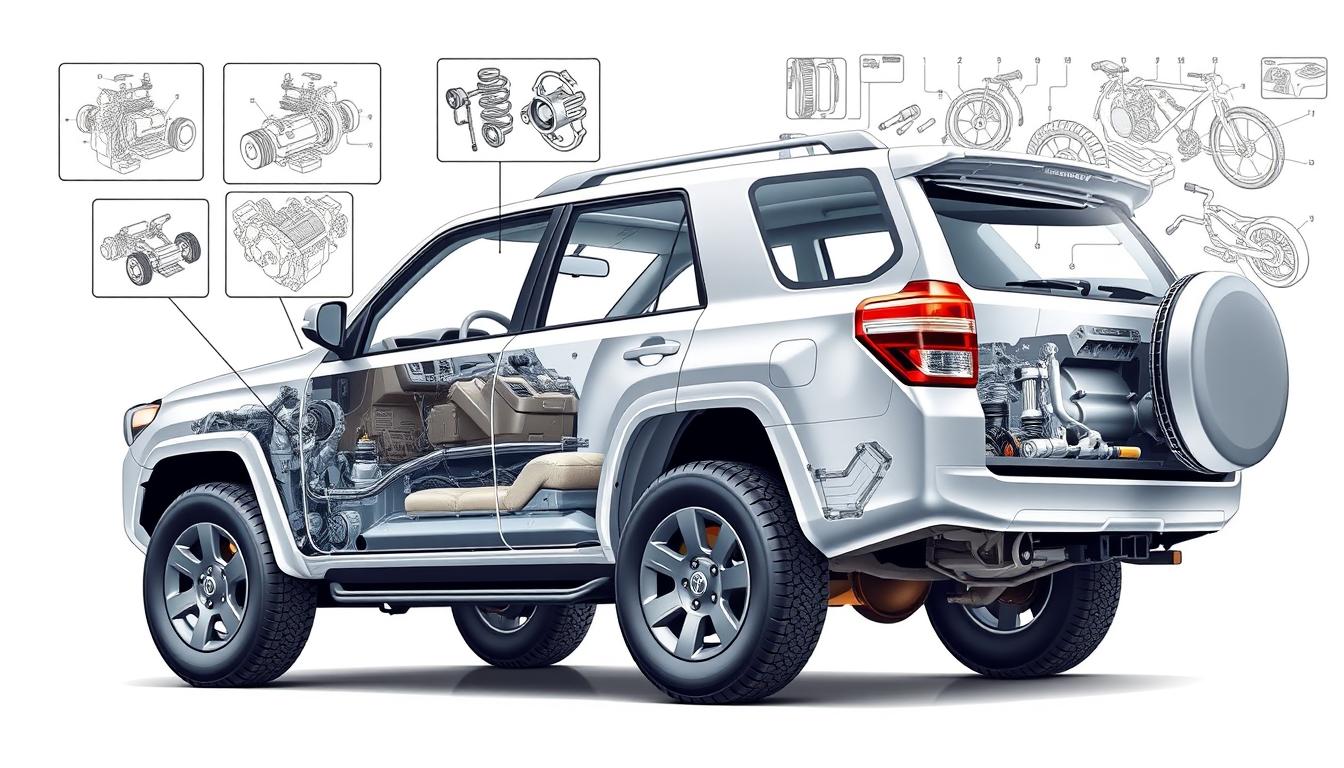
The Toyota 4Runner is known for being tough and great off-road. But, like any car, it has its own set of problems. Some model years have issues that owners should know about.
This guide covers the common issues in different 4Runner models. We’ll talk about problems like bad brakes in 2014-2017 models and rust around 150,000 miles. You’ll learn about the key 4Runner reliability issues to watch out for.
Dealing with issues like rough shifting, damaged dashboards, or a rattling timing chain? This guide has solutions for you. We’ll show you how to spot problems early and fix them without breaking the bank. Our aim is to keep your 4Runner running smoothly and avoid costly repairs.
Key Takeaways
- Braking system issues commonly affect 2014-2017 model years requiring immediate attention
- Frame rust and corrosion typically develop around 150,000 miles, specially in 4th generation models
- Dashboard cracking problems are prevalent in 2004 models due to material defects
- Transmission issues span 1990-2016 models with symptoms including rough shifting and power loss
- Early detection and prompt repairs can save thousands in maintenance costs
- Regular inspections help maintain the vehicle’s legendary durability and reliability
How to Identify Common Toyota 4Runner Problems
Knowing your Toyota 4Runner’s warning signs can prevent big problems. Your SUV tells you about its health through sounds, vibrations, dashboard lights, and changes in how it runs. Spotting these 4Runner symptoms early can save you from expensive repairs.
The Toyota 4Runner has specific issues based on the model year. For example, the 2003 model got 702 NHTSA complaints, with over 280 about structural problems. Common issues include brake failures, rough shifting in the transmission, and rust in 2003-2005 models. Dashboard cracking is a big problem for 2004 models.
To fix your Toyota 4Runner right, you need to know how to spot symptoms, use the right tools, and know when to call a pro. This approach keeps you safe and saves money by catching problems early.
Recognizing Warning Signs and Symptoms
Your Toyota 4Runner has specific warning signs for problems. Listen carefully to any unusual noises while driving. A grinding sound when braking means your brake pads are worn out. A rattling noise at startup often means timing chain issues.
Dashboard warning lights are your first clue to serious problems. The check engine light can mean anything from a loose gas cap to engine trouble. The ABS light warns of braking system issues, and the transmission temperature light signals overheating problems that need immediate attention.
Look for vibrations, pulling, and changes in how your 4Runner runs. If it pulls to one side, it might have alignment or uneven tire wear issues. Rough shifting or slipping in the transmission means hesitation during acceleration. These 4Runner warning signs often show up slowly, so regular checks are key.
Visual checks can catch many problems before they get worse. Look for:
- Fluid leaks under the vehicle after parking overnight
- Rust spots on the frame, specially around rear wheel wells
- Dashboard cracks that get worse over time
- Worn tire treads indicating alignment or suspension problems
- Corroded battery terminals affecting electrical systems
Using Diagnostic Tools Effectively
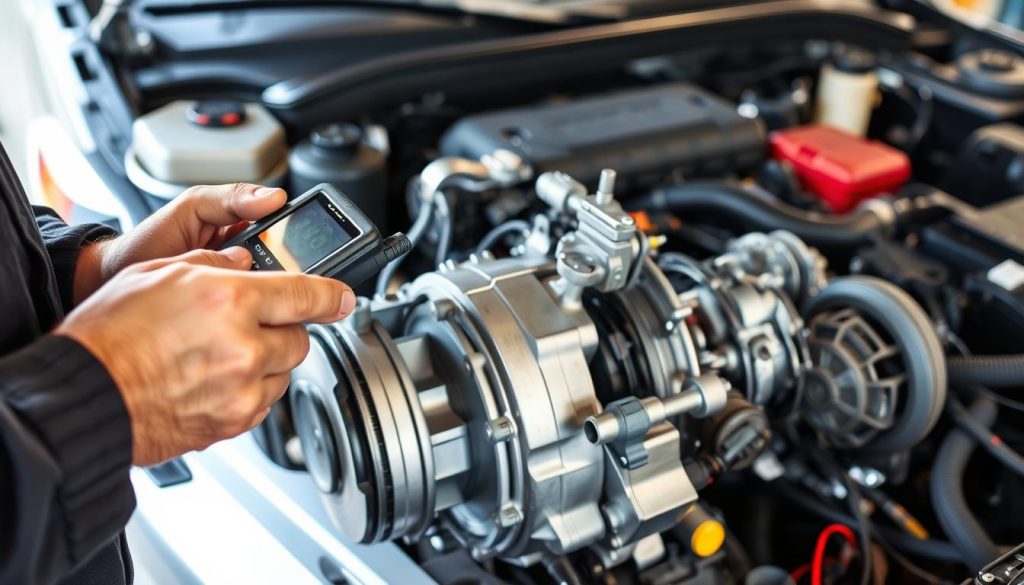
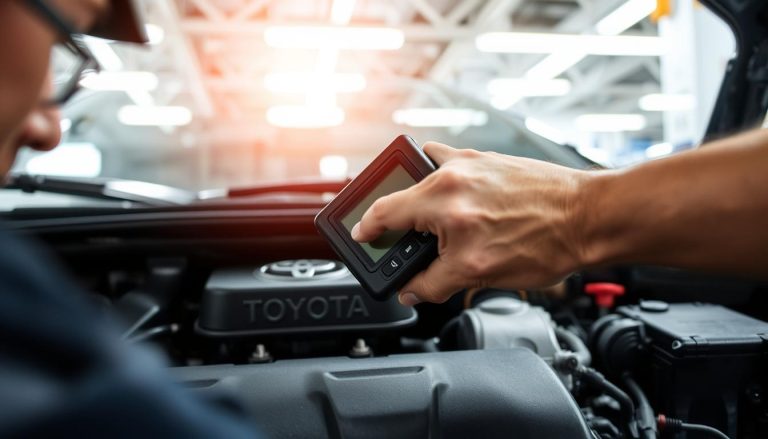
Modern 4Runner diagnostic tools make finding problems easier. An OBD-II scanner connects to your vehicle’s diagnostic port and reads error codes. These codes tell you exactly what’s wrong, from engine misfires to transmission issues.
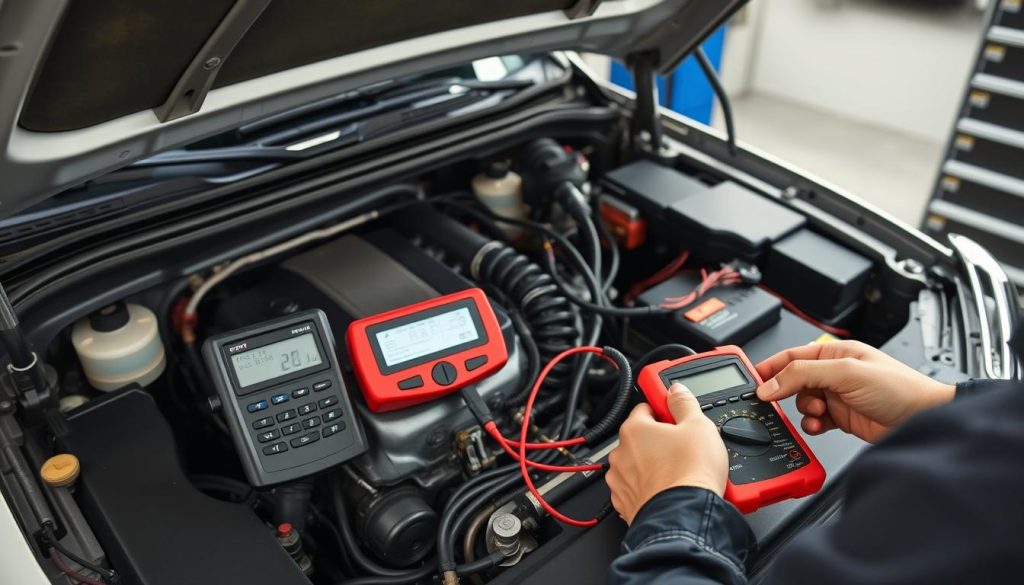
Every 4Runner owner should have basic tools like a digital multimeter, tire pressure gauge, and fluid level dipsticks. A compression gauge tests engine health, and a brake fluid tester checks moisture content that affects braking.
For deeper insights, professional-grade tools are needed. Oscilloscopes analyze electrical signals, and transmission scanners read specific codes that generic OBD-II readers miss. Many auto parts stores offer free diagnostic scans, making professional tools accessible without purchase.
Understanding what diagnostic tool readings mean is key. Error codes give you a starting point, but you need to investigate further. For example, a P0300 code indicates random misfires, but you must test spark plugs, fuel injectors, and compression to find the cause.
Determining DIY vs Professional Repair Needs
Choosing between DIY repairs and professional service depends on safety risks, tools needed, and your skill level. Safety always comes first when deciding on repairs. Brake system work, suspension components, and steering repairs need a pro’s touch due to safety reasons.
Consider your tool availability and workspace needs. Simple tasks like oil changes and air filter replacements need basic tools. But, transmission work requires specialized equipment, lifts, and a lot of experience that most DIYers don’t have.
Money matters when deciding on repairs. Professional labor costs can be 200-300% more than parts. But, DIY mistakes can lead to even more expensive problems than the original issue.
Professional repair is needed when:
- Safety-critical systems need attention (brakes, steering, suspension)
- Warranty coverage depends on professional installation
- Specialized tools cost more than professional repair
- Complex diagnostics are beyond your experience level
- Time constraints make DIY impractical
Start with simple repairs to build confidence and skills. Oil changes, air filters, and basic maintenance are good learning experiences without big risks. As you gain experience, you can tackle more complex projects and know when to seek professional help for tough repairs.
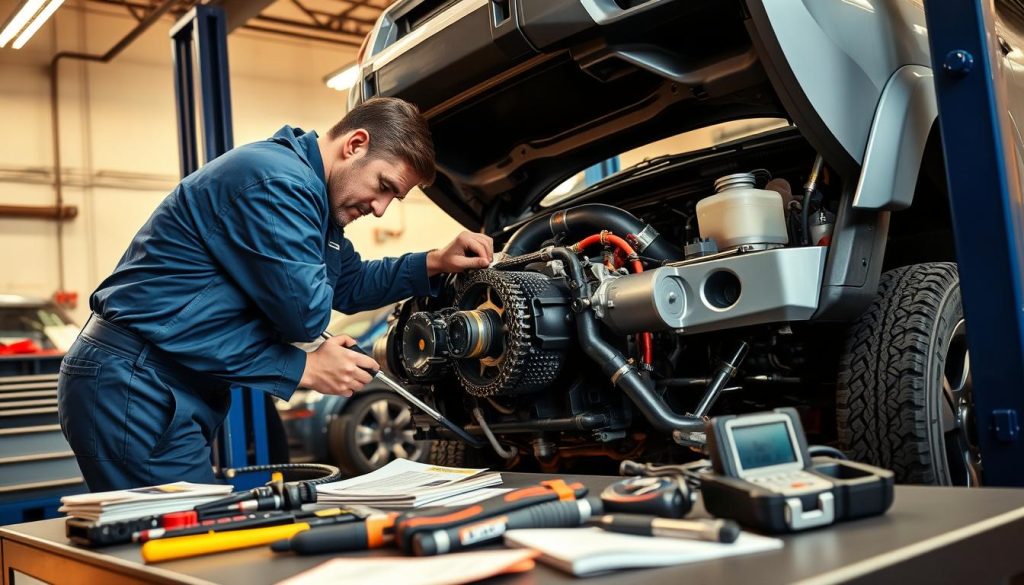
Fixing Engine Timing Chain Rattle Issues
If your Toyota 4Runner makes a rattling sound from the engine, it might have a timing chain problem. This 4Runner timing chain problems can cause serious engine damage if not fixed. The noise often starts when the engine is cold and gets worse over time.
It’s important to understand the timing chain system to diagnose issues. The timing chain links the crankshaft to the camshaft, ensuring valves open and close correctly. When it wears out, the chain rattles.
Diagnosing Timing Chain Noise
To tackle engine timing chain rattle, you need to diagnose it right. Start your 4Runner when it’s cold. Listen for a rattling or metallic sound from the engine’s front.
This 4Runner engine noise usually stops after 10-15 seconds. As oil pressure increases, the sound should fade. If the rattling doesn’t stop or gets louder during driving, the timing chain needs urgent attention.
Use an automotive stethoscope to find where the noise is coming from. Put the probe on the timing cover’s different spots. The loudest spot shows where the problem is, helping you focus your inspection.
| Noise Characteristics | Probable Cause | Urgency Level | Estimated Repair Cost |
|---|---|---|---|
| Cold start rattle (10-15 seconds) | Worn chain tensioner | Moderate | $400-$800 |
| Continuous rattling at idle | Stretched timing chain | High | $1,200-$2,000 |
| Rattling during acceleration | Failed chain guides | Critical | $1,500-$2,500 |
| Metallic grinding noise | Chain jumped timing | Emergency | $2,000-$4,000 |
Inspecting Chain Tensioners and Guides
To fix the issue, remove the timing chain cover. This means draining coolant and taking off engine parts. Take photos before you start to help with reassembly.
Check the chain tensioner for proper function. A good tensioner extends smoothly and keeps consistent pressure. Look for oil leaks, damaged seals, or a tensioner that can’t hold pressure.
Also, inspect the chain guides for wear or damage. These parts guide the chain’s movement. If they’re cracked, broken, or severely worn, the chain can whip around, causing noise and engine damage.
Use a timing chain checking tool to measure chain stretch. A stretched chain means the whole timing system is worn out. Replace the entire timing chain set if stretch exceeds manufacturer specifications.
Replacing Timing Chain Components
Start the Toyota timing chain repair by removing the old chain and parts. Mark the timing positions on the crankshaft and camshaft sprockets before removal. This ensures correct timing alignment during installation.
Install the new timing chain, tensioner, and guides as specified. Use a timing light or alignment marks to check the timing. Wrong timing can damage the engine or make it run poorly.
Apply thread locker to critical bolts and torque all fasteners to spec. Replace the timing cover gasket and any seals that were disturbed during the repair.
Safety Precautions and Required Tools
Working on timing chain systems needs specific safety steps and tools. Always disconnect the battery and let the engine cool before starting work. Never attempt this repair on a hot engine.
You’ll need a timing chain tensioner tool, torque wrench set, and engine support fixture. Also, basic hand tools, a gasket scraper, and fresh engine oil are necessary for the repair.
If you’re not experienced with timing systems, consider getting professional help. Wrong timing can destroy your engine, making the repair much more expensive than just replacing the timing chain.
Experienced mechanics can finish the repair in 6-10 hours. Add extra time for any unexpected issues or seized parts. Always use OEM or high-quality aftermarket parts for lasting repairs.
Resolving Head Gasket Failure Problems
Toyota 4Runner head gasket failure can cause serious engine damage. It’s a big problem for many 4Runner owners, mainly those with 3.0-liter V6 engines from 2003-2005 and 1990-1995. Head gasket repairs typically cost between $2,000 and $3,000, so catching it early is key to saving money.
The 3.0L V6 engine is known for head gasket issues, even after repairs. Knowing how to diagnose the problem is important before spending a lot on fixes. Acting fast can stop small leaks from turning into big engine problems.
Testing for Coolant and Oil Contamination
First signs of head gasket trouble include coolant and oil mixing. Check your oil dipstick for a milky or chocolate-colored oil. This means coolant is mixing with oil, harming your engine.
When the engine is cold, remove the radiator cap to check the coolant. Look for oil floating on top or brown, muddy coolant. Never open a hot engine’s radiator cap as it can cause burns.
Use a block tester kit to find combustion leaks. This kit changes color when it finds exhaust gases in the cooling system. This shows the head gasket has failed.
Checking Compression and Leak-Down Tests
Compression tests show if cylinders are sealing properly. Remove spark plugs and disable fuel before testing. Each cylinder should have similar compression, usually 140-180 PSI.
Low compression in nearby cylinders means head gasket trouble. But low compression in just one cylinder might be a valve issue. Keep track of all readings to see how well repairs work.
Leak-down tests give more details on cylinder sealing. This test fills each cylinder and measures pressure loss. Listen for air escaping to find the problem.
Head Gasket Replacement Process
Replacing a head gasket needs removing the cylinder head and special tools. Start by draining all fluids and taking off the intake manifold, exhaust manifolds, and timing components. Mark all electrical connections and vacuum lines for easy reassembly.
Remove cylinder head bolts in a specific pattern, from outside to center. Clean all surfaces well to avoid new gasket failure. Any damage to the head or block will ruin the new gasket.
Check the cylinder head for flatness with a straight edge and feeler gauges. If it’s warped, you’ll need professional machining. Install the new head gasket dry, unless the manufacturer says to use sealant.
Tighten cylinder head bolts in the right sequence and at the correct torque. Many 4Runner engines need angle torquing for the final tightening. Follow the exact torque specs to avoid crushing the gasket or not tightening enough.
When to Consider Engine Rebuild
Engine overheating often goes with head gasket failure and may mean deeper damage. If compression tests show low readings or big differences between cylinders, rebuilding might be better than just replacing the gasket.
Severe coolant contamination can harm bearings, pistons, and cylinder walls. Machine shops can check these parts during replacement to see if a rebuild is needed. Rebuilding can prevent repeated failures and ensure long-term reliability.
When deciding between gasket replacement and engine rebuild, consider all costs. A 4Runner coolant leak that has damaged the engine might make rebuilding more cost-effective than trying to fix it multiple times.
Transmission Shifting and Slipping Repairs
Toyota 4Runner transmission problems can happen from 1990 to 2016. They cause rough shifts and power loss. Faulty shift solenoids or throttle position sensors are usually the cause. Catching these issues early can save you a lot of money.
Transmission troubles often start with small issues like rough shifts or delayed engagement. If ignored, these problems can lead to complete failure. Luckily, you can diagnose these issues before they get worse.
Both A340E and A750E transmissions in different 4Runner models have common failure points. Knowing these weak spots helps you keep your vehicle in good shape. Prevention is always cheaper than replacement.
Diagnosing Transmission Fluid Issues
Start by checking the transmission fluid’s condition and level. Make sure the car is parked on level ground and the engine is warm. Pull the transmission dipstick while the engine is running and the transmission is in park.
Healthy transmission fluid is bright red and smells slightly sweet. If it’s dark brown or black, it means overheating and damage inside. A burnt smell means the clutch plates are wearing out and need attention right away.
Check the fluid level against the dipstick markings. Low fluid can cause Toyota transmission slipping and harsh shifts. Too much fluid can make the transmission foam, reducing hydraulic pressure and causing erratic behavior.
Look for metal particles or debris in the fluid. A little fine metal dust is okay in high-mileage vehicles. But large chunks or a lot of debris mean something inside is failing and needs a pro to check.
Testing Solenoid Function
Shift solenoids control the hydraulic pressure that engages transmission gears. They often fail in 4Runners, leading to specific shift problems. Use an OBD-II scanner to find transmission-related trouble codes.
Common solenoid codes include P0750, P0755, and P0760 series faults. These codes tell you which solenoid circuit has failed. Write down all codes before clearing them for accurate diagnosis.
4Runner shifting issues often come from stuck or failed solenoids. Test solenoid resistance with a multimeter set to ohms. Most Toyota solenoids should read between 11-15 ohms at room temperature.
Remove the transmission pan to get to the solenoids directly. Check the electrical connections for corrosion or damage. Clean them with electrical contact cleaner and apply dielectric grease to prevent corrosion.
Performing Transmission Service
Transmission service includes fluid and filter replacement, plus solenoid maintenance. Start by draining old fluid through the transmission pan drain plug. Some 4Runner models need the whole pan removed for access.
Replace the transmission filter and clean the pan well. Remove all old gasket material and put on a new pan gasket. Tighten pan bolts to the right torque in a crisscross pattern to avoid leaks.
Use the correct Toyota ATF for your model year. Most 4Runners use ATF Type T-IV or WS fluid. Never use generic transmission fluid as it causes shifting problems and damages components.
Change the transmission fluid every 30,000 miles for severe driving conditions. Normal driving can go up to 60,000 miles. But frequent towing or off-road use needs more frequent service.
After service, drive the vehicle through all gear ranges to circulate new fluid. Check the fluid level again after the transmission reaches operating temperature. Add more as needed to keep the levels right.
Warning Signs of Major Transmission Failure
Watch for these critical symptoms that mean your transmission is about to fail. Slipping gears under acceleration means worn-out clutches that can’t be fixed. You need a pro to fix this right away.
Complete loss of reverse or forward gears means major failure inside. Keep driving with these symptoms and you’ll damage expensive parts. Stop driving and get a pro to check it out right away.
Loud grinding or whining noises from the transmission mean bearing or gear damage. These sounds happen during shifts or when you accelerate. You’ll need a rebuild or replacement for this.
Transmission overheating causes fluid to burn and smells acrid. Keep an eye on your temperature gauge during heavy use. If you tow a lot or drive in mountains, get an auxiliary transmission cooler.
Suspension Component Replacement Guide
Your Toyota 4Runner’s suspension system faces a lot of wear from daily driving and off-road adventures. Over time, parts like ball joints, shock absorbers, and control arm bushings wear out and need to be replaced. 4Runner suspension problems often start small but can get worse if not checked regularly.
Second-generation 4Runners often have sagging suspension after a lot of miles. This can affect how the vehicle handles, tire life, and overall comfort. Knowing how to spot and replace worn parts helps keep your vehicle running well and saves money on repairs.
Step 1: Inspecting Ball Joints and Tie Rods
Begin by checking the ball joints for any play. Lift the front of your 4Runner and use jack stands to hold it up. Hold the tire at the 12 and 6 o’clock positions and try to rock it back and forth.
Any movement means the ball joints are worn and need to be replaced. You should feel no play in good joints. Next, check the tie rod ends by holding the tire at 3 and 9 o’clock positions and rocking it side to side.
Looking closely at the parts can also give you clues. Check for:
- Torn or cracked rubber boots
- Grease leaking from joints
- Excessive corrosion on metal components
- Loose or damaged mounting hardware
Ball joint replacement needs special tools and safety steps. If you find worn joints, it’s best to have a professional do the job unless you’re experienced with suspension work.
Step 2: Replacing Worn Shock Absorbers
Testing your 4Runner shock absorbers is key to knowing when to replace them. Push down on each corner of your vehicle and release. The suspension should return to normal without bouncing more than once.
Excessive bouncing means the shocks are worn and can’t control spring movement well. Look for fluid leaks around the shock body, which signal internal seal failure. Fresh oil streaks or wet spots mean you need to replace the shocks right away.
When replacing shocks, do one side at a time to keep the vehicle stable. Remove the upper mounting nut first, then disconnect the lower mounting bolt. Always use proper spring compression tools when working with coil springs.
New shock installation is the reverse of removal. Make sure to torque all fasteners to the manufacturer’s specs:
- Upper mounting nuts: 18-22 ft-lbs
- Lower mounting bolts: 65-75 ft-lbs
- Sway bar links: 25-30 ft-lbs
Step 3: Servicing Control Arm Bushings
Control arm bushings wear out over time, causing clunking noises and poor handling. Look for cracks, splits, or complete separation from their metal housings.
Worn bushings let control arm move too much, affecting wheel alignment and tire wear. You might notice steering wander or unusual road noise when bushings fail.
Replacing bushings often requires special tools for pressing out old parts and installing new ones. Some mechanics suggest replacing the entire control arm assembly, not just the bushings, on high-mileage vehicles.
Consider these factors when deciding on bushing service:
- Age and mileage of your 4Runner
- Cost difference between bushings and complete arms
- Labor time for each repair method
- Availability of quality replacement parts
Alignment Requirements After Repairs
After any suspension repair Toyota work, professional wheel alignment is a must. Replacing suspension parts changes the vehicle’s geometry and affects tire contact with the road.
Get your alignment done right after completing suspension repairs. Driving with improper alignment causes rapid tire wear and reduces handling precision. Most alignment shops can do the service in under an hour.
Proper alignment for your 4Runner includes specific camber, caster, and toe settings. These measurements ensure even tire wear and stable tracking on straight roads. Don’t skip this critical final step in suspension maintenance.
Regular suspension maintenance prevents many common 4Runner suspension problems from becoming expensive repairs. Following these inspection and replacement steps keeps your vehicle safe and comfortable for years of reliable service.
Electrical System Troubleshooting Steps
Toyota 4Runner electrical issues can be simple or complex. They range from battery failures to wiring malfunctions. These problems can hit many systems at once, making electrical troubleshooting key to keeping your vehicle running well. Models from the mid-2010s face unique issues, like infotainment glitches and wiring damage from rodents.
Using a step-by-step approach helps find problems fast. Begin with the basics like the battery and charging system. Then move on to more complex circuits. This method saves time and avoids replacing parts unnecessarily.
Testing Battery and Charging System
Testing the battery is the first step in fixing 4Runner electrical problems. A weak battery can mimic other electrical issues. Use a digital multimeter to check voltage at the battery terminals when the engine is off.
A fully charged battery should show 12.6 volts or higher. Less than 12.4 volts means it’s time to charge or replace the battery. Use a battery load tester to test under load, simulating driving conditions.
Check the charging system’s voltage with the engine running. The alternator should show 13.8 to 14.4 volts at idle. Lower voltages mean the alternator might need fixing, while too high can damage parts.
Look for corrosion and loose connections on battery terminals. Clean them with baking soda and water, then apply petroleum jelly to prevent corrosion. Clean, tight connections are essential for good electrical flow.
Diagnosing Window and Door Lock Issues
Window and door lock problems are common Toyota electrical issues in 4Runners. These issues often come from failed motors, worn switches, or damaged wiring. Start by testing each window and lock function separately.
Listen for motor sounds when using windows. A clicking sound without movement means the window regulator motor has failed. No sound at all points to electrical supply or switch problems.
Door lock actuators often fail in older 4Runners. Test locks with both interior switches and key fob controls. Intermittent operation means worn actuators, while complete failure suggests electrical faults.
Door wiring harnesses, where they flex between the door and body, are prone to damage. Look for broken wires or exposed copper conductors in these areas.
Fixing Dashboard Warning Lights
Dashboard warning lights are key for electrical troubleshooting. Modern 4Runners have advanced systems that detect failures and errors. Understanding these signals helps focus repairs.
Use an OBD-II scanner to get diagnostic trouble codes. Generic codes give basic info, while Toyota-specific scanners offer more details. Record all codes before clearing them to track intermittent issues.
Check engine lights often point to sensor failures or wiring issues. Common causes include oxygen sensor faults, mass airflow sensor problems, and loose connections. Fix these problems quickly to avoid engine damage.
ABS and traction control lights often light up due to wheel speed sensor problems. These sensors get dirty and need cleaning. Also, check wiring for damage or corrosion.
Common Wiring Problem Areas
Some areas of 4Runner wiring harnesses fail more often due to environmental and mechanical stress. The engine bay harness faces high temperatures and chemical exposure from fluids and road salt.
Mid-2010s models have soy-based wire insulation that attracts rodents. Mice and rats chew through these wires, causing short circuits. Regularly inspect wiring for bite marks and damaged insulation.
Door harnesses are another high-failure area due to constant flexing. Wires can break internally while looking fine. Use a multimeter to test continuity in suspected problem areas.
Ground connections can deteriorate over time, causing various electrical symptoms. Clean and tighten all ground points, focusing on engine and body ground straps. Poor grounds can affect many systems at once.
Brake System Maintenance and Repair
Toyota 4Runner brake problems are a big safety worry. Knowing how to maintain and repair brakes is key for owners. Models from 2013 to 2017 had major brake issues like complete failures and lock-ups.
From 2014 to 2017, many owners faced brake pedals sinking and master cylinder failures. The 2013 model year had unexpected brake lock-ups. So, regular brake system maintenance is vital for 4Runner owners.
Inspecting Brake Components
Start by checking the brake fluid level and color. If it’s dark or dirty, it might be contaminated or overheated. Clean fluid should be light amber or clear.
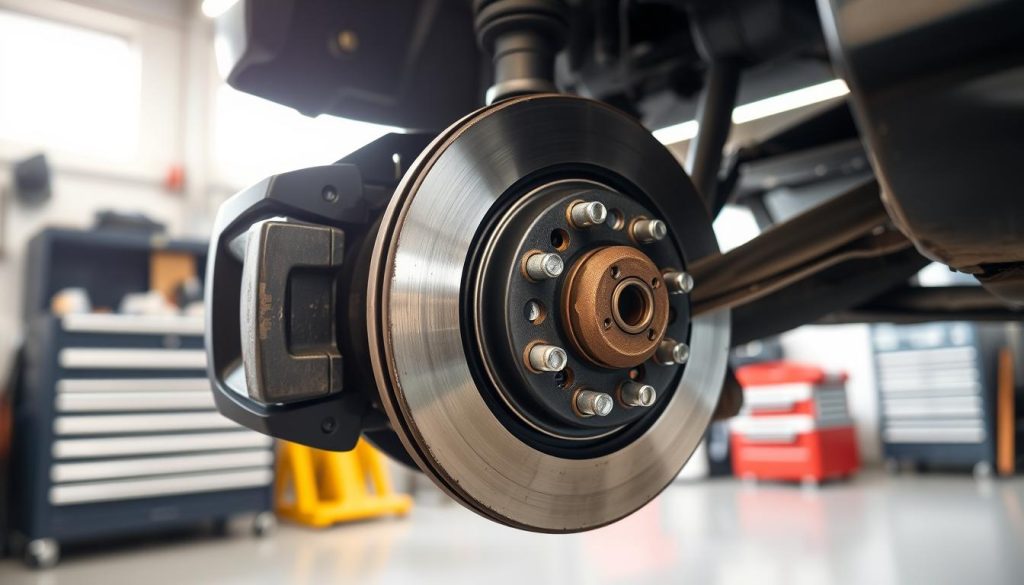
Remove each wheel to see the brake pads. Look for uneven wear that means alignment or caliper issues. Replace pads when they’re less than 3mm thick.
Use a micrometer to measure rotor thickness at different points. Compare these to the manufacturer’s specs. Look for signs of overheating like scoring, cracking, or blue discoloration.
| Component | Inspection Point | Warning Signs | Action Required |
|---|---|---|---|
| Brake Pads | Thickness measurement | Less than 3mm remaining | Immediate replacement |
| Brake Rotors | Surface condition | Deep scoring or cracking | Resurface or replace |
| Brake Fluid | Color and level | Dark brown or black fluid | Complete fluid change |
| Brake Lines | External condition | Corrosion or bulging | Line replacement |
Replacing Brake Pads and Rotors
Start brake pad replacement by securing the vehicle on jack stands. Never work under a vehicle on a jack alone. Use a C-clamp to compress the brake caliper piston before removing the old pads.
Remove the caliper bolts and lift the caliper off the rotor. Use wire to support the caliper to avoid brake line damage. Remove the old pads and check the caliper for leaks or damage.
Install new pads with the right shims and anti-squeal compound. Clean the rotor with brake cleaner before putting on the new pads. If you’re replacing rotors, make sure to tighten the wheel bolts correctly.
The bedding process is key for new brake parts. Drive at moderate speeds and gently apply the brakes several times. This helps transfer pad material to the rotor. Avoid heavy braking for the first 200 miles.
Servicing Brake Fluid System
Toyota brake repair often means replacing the brake fluid, which is common in older 4Runners. Start the bleeding process at the brake caliper farthest from the master cylinder, usually the rear passenger side.
Connect a clear tube to the bleeder valve and submerge the other end in clean brake fluid. Have someone pump the brake pedal while you open and close the bleeder valve. Keep going until clean fluid flows without air bubbles.
Keep an eye on the master cylinder reservoir during bleeding to prevent air from getting in. Never let the reservoir run dry as this will introduce air into the brake lines.
Test the brake pedal feel after bleeding. A spongy pedal means there’s air in the system. The pedal should feel firm and not sink when held under pressure.
Emergency Brake Adjustment Procedures
The emergency brake system needs regular adjustment to work right. Find the adjustment mechanism under the center console or near the rear brake assembly.
Engage the emergency brake lever three to five clicks and try to move the vehicle. If the rear wheels turn freely, the system needs adjustment. Tighten the adjustment nut gradually until the rear wheels drag slightly.
Release the emergency brake completely and make sure the rear wheels spin freely. Improper adjustment can cause brake drag and wear out rear brake parts too soon.
Replace emergency brake cables if they show fraying or corrosion. Use high-temperature brake grease on cable guides and pivot points during service.
Frame Rust Prevention and Treatment
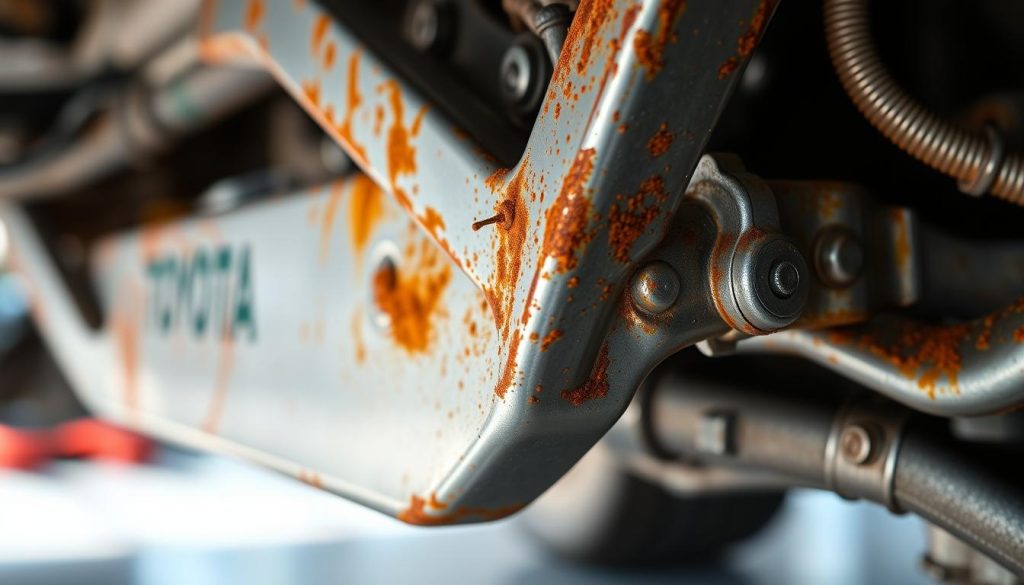
Learning how to fight 4Runner frame rust can save you a lot of money. The 2000 model year had 546 NHTSA complaints, with 177 about frame corrosion. So, preventing rust is key for every Toyota 4Runner owner.
Frame corrosion hits 4Runner models in different ways. The 2003-2005 models had the most rust problems, with 90 complaints. These complaints are the most common in the 4Runner’s history.
Salt, moisture, and the environment make frames rust faster. Your car’s underside faces constant attacks from road chemicals and weather. Taking steps to prevent rust keeps your car safe and valuable.
Identifying High-Risk Rust Areas
Frame rails are the most likely to rust on your 4Runner. These parts run along your car’s length and carry a lot of weight. Check both driver and passenger side rails during every check-up.
Cross members connecting the frame rails also rust early. These horizontal supports keep the frame strong. Look for signs of rust, like discoloration or flaking metal.
Suspension mounting points need extra attention. These areas get a lot of stress and moisture. Check where shock absorbers, control arms, and springs attach to the frame.
- Frame rail ends: Most susceptible to salt and moisture accumulation
- Rear axle housing mounts: High-stress areas prone to cracking
- Spare tire carrier brackets: Often overlooked but critical for safety
- Fuel tank mounting straps: Hidden areas that collect debris and moisture
Use good lighting and inspection mirrors to see hard-to-reach spots. A flashlight or work light helps find rust damage. Take photos to track any changes over time.
Treating Existing Rust Damage
Surface rust needs quick action to stop it from getting worse. Use wire brushes and sandpaper to remove it. Work carefully to remove all rust.
Chemical rust converters are another option for moderate damage. They turn rust into a protective coating. Always follow the instructions for the best results.
Deep rust damage might need a pro to fix. When rust goes through the metal, it’s a big problem. Don’t try to fix it yourself if it’s a safety issue.
- Clean the affected area: Remove dirt, grease, and loose debris thoroughly
- Sand or grind rust: Use appropriate tools to reach bare metal
- Apply primer: Use rust-inhibiting primer designed for automotive applications
- Paint protection: Apply matching paint or protective coating
Work in dry conditions for better adhesion. Moisture can ruin primer and paint. Let each layer dry fully before adding more.
Applying Protective Undercoating
Undercoating 4Runner vehicles helps prevent future rust. Professional-grade products last longer than DIY ones. Choose the right coating for your climate.
Rubberized undercoatings protect against moisture and debris. They stay flexible in extreme temperatures. Apply in thin, even coats for best results.
Wax-based undercoatings fill metal pores and crevices. They’re great for harsh winters. You might need to reapply depending on your driving and climate.
Preparation is key for undercoating success. Clean surfaces ensure better adhesion and protection. Remove all rust, dirt, and old coatings before applying new treatments.
- Temperature considerations: Apply coatings within manufacturer-specified temperature ranges
- Coverage patterns: Ensure complete coverage without excessive buildup
- Drying time: Allow proper curing before exposing to moisture or road conditions
- Equipment cleaning: Clean spray equipment immediately after use
Annual Inspection and Maintenance Schedule
Spring inspections show winter damage from salt and harsh weather. Schedule undercarriage checks after snow season ends. Document findings for future reference.
Fall preparations protect your vehicle for winter. Clean debris from frame areas and apply new treatments. Fix any rust found during summer.
Monthly checks help catch problems early. Look for new rust spots, coating damage, or discoloration. Early detection saves money.
| Season | Inspection Focus | Maintenance Tasks | Priority Level |
|---|---|---|---|
| Spring | Winter damage assessment | Wash undercarriage, treat new rust | High |
| Summer | General condition monitoring | Touch-up coatings, documentation | Medium |
| Fall | Pre-winter preparation | Apply protective treatments | High |
| Winter | Salt exposure monitoring | Regular washing, spot checks | Medium |
Professional inspections check for structural problems. Experts find issues you might miss. Get annual inspections or when selling your vehicle.
Good rust prevention takes effort and attention. Regular care is cheaper than big repairs or replacing your car. Keep your 4Runner safe with proactive care and quick action.
Air Conditioning System Repair Process
Air conditioning problems in Toyota 4Runners need careful diagnosis to find the root cause. The AC system has many parts that work together to cool the cabin. If any part fails, the whole system’s performance drops.
Most 4Runner AC problems come from refrigerant leaks, compressor failures, or electrical issues. Knowing these common problems helps you fix them step by step. This saves time and money by avoiding unnecessary part replacements.
Step 1: Diagnosing AC Performance Issues
Start your Toyota air conditioning repair by checking if the AC works. Turn it on and see if the compressor clutch engages. Listen for strange noises like grinding or squealing that mean mechanical issues.
Use manifold gauges to check system pressures. Normal pressures vary with temperature, but they should be between 25-45 PSI on the low side and 200-350 PSI on the high side. Abnormal pressure readings show specific problems.
Check the cabin air temperature with a digital thermometer. The AC should cool the air 15-20 degrees below the outside temperature. If it doesn’t cool enough, it might have low refrigerant or internal failures.
Look at the electrical connections to the compressor clutch, pressure switches, and control modules. Corroded or loose connections cause problems. Use a multimeter to check if the AC components get the right voltage.
Step 2: Recharging Refrigerant System
Before adding refrigerant, empty the system using a recovery machine. This removes moisture and contaminants that can harm AC parts. Never add refrigerant without first evacuating the system.
Check the owner’s manual for the correct refrigerant amount. Most Toyota 4Runners need 1.5-2.0 pounds of R-134a refrigerant. Adding too much refrigerant can damage the compressor and reduce cooling efficiency.
If you’ve replaced major components, add the right amount of PAG oil. The compressor needs proper lubrication to avoid seizing. Use only the oil type and amount recommended by the manufacturer.
Watch system pressures while adding refrigerant. Stop when pressures are in the normal range. Test the system at different RPMs to ensure it works well.
| AC System Component | Common Failure Signs | Typical Repair Cost | Prevention Method |
|---|---|---|---|
| Compressor | Loud grinding noise, no cooling | $800-1200 | Regular system operation |
| Evaporator | Sweet coolant smell, fogging | $600-900 | Replace cabin air filter |
| Condenser | Poor cooling at idle | $400-600 | Clean debris regularly |
| Expansion Valve | Icing, inconsistent cooling | $200-350 | Maintain proper refrigerant |
Step 3: Replacing Compressor and Components
Replacing the AC compressor requires evacuating the system and preparing components. Remove the serpentine belt and disconnect electrical connections before taking out the compressor.
Measure the oil in the old compressor by draining it. Add the same amount of fresh PAG oil to the new compressor. This ensures it’s properly lubricated without overfilling.
Replace the receiver-drier or accumulator whenever you open the refrigerant system. These parts contain desiccant that absorbs moisture and gets saturated during repairs. New desiccant prevents system contamination.
Install new O-rings on all refrigerant connections using the right sealant. Tighten all fittings to the manufacturer’s specifications to prevent leaks. Double-check all connections before evacuating the system.
Evacuate the system for at least 30 minutes to remove air and moisture. A proper vacuum should stay steady at 29+ inches of mercury. Any vacuum loss means there are leaks that need immediate attention.
Preventing Future AC Problems
Run your AC system monthly, even in winter, to keep it lubricated and seals conditioned. Regular use prevents compressor seizure and extends component life.
Replace the cabin air filter every 12,000-15,000 miles to ensure good airflow. A clogged filter restricts airflow, making the system work harder. This increases wear on components.
Keep the condenser clean by removing leaves, debris, and road salt buildup. Use a soft brush and low-pressure water to clean the fins carefully. Damaged fins reduce heat transfer efficiency.
Fix refrigerant leaks right away when you find them. Small leaks get worse over time and let moisture into the system. Moisture causes internal corrosion and expensive failures.
Have your AC serviced by a professional every two years to check its performance and catch problems early. Preventive maintenance is cheaper than fixing major problems and ensures reliable cooling.
Fuel System Cleaning and Repair
Your 4Runner’s fuel system is key to delivering clean fuel to your engine. But, when issues pop up, they need quick action. Toyota fuel system problems can lead to poor performance, lower fuel economy, and even engine failure if ignored.
Most 4Runner fuel system problems creep up over time. You might see rough idling, hesitation when accelerating, or trouble starting. These signs often point to dirty fuel, clogged filters, or failing fuel parts.
Step 1: Testing Fuel Pump and Pressure
Testing fuel pressure is the first step in diagnosing fuel system issues. Your 4Runner needs specific pressure levels to run right. Any changes suggest pump failure or system blockages.
Begin by attaching a fuel pressure gauge to your fuel rail’s test port. Most Toyotas need 38-44 PSI at idle without the vacuum line. Always follow safety procedures when working with fuel systems to avoid fires or injuries.
Listen for the fuel pump when turning the key to “on”. A bad pump might make odd noises or not prime the system. If pressure is off, fuel pump replacement is needed to fix fuel delivery.
Step 2: Cleaning Fuel Injectors
Dirty fuel injectors lead to uneven fuel distribution. This causes rough idle, misfires, and poor acceleration. Fuel injector cleaning can greatly improve engine performance by restoring proper spray patterns.
Ultrasonic cleaning is the most effective for heavily soiled injectors. But, cleaning on-car with special tools is cheaper for moderate buildup. This method connects cleaning gear directly to the fuel rail.
Consider removing injectors for bench testing if cleaning doesn’t help. This lets you check flow rates and spray patterns. Replace any injectors with big flow rate or spray pattern issues.
Step 3: Replacing Fuel Filter and Components
Regular fuel filter changes stop contamination from reaching your engine’s fuel system. Most 4Runners have both an external filter and an in-tank strainer that need regular checks.
The external fuel filter is usually found along the frame rail or near the fuel tank. Replace it every 30,000-50,000 miles, depending on fuel quality and driving conditions. Always relieve fuel system pressure before disconnecting any fuel lines.
Don’t forget the in-tank fuel strainer during fuel pump replacement. This fine mesh screen keeps debris out but can get clogged, causing fuel starvation symptoms.
Fuel Quality and Additive Recommendations
Using high-quality fuel and additives helps prevent future issues. Top-tier gasoline has detergent packages that keep injectors clean during normal use.
Adding fuel system cleaners every 3,000-5,000 miles keeps your 4Runner running well. Choose products made for Toyota vehicles to avoid damaging your fuel system.
| Component | Replacement Interval | Symptoms of Failure | Repair Cost Range |
|---|---|---|---|
| Fuel Pump | 100,000-150,000 miles | No start, low pressure, noise | $400-$800 |
| Fuel Filter | 30,000-50,000 miles | Poor acceleration, stalling | $50-$150 |
| Fuel Injectors | 80,000-120,000 miles | Rough idle, misfires, poor MPG | $300-$600 |
| Fuel Rail | As needed | Fuel leaks, pressure loss | $200-$400 |
Regular maintenance and choosing quality fuel extend the life of fuel system parts. Fixing problems early saves money and keeps your 4Runner running smoothly for years.
Exhaust System Inspection and Repair
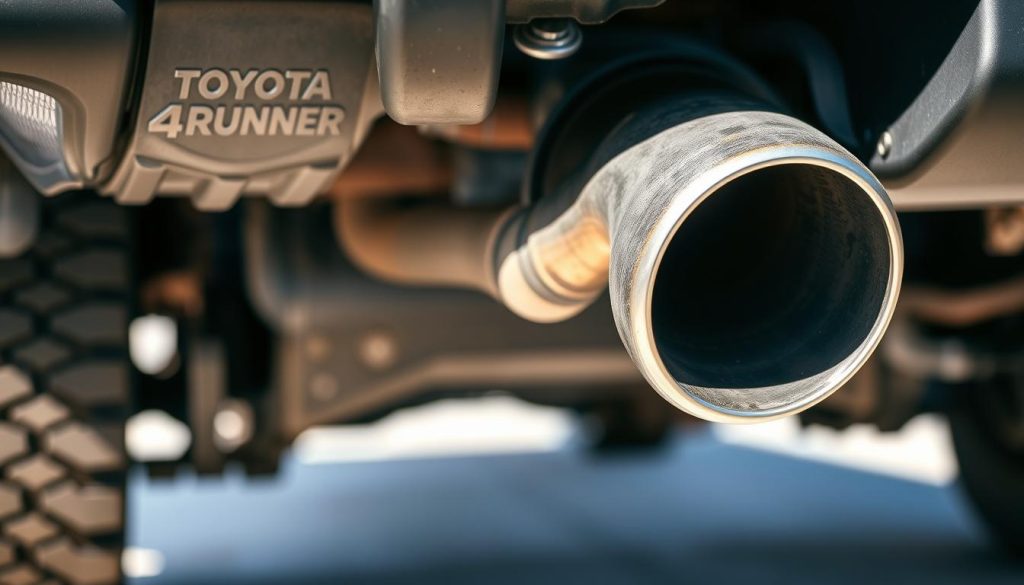
Problems with the exhaust system can hurt your 4Runner’s performance and safety. 4Runner exhaust problems can make your car less fuel-efficient, affect engine performance, and not meet emissions standards. Leaks in the exhaust can also be dangerous, releasing carbon monoxide that’s harmful to you and your passengers.
Regular checks can catch issues early, saving you money on repairs. The exhaust system runs from the engine to the tailpipe. Each part is important for removing harmful gases and reducing noise.
Step 1: Locating Exhaust Leaks
Start by looking for obvious damage like rust, cracks, or loose connections. Check from the exhaust manifold to the tailpipe. Look for black soot around joints and connections.
To find small leaks, use a soap solution. Mix dish soap with water in a spray bottle. Spray it on exhaust joints while the engine is running. Bubbles show where leaks are and need fixing.
Listen for strange sounds when the engine is on. Hissing or popping means you might need exhaust leak repair. Rev the engine gently and listen near the suspected area. Make sure the vehicle is supported and the engine is cool during inspection.
Step 2: Replacing Catalytic Converter
Signs of a failing catalytic converter include poor acceleration, sulfur smells, or failing emissions tests. Use a backpressure gauge to check for blockages. If readings are too high, it’s time for a new converter.
Check oxygen sensor readings to see if the converter is working. Use an OBD scanner to monitor sensor voltages. Catalytic converter replacement is needed if sensors show the same reading, meaning the converter isn’t working.
Getting a professional to install the new converter is best. It needs about 500 miles to break in. Avoid hard driving during this time to let the catalyst work right.
Step 3: Repairing Muffler and Pipe Damage
For small holes and cracks, use exhaust paste as a temporary fix. Clean the area well before applying the paste. This gives you time to plan a more permanent fix.
Exhaust clamps can also fix loose connections temporarily. Choose clamps that fit your pipe size well. Proper clamp installation prevents further damage to other parts.
For lasting fixes, you might need to replace pipes or get professional welding. Muffler replacement means removing the old one and putting in a new, direct-fit one. Always use parts that meet or exceed the original equipment’s standards.
Emissions Testing Considerations
To pass emissions tests, all exhaust parts must work right. Replace any damaged parts before your test. Failed tests mean costly re-inspections and possible registration problems.
After repairs, let the engine computer finish its readiness monitors. Most states require these monitors to be ready before passing emissions tests. Plan your repairs well before your registration renewal.
Interior Component Repair Solutions
Many 4Runner interior problems include dashboard cracks, faulty door handles, and power seat malfunctions. These issues can make driving uncomfortable and even unsafe. The 2004 model year was hit hard by dashboard damage from sunlight.
Fixing these problems needs patience and the right tools. Most 4Runner interior problems can be fixed with basic skills and the right advice. Knowing how each part works helps decide if you need a pro.
Step 1: Fixing Power Seat Motor Issues
Power seat repair starts with finding the source of the problem. Listen for grinding or clicking sounds when using the seat controls. These sounds often mean the motor or tracks are faulty.
First, check the seat fuse in your fuse box. A blown fuse is a common cause of seat problems. If the fuse is fine, use a multimeter to test the motor’s electrical connections.
Take out the seat to safely work on the motor. Make sure to disconnect the battery before starting any electrical work. The motor bolts to the seat frame with four bolts that need a socket wrench to remove.
- Test motor operation by applying direct 12-volt power
- Clean track debris and lubricate moving parts
- Replace worn motor brushes if accessible
- Install new motor if internal components are damaged
Step 2: Repairing Dashboard Cracks
Dashboard cracks in 2004 Toyota 4Runners were common due to UV damage. These cracks can make the dashboard sticky and affect airbag deployment. Fixing them quickly is important for safety.
Clean the cracked area well with mild soap and water before fixing it. Let it dry completely. Small cracks can be filled with special dashboard repair compounds found at auto parts stores.
For big dashboard cracks, you might need a pro or a dashboard cover. Temporary fixes include:
- Apply dashboard repair paste to fill cracks
- Sand smooth once paste cures completely
- Use texture spray to match original finish
- Apply UV protectant to prevent future damage
“Dashboard replacement costs between $800-1,500, while quality covers range from $150-300 and provide excellent protection against further sun damage.”
Step 3: Replacing Door Handles and Locks
Door handle replacement fixes both interior and exterior problems in older 4Runners. The 2014 models had issues with electronic door locks. Start by removing the door panel to get to the parts inside.
To replace the interior handle, remove the door panel clips and screws around the armrest. Be careful not to break the plastic clips that hold the panel. Keep all fasteners in a small container.
For exterior door handle replacement, access the handle through the door panel opening. Disconnect the lock rod and handle cable before taking out the handle assembly. Test the new handle before putting everything back together.
- Remove door panel carefully to avoid damage
- Disconnect electrical connections for power locks
- Replace worn handle springs and cables
- Lubricate lock mechanisms during reassembly
Upholstery and Trim Restoration Tips
Restoring fabric and vinyl can make your 4Runner’s interior last longer. Sun damage causes fading and cracking, affecting looks and comfort. Regular cleaning and conditioning help prevent early wear.
Choose the right cleaner for your upholstery type. Leather cleaners are different from those for fabric or vinyl. Always test cleaning products in a hidden area first.
Apply protectant products after cleaning to protect against UV damage. Window tinting helps keep the interior cool and prevents damage to upholstery. Consider seat covers for high-wear areas to keep the original materials in good shape.
Toyota 4Runner Problems by Generation
Toyota 4Runner reliability varies by generation. Some years are very durable, while others can be costly to fix. Knowing about 4Runner generation problems helps owners keep their vehicles in good shape. It also helps buyers choose the best model years.
Some Toyota 4Runner years to avoid can save you a lot of money on repairs. Certain years have specific issues, while others are reliable. This breakdown helps you make smart choices.
Third Generation Common Issues (1996-2002)
The third generation 4Runner brought big improvements but had its own challenges. Early models from 1996-1999 sometimes had head gasket problems. But, these were less severe than before.
The 2000 model year was very problematic. It had 546 NHTSA complaints, mostly about engine and electrical issues. Many owners faced premature timing chain wear and transmission problems.
Frame rust was a big issue for 2001-2002 models. They had poor undercoating, leading to severe rust in salt areas. This rust made many vehicles unsafe to drive within 10-15 years.
“The 2001-2002 4Runner frame rust issue represents one of the most significant reliability problems in Toyota’s SUV history, affecting thousands of vehicles across northern states.”
Fourth Generation Problem Areas (2003-2009)
The fourth generation had the most 4Runner generation problems. The 2003-2005 years were the worst. They had severe frame rust and head gasket failures.
Head gasket issues were common in early fourth-generation engines, like the 2003 4.0L V6. Many owners faced coolant loss, overheating, and engine damage. Repair costs often exceeded the vehicle’s value.
Frame rust got worse in 2003-2005 models. Toyota recalled and extended warranties for these years. But, many vehicles were already damaged.
Later fourth-generation years (2006-2009) were better. They fixed head gasket issues and had better rust protection. The 2007-2009 years are among the most reliable.
Fifth Generation Known Concerns (2010-Present)
The current fifth generation is much more reliable. Most 4Runner model year issues are minor. But, some years need careful consideration.
The 2013 model year had quality control problems. It had six 4Runner recalls, including airbag and engine oil issues. Many owners faced premature engine wear and expensive repairs.
Recent years have been very reliable. The 2014-2021 models have few major problems. But, the 2022 model had airbag issues that led to recalls.
Model Year Specific Recalls and TSBs
Knowing about recall history helps spot problem areas. 4Runner recalls have covered many issues, from safety to minor problems. Technical Service Bulletins (TSBs) offer insights into common repairs and solutions.
| Generation | Years to Avoid | Primary Issues | Recall Count | Reliability Rating |
|---|---|---|---|---|
| Third (1996-2002) | 2000-2002 | Frame rust, head gaskets | 8 major recalls | Below Average |
| Fourth (2003-2009) | 2003-2005 | Frame rust, head gaskets | 12 major recalls | Poor |
| Fifth (2010-Present) | 2013 | Airbag, oil consumption | 6 major recalls | Above Average |
The most serious recalls were about frame and engine issues. Toyota replaced many frames, but repairs took months. Recent recalls focus on airbags and electronics.
TSBs offer maintenance tips for each generation. They cover issues like transmission, air conditioning, and interior wear. Following TSBs can prevent costly repairs.
Creating a Preventive Maintenance Schedule
Smart 4Runner owners know that regular maintenance stops expensive problems. A good 4Runner maintenance schedule tackles known issues before they get worse. This saves money and keeps your vehicle running well for a long time.
Effective Toyota preventive maintenance needs consistency and detail. Your schedule should include monthly checks, seasonal tasks, and services based on mileage. Each part is key to avoiding costly failures.
Step 1: Establishing Monthly Inspection Routine
Start with a monthly check to keep your vehicle in top shape. Check engine oil, coolant, brake fluid, and power steering fluid levels. Low levels often mean leaks that need fixing right away.
Look at your tires for wear and pressure. Uneven wear means alignment or suspension issues. Also, check for damage like cracks in belts and hoses.
Make a simple maintenance checklist with:
- Fluid level inspection
- Tire condition and pressure check
- Battery terminal cleaning
- Visual leak inspection
- Light and electrical system test
Step 2: Planning Seasonal Maintenance Tasks
Seasonal maintenance tackles challenges your 4Runner faces. Winter preparation includes battery tests, coolant checks, and undercarriage cleaning to avoid salt damage.
Spring maintenance washes away winter’s corrosive effects. Clean your undercarriage and check for rust. Summer involves air conditioning and cooling system checks.
Fall tasks prepare for cold weather. Check your heating system, inspect weatherstripping, and ensure your battery handles cold.
Step 3: Setting Mileage-Based Service Intervals
4Runner service intervals follow the manufacturer’s advice but adjust for your driving. Frequent towing or dusty areas need more service.
Oil changes are every 5,000-10,000 miles, depending on the oil. Transmission fluid changes are every 60,000-100,000 miles. Timing belt replacement is around 90,000-100,000 miles for some models.
Major services at 30,000, 60,000, and 90,000 miles check many systems at once. These checkups catch problems early.
Record Keeping and Documentation
Keeping detailed maintenance records is key for warranty claims and resale value. Document every service with dates, mileage, and parts used. Digital apps or spreadsheets are good for tracking.
Save receipts for all parts and services. This proves maintenance history to buyers. Consistent record keeping also helps you stay on track and avoid missed services.
Cost-Effective Repair Planning Strategies
Smart budgeting helps 4Runner owners deal with expensive repairs without overspending. Repairs like head gasket replacements can cost $2,000 to $3,000. Frame rust repairs might even cost over $10,000. It’s key to plan wisely, knowing what repairs are most important, finding good deals on parts, and deciding if you should do it yourself or hire a pro.
Planning ahead can stop small problems from turning into big, expensive ones. Toyota 4Runner owners who plan save a lot of money. They understand their vehicle’s needs and budget for repairs now and in the future.
Step 1: Prioritizing Repairs by Safety and Cost
First, fix safety-critical repairs no matter the cost. Issues like brake failures, steering problems, and suspension issues need quick attention. These repairs keep you safe and prevent accidents that could cost a lot more.
Then, focus on repairs that prevent more damage. A failing water pump might seem less urgent than cosmetic issues. But ignoring it can lead to engine overheating and expensive head gasket problems. Prevention often costs less than cure in car repairs.
Make a repair plan that balances urgency and your budget. Non-critical items like minor interior wear or small cosmetic damage can wait. This way, you manage repair costs without risking safety or reliability.
“The biggest mistake I see owners make is putting off small repairs that turn into big problems. A $200 repair today often prevents a $2,000 repair tomorrow.”
Step 2: Sourcing Quality Replacement Parts
Finding the right parts can save a lot of money. OEM parts are the best but cost more. They offer a 20-30% price difference compared to aftermarket parts but come with a warranty.
Aftermarket parts are a good value for many repairs. Brands like Beck Arnley, Febi, and Gates make parts that meet OEM standards but are cheaper. Always check reviews and warranty terms before buying.
Online stores often have better prices on parts. Compare prices, including shipping and return policies. Local auto parts stores might match online prices and offer immediate help and advice.
Salvage yards are a cost-effective option for some parts, like body panels and interior parts. Make sure to inspect used parts for damage before buying. This is a good choice for older 4Runners where new parts are hard to find.
Step 3: Choosing Between DIY and Professional Service
DIY repairs can save a lot of money if done right. Simple tasks like oil changes and brake pad installation save hundreds each year. These jobs need basic tools and a bit of knowledge.
Be honest about your skills before tackling complex repairs. Jobs like engine timing chain replacement need special tools and expertise. Mistakes can cost more than the original repair. Know your limits to avoid expensive mistakes.
Consider buying parts yourself but have a pro install them. This cuts down on labor costs while ensuring parts are installed correctly. Many shops accept customer parts, but warranty coverage might only cover labor.
Don’t forget about tool costs when doing DIY repairs. Special tools for one-time repairs might not be worth it. But tools used often or for maintenance can save money in the long run.
Warranty and Insurance Considerations
Extended warranties can protect against high repair costs, mainly for high-mileage vehicles. Check warranty terms for coverage limits, deductibles, and what’s excluded. Some warranties cover specific parts, while others offer more complete protection.
Insurance covers damage from accidents but rarely for mechanical failures or wear and tear. But, it might cover damage from environmental factors like hail. Always review your policy to know what’s covered.
Recall campaigns offer free repairs for safety issues found by Toyota. Stay updated on recalls for your model year and VIN. These repairs fix known problems without cost, saving thousands.
Keep records of all repairs and maintenance with receipts and photos. This supports warranty claims, tracks maintenance, and boosts resale value. Proper records show you’re a responsible owner and can prevent disputes over coverage.
Conclusion
Knowing about common problems helps you manage your 4Runner ownership. The 4Runner’s reliability is well-known if you’re aware and fix issues early.
Good Toyota SUV maintenance means spotting warning signs early. Checking timing chains, head gaskets, and suspension parts regularly saves money. Being proactive helps your vehicle last longer.
Each 4Runner generation has its own issues, but with the right knowledge, you can make smart choices. Whether you’re buying used or keeping your current SUV, these tips help avoid big expenses.
It’s important to weigh repair costs against your vehicle’s value. Some repairs are worth it, while others mean it’s time to get a new one. A regular maintenance schedule prevents big problems.
Your 4Runner can last for decades with the right care. Investing in regular maintenance and timely repairs boosts its reliability and resale value. With the right approach, these SUVs are great for adventures and daily driving.
FAQ
What are the most common Toyota 4Runner problems across all generations?
Common issues include a timing chain rattle, head gasket failure, and transmission problems. Suspension wear and frame rust are also common. Electrical issues like dashboard lights are frequent. The fourth-generation models (2003-2009) face the most challenges.
How can I identify early warning signs of Toyota 4Runner problems?
Look for unusual noises, dashboard lights, and performance changes. Fluid leaks and vibrations are also signs. An OBD-II scanner can spot trouble codes early, helping with repairs.
Which Toyota 4Runner model years should I avoid due to known problems?
Avoid 2003-2005 models for frame rust and head gasket issues. The 2000 model had 546 NHTSA complaints. The 2013 model had recalls, and 2022 models had airbag issues. Third-generation models had early head gasket problems, while fifth-generation models are more reliable.
How much does it cost to fix a Toyota 4Runner head gasket failure?
Replacing a head gasket costs ,000-,000. The 3.0L V6 engine is often affected. The repair involves removing the cylinder head and installing a new one. Additional engine work may be needed, increasing costs.
What causes timing chain rattle in Toyota 4Runners?
Worn chain tensioners, stretched chains, or damaged guides cause timing chain rattle. This is more noticeable in cold starts. Both 2.7L and 4.0L engines can be affected. Ignoring this can damage the engine, so early repair is key.
How do I prevent frame rust on my Toyota 4Runner?
Clean the undercarriage regularly, and apply undercoating. Inspect the frame seasonally. Use rust converters on early rust spots and ensure proper drainage to prevent water buildup.
What are the signs of Toyota 4Runner transmission problems?
Look for rough shifting, delayed engagement, slipping, or unusual noises. Burnt-smelling fluid, leaks, or contaminated fluid are also signs. Solenoid failures can cause erratic shifting. Early diagnosis can prevent total failure.
How often should I service my Toyota 4Runner to prevent major problems?
Check fluids, tires, and for leaks monthly. Clean the undercarriage seasonally and check the battery. Follow oil change and transmission fluid replacement intervals. Document maintenance for warranty claims and resale value.
Can I diagnose Toyota 4Runner problems myself or do I need a professional?
Basic diagnostics like fluid checks and visual inspections are DIY-friendly. But, complex issues like engine timing or transmission problems need a professional. Consider your skills and safety when deciding to DIY or seek professional help.
What should I look for when buying a used Toyota 4Runner?
Check for frame rust, head gasket issues, and transmission operation. Test for timing chain rattle during cold starts. Review maintenance records and recall history to understand the vehicle’s history.
Are Toyota 4Runner electrical problems expensive to fix?
Costs vary by problem. Simple issues like battery replacement are cheap, but complex wiring problems can be expensive. Mid-2010s models with soy-based wiring may need extensive repairs. Proper diagnosis is key to avoid unnecessary costs.
How do I know if my Toyota 4Runner’s catalytic converter needs replacement?
Look for reduced engine performance, failed emissions tests, or a sulfur smell. Test using backpressure testing and emissions analysis. Replacement requires proper installation for optimal performance and emissions.

