Toyota Oxygen Sensor Problems: Causes and Fixes
Modern cars use advanced monitoring systems to run smoothly and efficiently. These systems track air-fuel mixtures and emissions control. They are key to your car’s performance.
When these parts fail, you’ll see immediate warning signs. Your dashboard lights might turn on without reason. You might also notice your car uses more gas or idles roughly.
Knowing about these problems lets you act fast. Proper diagnosis can stop small issues from becoming big, expensive problems. Many people ignore early signs until they fail emissions tests.
This guide will help you spot, diagnose, and fix common issues. We’ll cover everything from recognizing warning signs to replacing oxygen sensors. Professional-grade solutions and OEM parts ensure your car runs like new again.
Key Takeaways
- Dashboard warning lights often indicate failing monitoring components in your engine system
- Poor fuel economy and rough idling are common symptoms of malfunctioning air-fuel mixture sensors
- Early diagnosis prevents minor issues from escalating into costly engine repairs
- OEM replacement parts provide the same quality and reliability as original factory components
- Proper maintenance of emissions control systems helps your vehicle pass inspection tests
- Professional diagnostic tools can pinpoint exact component failures before replacement
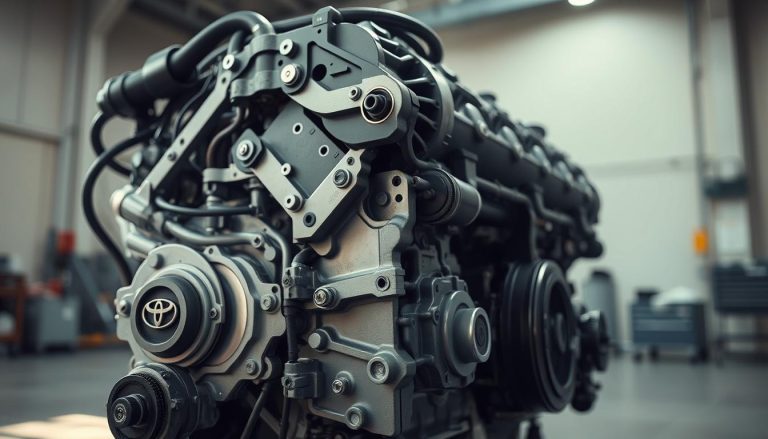
Understanding Oxygen Sensors in Toyota Vehicles
Oxygen sensors in Toyota vehicles are like smart monitors that check the air-fuel mix. They measure oxygen in exhaust gases to keep your engine running well. Knowing how they work helps you spot O2 sensor symptoms early.
Your Toyota’s engine burns air and fuel in the right mix in each cylinder. The perfect mix is just right for complete burning. If the mix is off, your engine might run too rich or too lean.
The oxygen sensor checks if the mix is balanced by comparing exhaust gas oxygen to air. It sends signals to your Powertrain Control Module (PCM). The PCM then adjusts fuel to keep your engine running well and reduce emissions.
Most Toyota oxygen sensors give voltage readings between 0.1 and 0.9 volts. Here’s what these readings mean:
- Voltage above 0.45 volts means too much fuel
- Voltage below 0.45 volts means too little fuel
- Fast voltage changes mean the sensor is working well
Toyota cars have several oxygen sensors, some before and some after the catalytic converter. The ones before check the air-fuel mix, and the ones after check the converter’s work. Knowing O2 sensor symptoms helps you know when to check these sensors.
If oxygen sensors fail, they can’t send the right signals to your PCM. This can cause bad fuel economy, more emissions, and engine damage if not fixed.
Most Common Toyota Oxygen Sensor Problems
Knowing why Toyota oxygen sensors fail helps avoid expensive fixes and keeps your car running well. These sensors face tough conditions that lead to predictable failures. Toyota sensor diagnosis is simpler when you know what to look for.
Most issues with oxygen sensors fall into three main groups. Each group needs different fixes and ways to prevent problems.
Contamination and Fouling
Fuel or engine oil leaks are the top causes of sensor problems. When silicone, coolant, or fuel additives get into the exhaust, they cover the sensor tip. This blocks accurate readings.
Carbon buildup occurs when engines run too rich for too long. The black soot prevents the sensor from working right. Rich fuel mixtures often come from bad injectors or air intake issues.

Electrical Connection Failures
Many sensor failures are caused by wiring issues. Over time, engine vibrations and temperature changes loosen connectors. Road salt and moisture cause corrosion that disrupts signals.
Damaged wires often happen near the exhaust manifold due to heat. Toyota sensor diagnosis should check all electrical connections before replacing sensors.
Age-Related Sensor Degradation
All oxygen sensors wear out over time. High temperatures and pressure changes stress them. As they wear, their response time slows down.
Most Toyota oxygen sensors last 60,000 to 100,000 miles under normal use. Severe driving conditions shorten this lifespan a lot.
| Problem Type | Common Causes | Typical Symptoms | Prevention Methods |
|---|---|---|---|
| Contamination | Oil leaks, bad fuel additives, carbon buildup | Poor fuel economy, rough idle | Fix leaks promptly, use quality fuel |
| Electrical Failure | Loose connectors, damaged wiring, corrosion | Check engine light, intermittent problems | Regular connector inspection, protect from moisture |
| Age Degradation | Heat cycles, normal wear, time | Slow response, gradual performance loss | Follow maintenance schedule, monitor performance |
Spotting these common problems early saves money and prevents engine damage. Toyota sensor diagnosis is easier when you know these failure patterns.
Identifying Symptoms of Failing Oxygen Sensors
Faulty oxygen sensors in your Toyota show several signs. These signs help you catch problems early. This can save you money on repairs.
Check Engine Light and Error Codes
The check engine light is the first sign of a problem. Your Toyota’s computer checks the exhaust system. If sensors give wrong readings, the light comes on.
Modern Toyotas show specific error codes. These codes tell mechanics which sensor is bad. Quick diagnosis prevents engine damage and keeps your car running well.
Poor Fuel Economy and Performance Issues
Failing oxygen sensors make your Toyota use more fuel. You’ll go to the gas station more often. The engine can’t adjust fuel injection without good sensor data.
Performance problems include hesitation during acceleration and less power when going uphill. Your Toyota might not speed up on the highway or feel slow. These problems get worse as the sensors get worse.
Rough Idling and Stalling
Bad oxygen sensors cause engine problems at low speeds. Your Toyota might shake or vibrate at traffic lights. The engine has trouble burning fuel without good sensor data.
You might smell sulfur or rotten eggs from your tailpipe. Dark smoke or soot on your rear bumper means fuel mixture problems. These signs often mean your engine is idling badly.
| Symptom | Severity Level | Immediate Action | Potential Damage |
|---|---|---|---|
| Check Engine Light | Moderate | Read diagnostic codes | Engine efficiency loss |
| Poor Fuel Economy | Moderate | Monitor fuel consumption | Increased operating costs |
| Rough Idling | High | Schedule immediate repair | Engine misfires |
| Dark Exhaust Smoke | High | Stop driving immediately | Catalytic converter damage |
Essential Tools for Toyota Oxygen Sensor Diagnosis and Repair
Quality tools and diagnostic equipment are key for fixing oxygen sensors. They help find problems accurately and safely. This prevents expensive mistakes.
Experts use the right tools to tell real sensor failures from other engine issues. This saves time and gives reliable results.

Diagnostic Equipment and Code Readers
An OBD-II code reader is your main tool for finding error codes when the check engine light comes on. Basic readers give you fault codes. Advanced tools show real-time data.
Top-notch scan tools show oxygen sensor voltage, response times, and patterns. They help you confirm actual sensor failure or other engine problems like vacuum leaks or fuel pressure issues.
Real-time sensor data shows if readings are off, proving sensor malfunction.
Hand Tools and Socket Sets
Specialized oxygen sensor sockets with wire cutouts make removal easier than regular sockets. They fit the sensor wiring and grip the housing well.
You’ll also need standard socket sets, combination wrenches, and needle-nose pliers for electrical work. Tools for removing oxygen sensors help with stuck or corroded ones.
Safety Equipment and Supplies
Safety glasses and heat-resistant gloves protect you from hot exhaust parts. Jack stands keep the vehicle safe while you work underneath.
Have quality replacement sensors, electrical contact cleaner, and anti-seize compound ready. Good ventilation is key when using penetrating oils or chemicals.
Step 1: Reading and Interpreting Diagnostic Trouble Codes
Before you replace any oxygen sensor, you need to understand the diagnostic codes stored in your Toyota’s computer. This step is key to avoid unnecessary repairs and save money. When the check engine light comes on, it means your car’s computer has found a problem and saved specific codes for you to follow.
Getting a professional to diagnose the issue is important. Many parts can affect fuel economy and show similar error codes. For example, a bad mass airflow sensor, vacuum leak, or fuel pressure issue can look like an oxygen sensor problem.
Connecting Your OBD-II Scanner
First, find your Toyota’s diagnostic port under the dashboard, near your left knee or in the center console. Make sure your engine is off before you plug in the scanner. Push the OBD-II connector into the port until it clicks.
Turn your ignition to the “ON” position without starting the engine. Most scanners will talk to your car’s computer right away. Wait for it to connect before you read the codes.
Understanding Common Toyota O2 Sensor Codes
Toyota oxygen sensor codes follow a pattern to show where the problem is. P0130, P0131, and P0132 mean Bank 1, Sensor 1 issues, which is before the catalytic converter. Codes P0136, P0137, and P0138 are for Bank 1, Sensor 2, which is after the catalytic converter.
Codes in the P0150 range tell you about Bank 2 sensor problems on V6 and V8 engines. Each code gives details about circuit issues, slow responses, or voltage problems that can hurt fuel economy and performance.
Determining Which Sensor Has Failed
Knowing your Toyota’s sensor layout helps find the exact problem. Bank 1 is always on the left, and Bank 2 is on the right for multi-bank engines. Sensor 1 is upstream, and Sensor 2 is downstream.
But don’t replace the sensor just because of the codes. Other issues like exhaust leaks, fuel system problems, or vacuum leaks can also cause false codes. Professional diagnosis is needed to tell if the sensor is really bad or if there’s another problem causing the codes.
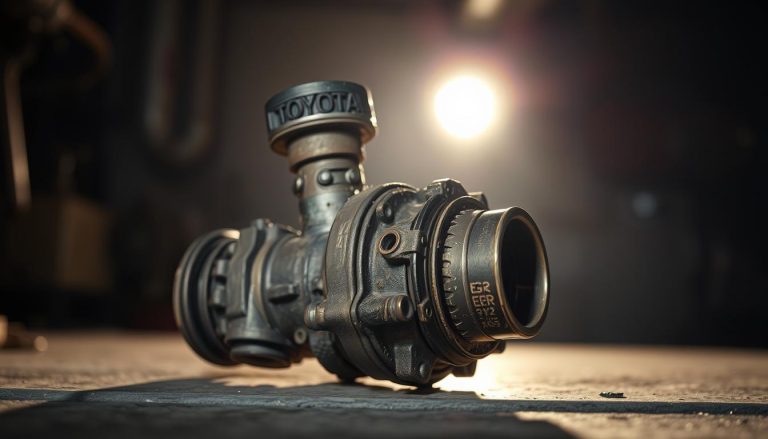
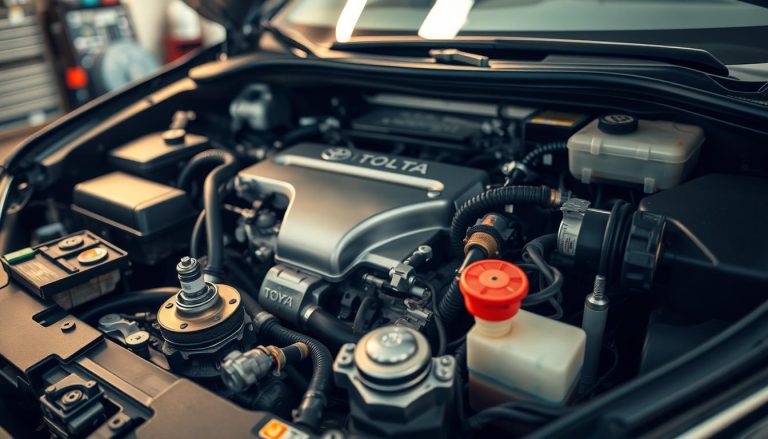
Step 2: Locating Toyota Oxygen Sensors
Oxygen sensors in Toyota cars are placed in the exhaust system. They check the air-fuel mix and catalytic converter work. These sensors are on exhaust pipes, with one part hot and the other cool. Most Toyotas have two sensors for better engine performance.
Upstream and Downstream Sensor Positions
Knowing where sensors are helps find problems. Upstream sensors, or Sensor 1, are before the catalytic converter. They watch the exhaust gases from your engine.
Downstream sensors, or Sensor 2, are after the converter. They check how well the converter works, not the fuel mix. This setup helps your car’s computer control emissions better.
Bank 1 and Bank 2 Identification
Four-cylinder Toyotas have only Bank 1. It’s easy to find. V6 and V8 engines have both banks, with Bank 1 always containing cylinder number 1. Look in your service manual or engine diagram to find cylinder 1.
The side opposite cylinder 1 is Bank 2. This helps techs find the right sensor for codes.
Model-Specific Sensor Locations
Toyota models differ in sensor placement. Four-cylinder cars like Camry and Corolla have two sensors. V6 engines in Highlander and 4Runner might have four sensors.
Hybrid models like Prius have special setups. Some sensors might be hidden, needing extra steps to get to.
| Toyota Model | Engine Type | Number of Sensors | Special Access Requirements |
|---|---|---|---|
| Camry | 4-Cylinder | 2 | None |
| Highlander | V6 | 4 | Heat shield removal |
| 4Runner | V6 | 4 | Skid plate removal |
| Prius | Hybrid | 2 | Hybrid system precautions |
Step 3: Visual Inspection and Initial Testing
Checking oxygen sensors visually can save you time and money. It helps spot problems that don’t need a new sensor. Often, issues come from damaged wiring or loose connections, not the sensor itself.
Start by making sure the engine is cool and the car is stable. Good lighting helps you see any problems. Take photos of where the sensors are before you start.

Checking Wiring and Connectors
First, look at the wiring going to each oxygen sensor. Check for frayed wires, melted insulation, or corrosion at the connections. Road debris can hit the underside and damage wiring, causing false sensor codes.
Be careful around hot exhaust parts. Heat damage looks like blackened or brittle insulation. Make sure connector pins are clean and fit well without bent terminals.
Do a wiggle test with your OBD scanner. Gently move connectors and wiring while watching for fault codes. If a connector or wire is loose or damaged, it might cut out the signal, causing an engine light even if the sensor works.
Inspecting Sensor Physical Condition
Look for any obvious damage on each sensor. Check for cracked housings, damaged threads, or corrosion on the sensor body. These need to be replaced right away.
Examine the sensor tip closely. It should be clean without heavy carbon buildup. White, chalky deposits mean coolant contamination, while black buildup suggests a rich fuel mixture.
Oil contamination leaves dark, sticky residue on the sensor tip. This usually means there are bigger engine problems than just the sensor.
Testing Sensor Voltage Output
Use a digital multimeter on the sensor’s signal wire with the engine running. Healthy sensors switch between 0.1 and 0.9 volts, mostly around 0.45 volts.
Use your OBD scanner to watch the sensor data live. Sensors stuck at high or low readings need to be replaced. Slow switching also means the sensor is failing.
Keep in mind that other engine issues can affect sensor readings. Consider the engine’s overall condition when looking at test results. A failing sensor shows consistent patterns in multiple tests.
Step 4: Preparing for Oxygen Sensor Replacement
Preparing well before replacing an oxygen sensor helps avoid mistakes and keeps you safe. Modern cars need careful attention. Proper preparation ensures both your safety and repair success. This step is key to success.

Engine Temperature and Safety Considerations
Engine temperature is very important for safe replacement. Let your engine cool completely before starting. Exhaust parts stay hot for hours after driving.
Many pros work on engines that have been off for 30-60 minutes. This lets parts cool down but keeps sensors warm for easier removal.
Always wear heat-resistant gloves and safety glasses during the whole process. Make sure you have good air flow when working under your car, even in tight spaces.
Gathering Replacement Parts and Materials
Quality parts are key for lasting repairs. Use only OEM Toyota oxygen sensors or high-quality aftermarket ones made for your car and engine.
You’ll need:
- High-temperature anti-seize compound
- Electrical contact cleaner
- New exhaust gaskets (if needed)
- Proper replacement sensors
Low-cost, universal sensors can lead to ongoing issues and bad readings. This can cause more problems.
Vehicle Positioning and Access
Safe positioning of your car makes work easier and prevents accidents. Use proper jack stands on level ground, never just hydraulic jacks.
Think about how you’ll get to the sensor before starting. Some sensors need you to remove heat shields or skid plates. Know which tools you’ll need and how to wire the new sensor to avoid damage.
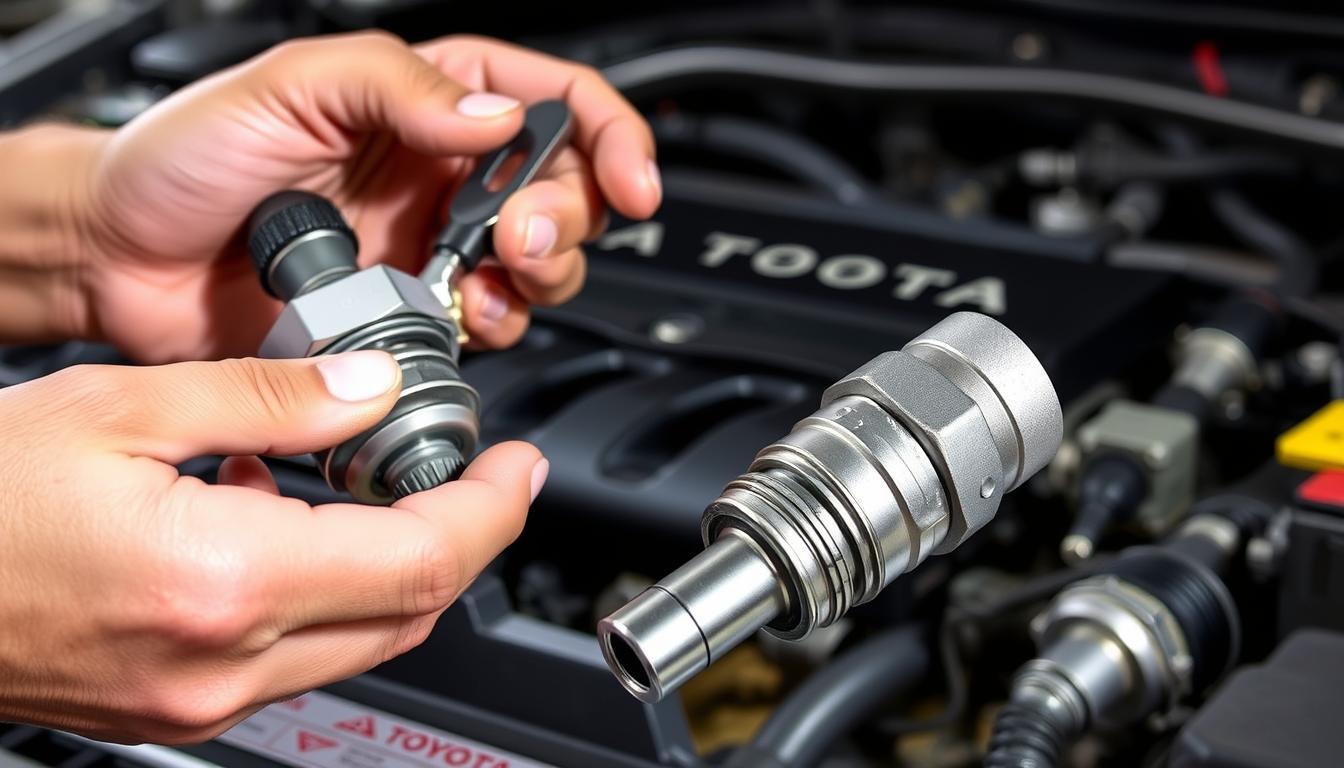
Step 5: Removing the Faulty Toyota Oxygen Sensor
Removing a faulty oxygen sensor from your Toyota needs careful preparation and the right approach. This step is critical to avoid costly damage. Success depends on following systematic procedures that prevent thread damage and ensure safe handling of all connections.

Disconnecting Electrical Connections Safely
First, find the sensor’s electrical connector, which Toyota places away from the exhaust heat. Clean around the connector with electrical contact cleaner before disconnecting to prevent dirt contamination. Never pull on the wires themselves – this can cause internal wire damage.
Press the connector’s release tab firmly while pulling the connector apart with steady pressure. Some Toyota models have connector locks or secondary clips that need to be released first. Always support the wiring harness during disconnection to prevent stress on other connections.
Using Proper Removal Techniques
Oxygen sensor sockets with wire cutouts provide the best grip and prevent damage during removal. Place the socket squarely on the sensor hex and turn counterclockwise while supporting the exhaust pipe. Apply steady, even pressure, avoiding sudden force that might break components.
The removal process works best when sensors are warm but not hot. Warm threads expand slightly, making removal easier while preventing burns to your hands.
| Sensor Condition | Removal Method | Success Rate | Time Required |
|---|---|---|---|
| Normal wear | Standard socket | 95% | 10-15 minutes |
| Light corrosion | Penetrating oil + socket | 85% | 30-45 minutes |
| Heavy corrosion | Heat + specialized tools | 70% | 1-2 hours |
| Seized threads | Professional extraction | 90% | 2-3 hours |
Handling Stuck or Corroded Sensors
Years of heat cycling and exhaust exposure can cause sensors to seize in their threads. This presents the biggest challenge during replacement work. Patience becomes your most valuable tool when dealing with stubborn sensors.
Using Penetrating Oil and Heat
Apply high-temperature penetrating oil around the sensor threads and allow overnight soaking for best results. Gentle heat application with a propane torch can expand the exhaust housing slightly. Exercise extreme caution to avoid overheating and damaging threads or nearby components.
Specialized Removal Tools
Enhanced grip sockets, thread chasers, and extraction kits provide solutions for difficult removals. Some situations require cutting the old sensor and extracting the threaded portion separately. Remember that applying anti-seize compound during installation prevents future removal difficulties.
Sometimes professional help becomes necessary when sensors are completely seized to prevent expensive exhaust system damage.
Step 6: Installing the New Oxygen Sensor
Now that the old sensor is out, it’s time to put in the new one. This step is key to your Toyota’s performance for years. OEM Toyota Auto Parts ensure your car runs smoothly. Careful installation avoids future issues and keeps your engine running well.

Applying Anti-Seize Compound
Anti-seize compound stops your new sensor from sticking in the exhaust system. Use high-temperature anti-seize for exhaust systems. Apply a thin layer to the threads only.
Don’t put anti-seize on the sensor tip or electrical parts. This can cause the sensor to fail right away. Too much can attract dirt and cause more problems.
Nickel-based anti-seize is best for high heat. Some prefer ceramic-based for its non-conductive properties. Both are good if used correctly.
Proper Installation and Torque Specifications
Start by hand-threading the sensor to avoid damage. Then, use your oxygen sensor socket for the final tightening.
Most Toyotas need 25-35 foot-pounds of torque. Check your manual for the exact amount. Too much torque can damage the sensor or exhaust threads.
Too little torque can lead to leaks and sensor issues. Always follow the manufacturer’s torque guidelines.
“Proper torque prevents both loose sensors and thread damage. It’s the difference between a professional job and a comeback repair.”
Reconnecting Electrical Components
Clean both connector halves with electrical contact cleaner before reconnecting. This ensures good electrical contact and prevents future problems.
Ensuring Secure Connections
The connector should click firmly into place. Check that all locks or clips are secure. A loose connection causes intermittent sensor problems.
Routing Wires Properly
Follow the original wire path using clips and supports. Keep wires away from heat and sharp edges. Make sure there’s enough slack for movement without stretching.
Some setups need new wire clips or sleeves to prevent damage. This step helps avoid costly wire issues later.
Step 7: Testing and Verification After Installation
After installing a new oxygen sensor, it’s important to test it. This step makes sure your Toyota runs well and avoids future problems. Experts say it’s key to check everything to confirm the sensor works right.
Don’t just replace an O2 sensor without checking other parts. Many issues can cause air or fuel problems. Techs use special tools to check sensor data and see if it’s normal.

Clearing Diagnostic Trouble Codes
Clearing diagnostic trouble codes is a must. Old codes can hide new issues or stop the engine computer from adjusting to the new sensor. Use an OBD-II scanner to clear codes, but keep a record of them.
After clearing codes, let the engine idle for a few minutes. This lets you see if any new codes come up. Keep an eye out for any warning lights during this time.
Performing Test Drive Procedures
Test drives are key to checking the sensor’s work. Start with a slow drive to warm up the engine. Then, drive at different speeds and loads.
Listen for smooth engine sounds and good throttle response. A good oxygen sensor makes the engine run better and fixes problems.
Monitoring New Sensor Performance
Keep an eye on the new sensor performance with your scanner. Look for quick changes in oxygen sensor voltage readings. Slow or stuck readings mean there’s a problem.
Check fuel trim values too. They should be close to normal. Take notes and keep watching the sensor for a few hundred miles.
| Test Parameter | Normal Range | Warning Signs | Action Required |
|---|---|---|---|
| Oxygen Sensor Voltage | 0.1-0.9 volts switching | Stuck readings or slow response | Recheck installation or replace sensor |
| Short-term Fuel Trim | ±10% at idle | Values exceeding ±15% | Inspect for vacuum leaks or other issues |
| Long-term Fuel Trim | ±10% average | Consistent high positive/negative values | Check for additional engine problems |
| Engine RPM Stability | Steady idle 600-800 RPM | Rough idle or fluctuating RPM | Verify electrical connections and codes |
Preventing Future Toyota Oxygen Sensor Problems
Following maintenance tips helps your Toyota’s oxygen sensors last longer. Taking care of your car saves money and keeps it running well for years. It’s cheaper to prevent problems than to fix them later.
Essential Care Routines
Regular oil changes are key to protecting your oxygen sensors. Use the right oil for your Toyota and change it as needed. Dirty oil can harm sensors quickly.
Change your air filter every 12,000 to 15,000 miles. Clean air filters keep dirt out of the engine. A dirty filter makes your engine work harder and can damage sensors.
Keep your ignition system in good shape by replacing spark plugs on time. Bad spark plugs can damage sensors. Fix cooling system leaks fast to avoid harming sensors.

Choosing the Right Fuel
Quality fuel is important for your sensors. Use Top Tier gasoline with cleaning detergents. These additives keep your engine clean and reduce sensor damage.
Avoid cheap gas stations with low-quality fuel. Bad fuel can harm sensors. Use fuel system cleaners only if they’re safe for oxygen sensors.
Don’t use fuel additives with silicone or unknown chemicals. They can damage sensors right away.
Watching for Warning Signs
Check your Toyota’s engine performance often. Notice if your fuel economy drops. Dashboard warning lights and poor fuel efficiency mean you need to act fast.
Look out for rough idling, hesitation, or strange exhaust smoke. These signs mean combustion problems that can harm sensors. Don’t ignore check engine lights.
Keep an eye on emission test results. Falling numbers can signal problems. Get a professional to check it out early to avoid expensive fixes later.
Cost Considerations and Professional Service Options
Toyota owners must decide between fixing oxygen sensors themselves or getting professional repair. Knowing the costs helps you pick the right option for your budget.
When planning, think about all costs, not just parts. Consider your skills, time, and the risks of DIY.
DIY Repair Costs vs Professional Service
Replacing an oxygen sensor yourself can cost $50-150 per sensor for parts. You’ll also need tools like socket sets and possibly an OBD-II scanner.
Professional services cost $200-400 per sensor with labor. This price includes expert diagnosis, correct installation, and warranty.
DIY repairs have hidden costs. Mistakes can lead to expensive fixes. Consider your time and the risk of errors.

Warranty Coverage and Considerations
OEM Toyota oxygen sensors come with warranties. But, improper installation can void this coverage. Professional repairs usually include both parts and labor warranties.
Some warranties or service contracts cover sensor replacement. Check your coverage and approved repair shops before fixing.
Save all warranty documents. Follow maintenance schedules to keep your warranty valid.
When to Choose Professional Installation
DIY is hard for sensors in tricky spots that need exhaust system removal. Also, if you have multiple sensor failures or engine issues, experts are best.
Toyota service centers use advanced tools and trained technicians. They use genuine Toyota parts for your car’s best performance.
For hybrid vehicles like Prius, professional repair is key due to unique sensors. If you’re not comfortable with hot exhaust systems, experts ensure safety and quality.
Troubleshooting Ongoing Issues After Sensor Replacement
Even after replacing your Toyota’s oxygen sensor, you might face ongoing issues. Don’t worry if problems don’t go away right away. Many things can make it seem like the sensor is failing again.
Fixing these problems starts with checking your work. Make sure you installed everything correctly before looking for more issues.
Common Post-Installation Problems
Right after replacing the sensor, you might see some issues. Persistent check engine lights often mean you made a mistake or used the wrong sensor.
First, check if you picked the right sensor for your Toyota. The wrong one can cause problems. Also, ensure your electrical connections are clean and tight.
Don’t put anti-seize compound on the sensor tip. It should only be on the threads. If it’s on the tip, it can give wrong readings.
Use an OBD-II scanner to clear all codes after installing. Some cars need a full drive cycle to recognize the new sensor.
Additional System Components to Check
Vacuum leaks can make it seem like the oxygen sensor is failing. These leaks mess with air-fuel mixture readings.
Look at your fuel pressure regulator and fuel injectors too. Sticky or leaking injectors can cause problems. Mass airflow sensors also play a role in fuel delivery.
Check your catalytic converter if downstream sensors show issues. A bad converter can damage new sensors and affect oxygen readings.
Don’t forget about ignition system parts. Bad spark plugs or ignition coils can contaminate new sensors with unburned fuel.
Addressing Multiple Sensor Failures
When many sensors fail at once, you need to troubleshoot carefully. Don’t replace all sensors without finding the real cause, or they’ll fail again.
Common causes include dirty fuel, coolant leaks, or engine problems. Exhaust leaks can mess with multiple sensors at once.
Think about recent repairs or maintenance that might have caused problems. Sometimes, one issue can trigger many sensor codes, making it harder to solve.
Getting help from a professional can be a good idea. They have the right tools to find system-wide problems that you might miss.
Conclusion
Your Toyota’s oxygen sensors are key to its smooth operation. They impact fuel economy, engine performance, and emissions. Quick action is needed when problems arise to avoid expensive fixes.
Regular maintenance catches sensor issues early. Simple steps like timely oil changes and quality fuel use extend sensor life. Watch for signs like check engine lights or poor gas mileage.
While this guide offers DIY repair tips, some issues need a pro. Complex problems or multiple sensor failures require expert help. Don’t ignore warning lights or unusual car behavior – let experts handle it.
Whether you fix it yourself or go to a service center, acting fast is key. Use genuine Toyota parts or quality alternatives for reliable performance. Proper installation avoids future problems.
Your Toyota needs the best care. Be alert to any performance changes and follow Toyota’s maintenance schedule. Quick action ensures your oxygen sensors keep your engine running well for many miles.
FAQ
How do I know if my Toyota’s oxygen sensor is failing?
Look out for a check engine light, poor fuel economy, and rough idling. You might also notice hesitation when accelerating or unusual exhaust smells. Dark smoke from the tailpipe or failing emission tests are other signs.
What are the most common Toyota oxygen sensor error codes?
Common codes include P0130 to P0138 for Bank 1, Sensor 1 and 2. P0150 to P0158 cover Bank 2 issues. Each code tells you about sensor problems, slow responses, or voltage issues.
Can I replace Toyota oxygen sensors myself or should I use professional service?
You can replace them yourself with the right tools and knowledge. Parts cost -150. But, professional service (0-400) offers expertise and warranty. It’s best for complex jobs or if you’re not comfortable with hot exhaust systems.
How long do Toyota oxygen sensors typically last?
They usually last 60,000-100,000 miles. But, contamination, poor fuel, or carbon buildup can shorten their life. Regular maintenance and quality fuel can help extend their life.
What causes Toyota oxygen sensors to fail prematurely?
Contamination from oil, coolant, or silicone products is a common cause. Carbon buildup, electrical issues, and contaminated fuel can also lead to early failure.
Where are oxygen sensors located in my Toyota?
Upstream sensors are before the catalytic converter. Downstream sensors are after it. Four-cylinder engines have two sensors, while V6 and V8 engines may have four. Bank 1 is on one side, and Bank 2 is on the other.
What tools do I need to replace Toyota oxygen sensors?
You’ll need an OBD-II code reader, oxygen sensor socket, and standard tools. Safety gear like gloves and glasses is also important. Professional tools help monitor sensor data.
Why does my check engine light come back after replacing oxygen sensors?
It often means there’s a deeper problem. Vacuum leaks, fuel pressure issues, or dirty sensors can cause it. Proper diagnosis is key to finding the real issue.
How much should I expect to pay for Toyota oxygen sensor replacement?
DIY costs -150 per sensor. Professional service is 0-400. Prices vary based on location and sensor type. Always use quality parts for best performance.
Can bad oxygen sensors damage my Toyota’s engine or catalytic converter?
Yes, they can cause engine damage or clog the catalytic converter. Rich or lean mixtures can lead to overheating or damage. Replacing sensors promptly prevents these problems.
What’s the difference between upstream and downstream oxygen sensors?
Upstream sensors check the air-fuel mixture before the catalytic converter. Downstream sensors monitor the converter’s efficiency. They help detect converter problems.
How do I prevent Toyota oxygen sensor problems?
Regular oil changes and air filter replacements are key. Keep spark plugs in good condition and address leaks quickly. Use Top Tier gasoline and avoid additives that harm sensors. Monitor fuel economy and address check engine lights promptly.