
Common Toyota MAF Sensor Problems Explained
Your mass airflow sensor is key to your engine’s smooth operation. It measures the air entering your engine. For every gallon of fuel, your engine needs over 9,000 liters of air for the right mix.
When this important part fails, you’ll see big changes in your car’s performance. Toyota MAF sensor problems are common and affect fuel economy, engine power, and how well your car drives.
Dirt and debris, electrical issues, and engine vibrations often cause these problems. Knowing these causes helps you fix Toyota engine troubleshooting issues with ease.
This guide gives you the tools to spot, fix, and prevent these car troubles.
Key Takeaways
- Mass airflow sensors measure over 9,000 liters of air for every liter of fuel used
- Contamination from dust and debris is the leading cause of sensor failures
- Electrical connection faults can trigger multiple engine performance issues
- Engine vibrations may cause physical damage to sensitive sensor components
- Early diagnosis prevents costly engine damage and improves fuel economy
- Proper troubleshooting techniques help identify root causes quickly
Understanding Your Toyota’s Mass Airflow Sensor
Every time you start your Toyota, a small but mighty sensor starts measuring the air. This component, known as the mass airflow sensor (MAF), works behind the scenes. It ensures your vehicle runs smoothly and efficiently.
Think of your MAF sensor as the gatekeeper of your engine’s breathing system. It constantly monitors the volume, temperature, and density of air. This information helps your car’s computer calculate the perfect amount of fuel to mix with the incoming air.
What is a MAF Sensor and How Does It Work
The mass airflow sensor function relies on sophisticated hot wire technology. Most Toyota vehicles use this today. Inside the sensor housing, you’ll find two thin sensing wires. One wire gets heated by electrical current, while the other stays at ambient temperature.
As air flows across the heated wire, it cools down naturally. The sensor immediately adjusts the electrical current to maintain the wire’s temperature. This current adjustment gets converted into a voltage or frequency signal that travels directly to your engine control unit (ECU).
The hot wire MAF sensor design is incredibly sensitive. It can detect even tiny changes in airflow. This makes it perfect for modern engines that need precise fuel delivery. This technology has largely replaced older vane-type sensors because it’s more accurate and responds faster to changing conditions.
Location of MAF Sensors in Different Toyota Models
Finding your MAF sensor is easier than you might think. In most Toyota models, including the Camry, Corolla, RAV4, and Tacoma, the sensor sits between the air filter box and the throttle body.
Look for a cylindrical or rectangular component connected to the main air intake tube. It typically has a electrical connector with several wires leading to it. In newer Toyota models, the sensor often integrates directly into the air intake tube itself.
Some Toyota trucks and SUVs place the MAF sensor closer to the air filter housing. Always check your owner’s manual for the exact location in your specific model year. Toyota has made design changes over the years.
The Role of MAF Sensors in Engine Performance
Your Toyota air intake system depends on accurate MAF sensor readings to maintain optimal performance. The sensor’s data helps the ECU calculate the ideal air-fuel mixture for every driving condition.
When you accelerate, the MAF sensor detects increased airflow and signals the ECU to inject more fuel. During idle or cruising, it reduces fuel delivery to match the lower air volume. This constant adjustment ensures maximum fuel efficiency and minimal emissions.
Without proper MAF sensor function, your Toyota’s computer becomes blind to airflow changes. This can lead to rough idling, poor acceleration, increased fuel consumption, and engine damage over time.
Identifying Common Toyota MAF Sensor Problems
MAF sensor issues in Toyota cars usually fall into four main categories. Each type of problem needs a different approach to solve. Knowing these common issues helps you find the problem faster and fix it right.
MAF sensor problems don’t happen suddenly. They develop over time due to various factors. Spotting these issues early can prevent bigger engine problems and expensive repairs later.

Contaminated MAF Sensor Elements
A dirty MAF sensor is the most common cause of airflow problems in Toyotas. Dust, pollen, oil vapors, and road debris slowly cover the sensor’s inside parts. This makes it hard for the sensor to measure airflow changes correctly.
Driving in stop-and-go traffic exposes your Toyota to more airborne particles. Areas with heavy pollen counts and construction zones also pose challenges for MAF sensors.
Smaller Toyota models like the Yaris and Corolla are more prone to contamination. Their smaller engine compartments mean less air gets to the sensor, allowing contaminants to build up faster. Many owners notice problems between 18,000 and 25,000 miles.
Oil vapors from the crankcase ventilation system also contaminate MAF sensors. When PCV systems fail, oil mist coats the sensor elements. This oily residue attracts more dirt and debris, making it hard to clean.
Electrical Connection Issues
MAF sensors face electrical problems due to their location in the engine bay. Heat, moisture, and vibration stress the electrical connections. This causes corrosion on connector pins, leading to signal transmission issues.
The wiring harness connecting to the MAF sensor flexes with engine movement. This can cause wire breaks and intermittent connection problems. These issues may seem like random performance hiccups.
Ground connection failures are tricky to diagnose. Poor connections cause erratic voltage readings that confuse the engine control module. Symptoms can mimic other engine problems, leading to wrong diagnoses and unnecessary repairs.
Moisture, oil, and road salt can damage electrical connections. Winter driving in northern climates is harsh for these connections. Regular cleaning can prevent many issues.
Physical Damage to Sensor Housing
MAF sensor housing damage occurs through various means during normal driving. Engine vibrations can create hairline cracks that let unmetered air in. This causes lean fuel mixtures and poor engine performance.
Improper maintenance can damage MAF sensors. Using compressed air to clean air filters can push debris into the sensor housing. Careless handling during air filter changes can also damage the sensor or its housing.
Road debris and minor accidents can damage air intake system components. A cracked air intake tube near the MAF sensor lets unfiltered air bypass the sensor. This causes measurement errors that affect fuel delivery calculations.
Aftermarket modifications to the air intake system can stress MAF sensor components. Cold air intake systems that relocate the MAF sensor may expose it to different vibrations or temperatures than intended.
Age-Related Sensor Degradation
MAF sensors degrade over time as they accumulate operating hours. The sensing elements lose calibration accuracy due to thermal cycling and contaminated airflow. This decline is so gradual that drivers often don’t notice it.
Hot wire MAF sensors experience element fatigue from constant heating and cooling. The fine platinum wire elements can develop microscopic changes in resistance over time. These changes affect the sensor’s ability to measure airflow accurately across different conditions.
Temperature cycling from cold starts to full operating temperature stresses all sensor components. The expansion and contraction of different materials within the sensor can cause mechanical stress points. After 100,000 miles or more, these stresses may cause permanent calibration shifts.
Fuel quality issues can also accelerate sensor aging in some areas. Ethanol-blended fuels can create more aggressive combustion byproducts that contaminate the intake system. These byproducts may chemically interact with sensor materials, causing premature degradation of the sensing elements.
Recognizing MAF Sensor Failure Symptoms in Your Toyota
When your Toyota’s MAF sensor starts to fail, your engine will show signs of trouble. These signs can start slowly, making them seem minor at first. But knowing these MAF sensor symptoms can help you fix problems before they get worse.
Spotting patterns is key to catching issues early. A single rough start might not mean anything, but repeated problems are a warning. Notice how your Toyota acts in different situations, as MAF sensor issues can show up differently at idle versus on the highway.
Engine Performance Warning Signs
MAF sensor failure often leads to power and speed issues. Your engine might feel slow to pick up speed, even when you press the gas hard. This is because the faulty sensor gives the wrong air data to the engine’s computer.
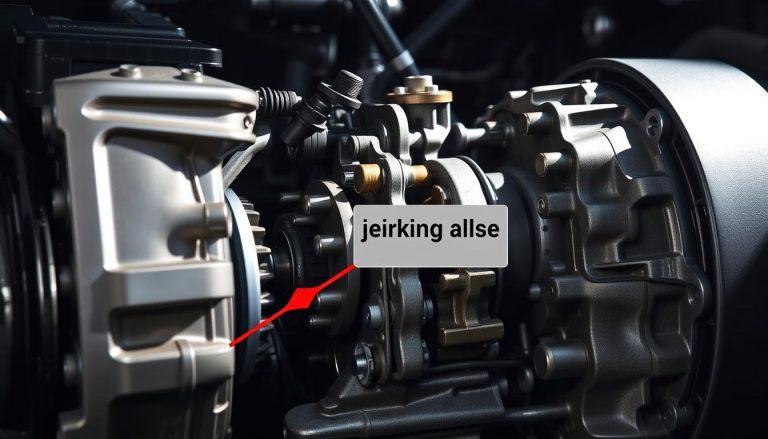
Another sign is hesitation when you try to speed up. Your Toyota might jerk or stumble, which is risky, like when merging or going up hills. This hesitation can be dangerous in traffic situations, making quick diagnosis important for safety.
Stalling is the worst symptom. Your engine might shut off suddenly at lights, during parking, or in traffic. These shutdowns can be dangerous and happen without warning.
Fuel Economy Deterioration
A failing MAF sensor hurts your Toyota’s fuel efficiency. Poor fuel economy is often the first sign, showing up weeks or months before other symptoms. You might find yourself filling up more often or getting fewer miles per gallon.
This decline in fuel efficiency comes from the engine’s computer getting bad air data. It might add too much or too little fuel, wasting gas or damaging the engine. Running rich wastes fuel, while running lean can harm engine parts over time.
Keep an eye on your fuel use to spot changes. A 10-15% drop in fuel efficiency without changing your driving habits suggests MAF sensor trouble.
Unusual Engine Behavior Patterns
MAF sensor failure also leads to unique behaviors. Rough idle is common, causing your engine to shake or run unevenly at stops. Experienced Toyota owners learn to recognize these signs.
RPM changes without you touching the gas are a big warning sign. Your tachometer needle might jump around while idling, or your engine speed might jump and drop without reason. These changes show your engine’s computer is having trouble with fuel delivery.
Excessive vibrations in the car often go with a rough idle. Your steering wheel, seats, and dashboard may shake noticeably when the engine is running poorly. This is due to bad air-fuel ratios from a faulty MAF sensor.
Reading Check Engine Light and Diagnostic Codes
Your Toyota’s onboard computer gives specific error codes for MAF sensor issues. When the check engine light turns on, it’s not just a random warning. It’s your car’s way of telling you about the MAF sensor problem.
Modern Toyotas store diagnostic trouble codes in their computer when the MAF sensor isn’t right. These codes are like digital breadcrumbs that lead you to the problem. An OBD scanner can read these codes and show you exactly what’s wrong.

This system makes car problems easier to solve. Your Toyota acts like its own mechanic, watching the MAF sensor and alerting you to issues. This saves you time, money, and the hassle of guessing what’s wrong.
Common MAF-Related Error Codes
There are specific codes for MAF sensor troubles in Toyotas. The most common are in the P0100 series. Each code tells a different story about your sensor.
P0100 means there’s a general problem with the MAF circuit. It’s like your car saying, “Something’s wrong with the MAF sensor, but I’m not sure exactly what.”
P0101 shows a range or performance issue. Your MAF sensor is working, but the readings are off. This often happens when the sensor is dirty or contaminated.
P0102 means the MAF circuit has low input. The sensor is sending a weak signal, usually because it’s dirty or failing. P0103 is the opposite – high input that suggests the sensor is sending too strong readings.
P0104 indicates an intermittent problem. This tricky code means the MAF sensor works sometimes but not others. It’s often the hardest to diagnose because the problem comes and goes.
Understanding P0100 Series Codes
The P0100 MAF codes follow a logical pattern. The “P” stands for powertrain-related, and “0100” refers to the MAF sensor circuit family. Each number in the sequence tells you something specific about the problem.
Beyond the direct MAF codes, you might see P0171 and P0174. These codes indicate “system too lean” conditions for bank 1 and bank 2 respectively. While they’re not technically MAF codes, they often appear alongside MAF problems because a faulty sensor can cause incorrect fuel mixture calculations.
“A contaminated or failing MAF sensor often triggers lean condition codes because the engine computer can’t properly calculate the correct air-fuel mixture.”
When you see lean codes with MAF codes, it confirms that your MAF sensor problem is affecting engine performance. The computer is trying to compensate for bad airflow readings by adjusting fuel delivery, but it can’t keep up with the incorrect information.
When to Take Action on Codes
Not all diagnostic trouble codes need immediate action, but MAF-related codes shouldn’t be ignored for long. If you see a P0100 series code, you can usually continue driving for a short time while you plan your repair approach. But, your fuel economy will suffer, and engine performance may be rough.
Take immediate action if you see multiple codes appearing together or if the codes keep coming back after clearing them. This suggests a more serious problem that could damage other engine components if left untreated.
Intermittent codes like P0104 can be tricky because they might disappear for weeks before returning. Don’t assume the problem fixed itself. Instead, use this time to plan your diagnosis and repair strategy. The code will likely return, and when it does, the problem may be worse.
If lean codes appear alongside MAF codes, address the issue promptly. Running lean can cause engine damage over time, including burned valves and damaged catalytic converters. Your check engine light is trying to protect your engine, so listen to what it’s telling you.
Step 1: Gathering Tools and Materials for Diagnosis
Before starting MAF sensor diagnosis, it’s important to have the right tools. This saves time and avoids frustration. Having everything ready means you won’t have to stop for a trip to the auto parts store.
The right tools make a big difference. They can turn a simple repair into a smooth process or a tough challenge.
Success requires three main types of equipment. You’ll need diagnostic tools to find problems, cleaning supplies for maintenance, and safety gear for protection. Each type has a specific role in the repair process.
Essential Diagnostic Equipment
An OBD-II scanner is key for modern car diagnosis. Basic code readers are good for simple error code checks. But, advanced scanners that show live data streams give better insight into MAF sensor performance.
For Toyota cars, look for scanners that support enhanced protocols. These tools can show real-time MAF sensor readings in grams per second. This helps you see if the sensor works right with throttle changes.
An automotive multimeter is vital for electrical tests. It checks voltage output and makes sure the sensor gets the right power. Digital multimeters with auto-ranging features are best for beginners.
Advanced diagnostic tools like oscilloscopes are for experienced techs. They show sensor waveforms. While not needed for simple repairs, they offer detailed analysis of sensor responses.
Cleaning Supplies and Materials
Using a MAF sensor cleaner is critical for maintenance. Never use carburetor cleaner, brake cleaner, or household products. These harsh chemicals can damage the sensor’s delicate parts.
Good MAF sensor cleaners evaporate fast without leaving residue. CRC MAF Sensor Cleaner and Gumout MAF Cleaner are popular and safe for Toyota sensors.
You’ll also need clean, lint-free cloths for drying. Microfiber towels are perfect. Avoid paper towels or regular rags that might leave fibers on the sensor.
Safety Equipment Requirements
Wearing personal protection prevents chemical exposure and electrical hazards. Nitrile gloves protect your hands from cleaning solvents. These chemicals can irritate your skin with prolonged contact.
Safety glasses protect your eyes from spray-back when using aerosol cleaners. The pressurized cans can sometimes splatter unexpectedly.
Work in well-ventilated areas when using cleaning products. The fumes from MAF sensor cleaner can make you dizzy in closed spaces.
| Equipment Category | Essential Items | Budget Range | Key Features |
|---|---|---|---|
| Diagnostic Tools | OBD-II Scanner, Multimeter | $25-$200 | Live data, voltage testing |
| Cleaning Supplies | MAF Cleaner, Microfiber cloths | $10-$25 | Quick evaporation, residue-free |
| Safety Equipment | Gloves, Safety glasses | $5-$15 | Chemical resistance, eye protection |
| Basic Tools | Screwdrivers, Socket set | $15-$50 | Multiple sizes, magnetic tips |
Step 2: Performing Initial MAF Sensor Inspection
Before you start complex tests, a simple visual inspection can show many MAF sensor problems. This hands-on check helps spot obvious issues without needing expensive tools. Many Toyota owners find the engine trouble’s cause during this easy but detailed check.
A good inspection saves time and money by finding clear signs of damage or dirt. Often, visual clues directly point to the solution. This step-by-step method ensures you catch all important details for your diagnosis.

Visual Inspection Checklist
Begin your visual inspection by looking at the MAF sensor housing for cracks or damage. Check the plastic casing around the sensor elements. Even tiny cracks can let unmetered air in, causing wrong readings.
Next, examine the sensor’s wire mesh screen for tears or holes. This screen keeps big debris out of the sensor. A damaged screen means contamination has likely reached the sensor.
Use a flashlight to look at the sensing elements. Look for oil, dirt, or particles on the thin wire elements. These contaminants mess up the sensor’s airflow measurement. Note any contamination for future use.
Checking Electrical Connections
Check all electrical connections to the MAF sensor for corrosion or looseness. Green or white powdery deposits mean corrosion that can mess up signal transmission. Gently wiggle the connector to make sure it’s tight.
Look for damaged or frayed wiring near the sensor. Engine bay heat can damage wire insulation over time. Be careful where wires might rub against metal or moving parts.
Make sure the connector clicks securely when reconnected. A loose connection can cause hard-to-find problems later. Clean any visible corrosion with electrical contact cleaner if needed.
Examining Air Filter Condition
The air filter condition affects your MAF sensor’s life and performance. Remove the air filter and hold it up to light. If light doesn’t pass through, the filter needs a change. A clogged filter makes your engine work harder and can damage the MAF sensor.
Check the air filter housing for cracks or gaps that might let unfiltered air in. These leaks can introduce dirt and debris into the MAF sensor area. Make sure all clamps and connections are tight and sealed.
Look for oil or moisture in the air intake system. Excessive oil means a possible engine problem, while moisture suggests a damaged air filter housing. Both can contaminate your MAF sensor and cause it to fail early.
Step 3: Using Diagnostic Tools to Test MAF Sensor
Diagnostic tools make MAF sensor testing precise and data-driven. They help mechanics diagnose sensor issues accurately. With the right tools and knowledge, you can test your Toyota’s air intake system thoroughly.
Modern tools give detailed sensor performance info. This data helps decide if cleaning or replacing the sensor is needed. Understanding these test results saves both time and money by avoiding unnecessary repairs.

Connecting OBD-II Scanner
First, find your Toyota’s diagnostic port under the dashboard. It’s near the driver’s left knee. Plug in your scanner until it clicks.
Turn the ignition to “on” without starting the engine. Most scanners will find your vehicle’s system. Go to the live data parameters menu for real-time sensor readings.
In the engine management section, look for MAF sensor data. Scanners might show it as “MAF,” “Mass Air Flow,” or “Air Flow Rate.” The readings are in grams per second or pounds per minute.
Testing MAF Sensor Voltage Output
Use a digital multimeter to check the sensor’s electrical performance. Connect the positive lead to the signal wire and the negative lead to ground. Break-out leads prevent damage to your wiring harness during testing.
Check the power supply voltage with the ignition on but engine off. Normal readings are 7.5 to 14 volts. Low voltage means wiring problems or a failing connection.
Start the engine and watch the voltage output at idle. Healthy sensors show 0.5 volts or frequency readings between 0 and 12,000 Hz. These values change as you rev the engine, showing proper sensor response.
Test the connection cables using the resistance setting. Properly functioning cables should show about 0 ohms resistance. Higher readings mean corrosion or internal wire damage.
Interpreting Diagnostic Results
Normal MAF sensor readings change with engine conditions. At idle, expect 3-7 grams per second for most Toyota engines. During acceleration, values should increase smoothly to 15-25 grams per second or higher.
Erratic readings mean contamination or sensor failure. If values jump randomly or stay fixed despite engine speed changes, the sensor needs attention. Consistent patterns help identify specific problems.
Compare your diagnostic results with manufacturer specs. Toyota gives specific ranges for each engine type. Values outside these ranges confirm sensor problems needing cleaning or replacement.
Documenting Test Findings
Record all test measurements for future reference. Note the date, mileage, and specific conditions during testing. This documentation helps track sensor performance over time.
Take screenshots of scanner data when possible. Digital records provide clear evidence of sensor behavior patterns. These images are valuable references during parts ordering or warranty claims.
Create a simple test log including voltage readings, resistance measurements, and live data values. Organized documentation makes it easier to compare results after cleaning or replacement procedures.
Step 4: Cleaning Your Toyota MAF Sensor
Cleaning your Toyota’s MAF sensor can boost engine performance and fix common issues. You’ll need special products and care to avoid damaging the sensor. Follow this guide to clean your sensor safely.
Some digital MAF sensors can’t be cleaned well. Always check your Toyota’s manual before you start. Never use household cleaners or compressed air on MAF sensors because they can harm the sensor’s parts.
“The key to successful MAF sensor cleaning is patience and using only approved cleaning products designed for these sensitive components.”
Safely Removing the MAF Sensor
First, disconnect your Toyota’s negative battery terminal for safety. This stops electrical shorts. Let the engine cool down before you start.
Find the air intake duct connected to your MAF sensor. Loosen the clamps with a screwdriver or pliers. Gently wiggle the duct while pulling to avoid tearing the rubber boot.
Unplug the electrical connector from the MAF sensor. Press the release tab while pulling the connector straight out. Avoid twisting or forcing the connection, which can damage the pins.
Remove the hex bolts holding the MAF sensor to the air filter housing. Most Toyotas have two or four bolts. Keep these bolts organized for easy reinstallation.

Proper Cleaning Techniques and Products
Use only specialized MAF sensor cleaner spray for this job. Brands like CRC MAF Sensor Cleaner and Gumout MAF Cleaner are good choices. Never substitute these with carburetor cleaner or brake cleaner, as they can damage the sensor.
Hold the sensor by its plastic housing, never touching the sensing elements. Place the sensor over a clean surface or container to catch any dripping cleaner.
Spray the cleaning solution in short bursts from different angles. Focus on the sensing wires or film elements inside the housing. This method ensures thorough coverage without over-saturating the components.
Apply 3-4 light coats instead of one heavy coat. Let each coat dissolve contaminants for 30 seconds before adding the next. Patience during this step prevents damage and ensures effective cleaning.
Drying and Reinstallation Process
Let the cleaned sensor air dry completely before putting it back. This usually takes 10-15 minutes in normal conditions. Never use heat sources or compressed air to speed drying, as they can harm the delicate parts.
Check the sensor housing and electrical connections for any remaining moisture. All surfaces must be dry before you start the reinstallation process.
Install the MAF sensor in reverse order of removal. Make sure the sensor fits flush against the air filter housing before tightening the bolts. Use a torque of 25-35 inch-pounds to avoid over-tightening.
Reconnect the electrical connector until it clicks securely. Reattach the air intake duct and secure all clamps properly. Double-check all connections before proceeding.
Testing Sensor Function After Cleaning
Reconnect the battery terminal and start your Toyota. Let the engine idle for 2-3 minutes while watching for unusual sounds or rough operation.
Take your vehicle for a test drive in different conditions. Include city driving, highway speeds, and gentle acceleration. Pay attention to throttle response and overall engine smoothness.
Use your OBD-II scanner to check for any new error codes after cleaning. A successful cleaning should remove previous MAF-related codes within 2-3 drive cycles.
Watch fuel economy over the next few tanks of gas. Properly cleaned sensors typically show improved fuel efficiency within one week of cleaning. If problems continue, the sensor might need to be replaced.
Step 5: Determining When Replacement is Necessary
Not every MAF sensor problem can be fixed with cleaning. Sometimes, you need to replace it. Knowing when to replace it saves time and money and prevents engine damage.
Several factors decide if your Toyota’s MAF sensor needs to be replaced. Damage to internal parts, permanent calibration changes, and electrical failures mean cleaning won’t work.

Signs That Cleaning Won’t Solve the Problem
Certain sensor failure signs mean you need to replace it. These signs help you avoid wasting time on cleaning.
Physical damage to sensing elements is a clear sign for replacement. Cracked or broken hot wire elements can’t be fixed by cleaning. Also, damaged sensor housing that lets unfiltered air in makes it useless.
Permanent calibration drift happens when contaminants change the sensor’s readings too much. If your Toyota shows sensor failure signs after cleaning, the calibration has likely changed. This often happens after years of use in dusty places.
Electrical failures in the sensor also mean it needs to be replaced. Corroded circuits, damaged resistors, or failed temperature compensation elements can’t be fixed by cleaning. These failures show up as erratic voltage or no signal at all.
Choosing Between OEM and Aftermarket Parts
The OEM vs aftermarket choice affects your car’s performance and reliability. Knowing the differences helps you choose based on your needs and budget.
OEM sensors have many advantages. They match the exact specifications and calibration of your car. OEM sensors usually offer better accuracy and last longer, ensuring your engine runs well.
Aftermarket sensors are cheaper but have trade-offs. Quality varies, and they might not meet Toyota’s standards. But, some good brands can offer good performance at a lower cost.
| Feature | OEM Parts | Aftermarket Parts | Performance Impact |
|---|---|---|---|
| Initial Cost | $150-300 | $50-150 | Budget consideration |
| Accuracy | Factory specifications | Varies by brand | Engine performance |
| Longevity | 5-7 years typical | 2-5 years typical | Replacement frequency |
| Warranty | 2-3 years | 1-2 years | Risk protection |
Think about your car’s age, mileage, and use when choosing between OEM vs aftermarket. Newer Toyotas or those under warranty do best with OEM sensors. Older cars with high mileage might do okay with good aftermarket parts.
Finding the Correct Part Number
Finding the right part numbers is key for the correct sensor. Using the wrong sensor can harm your engine’s performance.
Look at your MAF sensor for printed part numbers. Most Toyota sensors have the part number on a label or molded into the plastic. This number is the best way to find a replacement.
Your car’s VIN (Vehicle Identification Number) is another way to find the right part. Toyota dealerships and online parts catalogs can help match your VIN to the correct sensor. This method avoids mistakes and ensures the part fits.
Online Toyota parts catalogs have detailed databases for finding part numbers. Just enter your car’s year, model, and engine size to find the right part. Many aftermarket suppliers also have VIN lookup tools for finding compatible parts.
Keep a record of the part number before you start looking. Having different ways to identify the part helps avoid ordering mistakes that can slow down your repair.
Step 6: Replacing Your Toyota MAF Sensor
Replacing a MAF sensor needs careful planning and precise steps for a job well done. If cleaning doesn’t work, you’ll need a new sensor to fix your engine. This step is critical and requires attention to avoid damage.
Replacing a sensor is more than just swapping parts. Success comes from following the right steps and keeping your workspace clean. A good replacement sensor needs proper installation to last long.

Preparation and Safety Procedures
Start by getting all tools and materials ready in a clean area. Being organized helps avoid mistakes and makes sure you have everything before you start. Make sure to disconnect the negative battery terminal and wait 10 minutes before starting.
Make sure the work area is well-lit so you can see everything clearly. Wash your hands well and avoid using lotions or oils that could harm the new sensor. Wear safety glasses and make sure the engine is cool before starting.
Remove any covers or parts that block access to the MAF sensor. Take photos of the original setup before removing anything. Keep the new sensor in its packaging until you’re ready to install it.
Removing the Failed Sensor
Begin by disconnecting the electrical connector from the old MAF sensor. Press the release tab and pull the connector straight away from the sensor. Never pull on the wires as it can damage the connection.
Loosen the clamp screws that hold the sensor to the air intake tube. Most Toyotas use Phillips head or flathead screws. Remove the screws and set them aside safely.
Gently twist and pull the sensor housing from the air intake tube. Some resistance is normal due to rubber seals. Avoid using too much force to prevent damage.
Installing the New MAF Sensor
Check the new sensor carefully before installing to make sure it matches the old one. Make sure all mounting tabs and electrical connections are the same. Handle the new sensor by its housing, not the sensing elements inside.
Apply a thin layer of dielectric grease to the electrical connector if the manufacturer suggests it. This prevents corrosion and ensures good electrical contact. Use a little lubricant for electrical connections.
Put the new sensor into the air intake tube, making sure it’s aligned with the mounting holes. It should fit smoothly without forcing. Use the original clamp screws to secure it, tightening to the manufacturer’s torque specification if given.
Make sure the electrical connector is connected firmly until you hear or feel it click. Check the connection is secure by gently tugging on the connector housing.
Post-Installation Testing and Verification
Reconnect the negative battery terminal and start the engine for initial testing. Let the engine idle for a few minutes while watching for any unusual sounds or behaviors. The engine might run a bit rough at first as the ECU adjusts to the new sensor.
Use your OBD-II scanner to clear any stored diagnostic codes from the old sensor failure. After clearing, check that no new codes appear. Use the scanner to verify the new sensor is giving the right voltage readings.
Do a thorough road test under different conditions like idle, acceleration, and highway speeds. Watch for throttle response, fuel economy, and engine performance. You should notice an improvement right away if the sensor replacement fixed the problem.
Keep a record of the installation date and part number for future reference. Keeping good records helps track maintenance and warranty coverage. Schedule a follow-up check after 100-200 miles to make sure the repair is working well.
Preventing Future Toyota MAF Sensor Problems
Using smart preventive maintenance can make your Toyota MAF sensor last longer and work better. By taking care of it now, you avoid expensive fixes later and keep your engine running smoothly.
Knowing what causes problems and fixing them early is key to a long-lasting MAF sensor. Most issues come from dirt, bad maintenance, and things you can control.

Regular Air Filter Maintenance Schedule
Air filter replacement is your MAF sensor’s first defense against dirt and pollutants. Toyota says to change air filters every 12,000 to 15,000 miles if you drive normally.
But, your driving area affects this schedule. City drivers in heavy traffic and pollution should change filters every 8,000 to 10,000 miles. Drivers in dusty areas might need to change them even more often.
Check your air filter every month by taking it out and holding it up to light. If light can’t pass through, it’s time for a new one. A dirty filter makes your MAF sensor work harder and increases the risk of contamination.
Avoiding Common Contamination Sources
To prevent contamination, know what harms your MAF sensor and avoid it. Oil vapors from a bad PCV system are very damaging.
Watch your PCV system for signs of trouble, like too much oil consumption or strange engine sounds. Replace PCV valves as your Toyota recommends, usually every 60,000 to 100,000 miles.
Don’t use aftermarket parts that skip the factory filter. These parts can let in more dirt and might void your warranty. Use OEM or similar parts for the best protection.
Keep your engine area clean to prevent dirt from getting into the intake system. Regular cleaning helps during maintenance or repairs.
Implementing Proper Engine Care Practices
Good engine care helps your MAF sensor work well for a long time. Keep your fuel system clean by using good gasoline and fuel system cleaners now and then.
Fix vacuum leaks right away. Small leaks can cause your MAF sensor to work too hard. Listen for hissing sounds when your engine is idling and fix leaks fast.
Use diagnostic scans to check your Toyota’s engine management system often. Many auto parts stores offer free code reading services to catch problems early.
Watch for small signs like changes in idle, slight drops in fuel efficiency, or hesitation when you accelerate. These signs often mean problems that preventive maintenance can solve.
Also, drive in a way that’s good for your engine. Avoid idling too long, warm up your engine in cold weather, and use the right octane fuel for your Toyota.
Cost Analysis and Budgeting for MAF Sensor Repairs
MAF sensor problems cost more than just the repair bill. Smart Toyota owners know they need to look at all costs. This includes both professional services and DIY repairs.
Knowing these costs helps you make the best choice for your situation. Whether you choose professional help or DIY, budgeting is key. It prepares you for both regular maintenance and unexpected failures.

Professional Diagnosis and Repair Costs
Professional diagnosis costs $100 to $150 at most shops. Dealerships might charge $200 or more. This covers tests, inspections, and a professional check of your MAF sensor.
Replacing a MAF sensor costs differently based on where you go. Independent shops charge $250 to $400. Dealerships might cost $400 to $650, due to higher labor and parts.
Cleaning your MAF sensor is a cheaper option. Shops offer this for $75 to $125. It’s great for sensors with dirt issues, not electrical problems.
DIY Repair Investment Breakdown
Starting with DIY tools and supplies can save you money in the long run. A basic OBD-II scanner is $25 to $100. Professional ones cost $150 to $300. MAF sensor cleaner is $8 to $15 per can, good for many cleanings.
MAF sensors vary in price. OEM ones are $150 to $300. Aftermarket ones are $75 to $200. DIY saves on labor, which is $100 to $200 at shops.
DIY also means investing time. Cleaning takes 30 to 60 minutes. Replacing takes 1 to 2 hours. This builds your mechanical skills and confidence.
Long-term Maintenance Budget Planning
Good maintenance budget planning includes both regular care and unexpected repairs. Saving $20 to $30 monthly builds a repair fund. This way, you avoid big costs when sensors fail.
Regular maintenance lowers costs over time. Replacing air filters every 15,000 to 30,000 miles costs $15 to $40. It prevents MAF sensor contamination and saves money.
Ignoring MAF sensor issues can hurt your budget. Faulty sensors waste $200 to $500 a year in fuel. They can also damage expensive engine parts, costing thousands to fix.
Long-term planning should include when to replace sensors. Most Toyota MAF sensors last 80,000 to 120,000 miles. Replacing them on time prevents emergency repairs and saves money.
Building relationships with trusted shops is smart. They offer discounts and deals for regular customers. This balances professional service with better prices than dealerships.
Conclusion
Proper Toyota maintenance starts with understanding your MAF sensor. This guide has given you the tools to care for your MAF sensor. Regular cleaning and timely replacement can save you hundreds of dollars and keep your engine running smoothly.
Following the diagnostic steps outlined here can help you spot problems early. Keeping your air filters clean prevents contamination. Using quality cleaning products can restore your sensor’s function. These simple steps can make your MAF sensor last longer.
Your Toyota needs attention to detail. Start with basic visual inspections during routine maintenance. As you get more confident, try simple cleaning procedures. Then, move on to more complex diagnostic testing as your skills grow.
Professional help is always an option for complex electrical issues or when codes don’t go away after cleaning. The knowledge you’ve gained helps you talk to mechanics and make smart repair choices.
Healthy MAF sensors mean better fuel economy and lower emissions. Your wallet will thank you for the savings. The environment will benefit from cleaner exhaust. Your Toyota will run better and last longer with the right MAF sensor care.
Start with preventive measures today. Check your air filter every month. Inspect MAF sensor connections during oil changes. Address any warning signs right away. These small steps can prevent big engine problems later on.
FAQ
What is a MAF sensor and why is it important in my Toyota?
A MAF sensor measures air volume, temperature, and density in your Toyota’s engine. It uses hot-wire technology to give precise data to the engine’s ECU. This helps calculate the perfect air-fuel mix for better performance, fuel efficiency, and emissions control.
Without accurate readings, your Toyota might have poor fuel economy, less power, and more emissions.
Where can I find the MAF sensor in popular Toyota models like Camry, Corolla, RAV4, and Tacoma?
In most Toyotas, the MAF sensor is between the air filter and the throttle body. For Camry and Corolla, it’s near the air filter box. RAV4 and Tacoma have it in a similar spot but might need an engine cover removal for access.
Look for a rectangular or cylindrical part with electrical connections in the main air intake tube.
What are the most common symptoms of a failing MAF sensor in Toyota vehicles?
Common signs include rough idling, hesitation, stalling, and reduced fuel economy. You might also see the check engine light on. The engine might surge, start poorly, or perform badly under load.
Toyota owners often feel their vehicle is sluggish, mainly when accelerating or climbing hills.
What diagnostic trouble codes indicate MAF sensor problems in Toyota vehicles?
Common codes are P0100 to P0104, which point to MAF circuit issues. P0171 and P0174 suggest lean fuel conditions due to MAF sensor errors. P0100 is a general malfunction, while P0101 indicates a sensor output problem.
Can I clean my Toyota’s MAF sensor myself, and what products should I use?
Yes, you can clean your MAF sensor with specialized cleaner. Never use household cleaners as they can damage the sensor. Remove the sensor, spray it with cleaner, let it dry, and then reinstall it.
Always disconnect the battery first and handle the sensor by its housing to avoid touching the sensing wires.
How much does it typically cost to replace a MAF sensor in a Toyota?
Replacing a MAF sensor costs 0-0, including parts and labor. OEM sensors cost 0-0, while aftermarket ones are -0. DIY replacement can save 0-0 in labor but requires basic tools and about 30 minutes of work.
How often should I replace my air filter to protect my Toyota’s MAF sensor?
Replace your air filter every 12,000-15,000 miles under normal conditions. If you drive in dusty areas, do it more often. A dirty air filter can contaminate the MAF sensor, so keeping it clean is key.
When should I choose OEM Toyota parts versus aftermarket MAF sensors?
OEM Toyota MAF sensors are best for reliability and performance, even for newer vehicles under warranty. They’re made for your model and last longer than aftermarket ones. Use aftermarket sensors for older vehicles where cost is more important, but ensure they meet OEM standards.
What tools do I need to diagnose and repair MAF sensor problems in my Toyota?
You’ll need an OBD-II scanner, a multimeter, screwdrivers, and a MAF sensor cleaner. Safety glasses, nitrile gloves, a flashlight, and the service manual or wiring diagrams are also helpful.
Can a dirty MAF sensor cause my Toyota to fail emissions testing?
Yes, a dirty or faulty MAF sensor can cause emissions test failure. It leads to poor air-fuel mixtures, increasing emissions. Cleaning or replacing the sensor often fixes emissions problems and helps pass inspection.
Is it safe to drive my Toyota with a faulty MAF sensor?
Driving short distances with a faulty MAF sensor is okay, but not for long. It can cause poor fuel economy, reduced performance, and engine damage. If you experience stalling or significant power loss, get it checked and fixed quickly to avoid more damage.
How can I prevent future MAF sensor problems in my Toyota?
To prevent problems, maintain your air filter, avoid aftermarket intake mods, and keep your PCV system clean. Regular maintenance, addressing vacuum leaks, and avoiding dusty driving can help. Regularly check your air intake system for issues.